Handmade acrylic stand ideas: DIY merch for your fave

Acrylic stands have become an essential item for any fan activity, haven’t they?
Many of you probably already own acrylic stands of your favorite idols or characters.
In this article, we introduce DIY ideas for making acrylic stands.
We cover classic methods using resin, shrink plastic, and hard cases, as well as ideas for making acrylic stands without using any of those three materials at all.
These ideas are easy to copy, so please use them as a reference and give them a try!
Handmade acrylic stand ideas: DIY merch for your fave
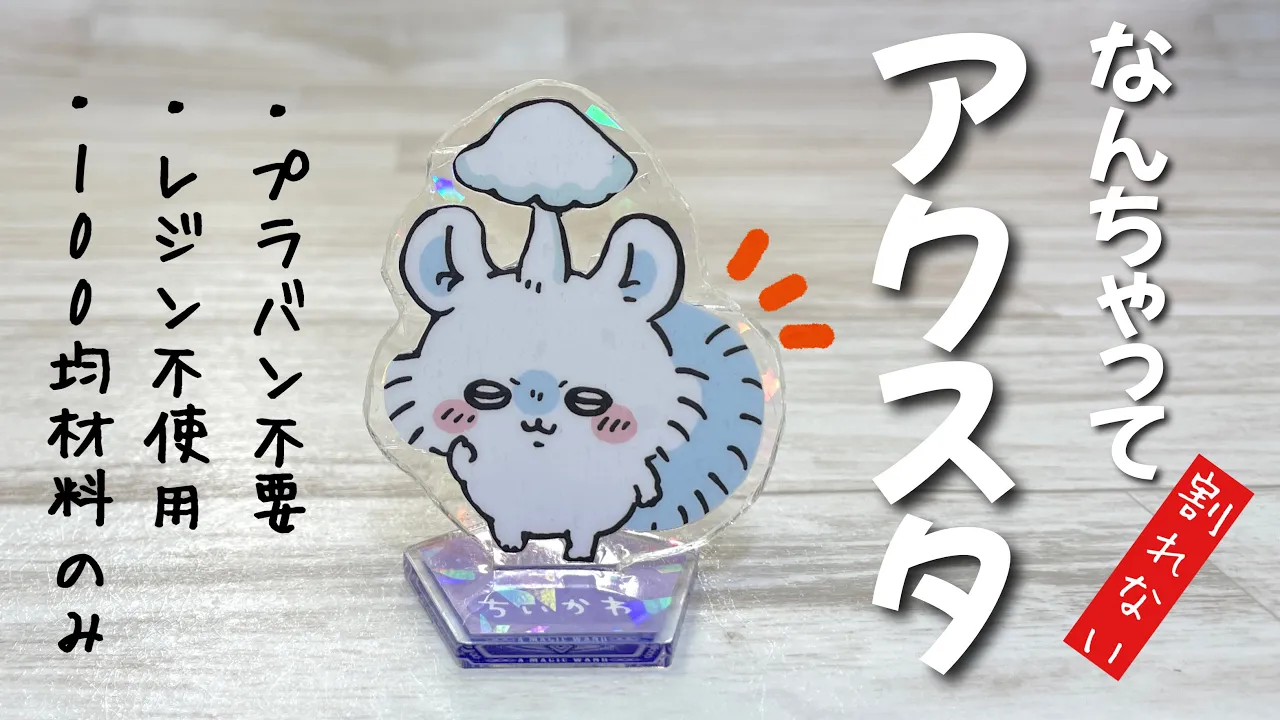
An acrylic stand made with adhesive tape and laminate film

This is an ultra-easy way to make an acrylic stand without using resin or plastic sheets.
Everything you need—self-adhesive laminating sheets, holographic film, double-sided adhesive gel tape, an acrylic stand base, etc.—can be bought at a 100-yen shop.
Also, photos from capsule toy machines are said to be just the right size to stick on.
First, apply the laminating sheet, then stick the holographic film on top and cover the surface with strips of double-sided tape.
This tape gives it just the right thickness.
Place the sticker you want to display on top of that, and finish by sealing it with another laminating sheet.
Done!
[Official Size] Acrylic Stand Made with Plastic Sheets
![[Official Size] Acrylic Stand Made with Plastic Sheets](https://i.ytimg.com/vi/2qA4bfg3Zx0/sddefault.jpg)
I’m going to try making an acrylic stand in the official size using shrink plastic.
First, I’ll copy the official acrylic stand on a copier.
Since shrink plastic shrinks, enlarge the copy to the size indicated on the plastic.
After enlarging, place it over the shrink plastic and cut it out.
For the base slot of the stand, to prevent the hole from collapsing, it works well to bake it with a small piece of something like a silicone bento cup stuffed in partway.
Because it’s shrink plastic, the thickness is a relatively thin 1.8 mm, but I managed to make something that looks pretty much like the real thing.
Acrylic stand in a hard case

Acrylic stands—aka “acry-stas”—are indispensable for anyone who supports their faves.
Everyone has their own way to enjoy them: collecting and lining up favorite characters, or lighting them with LEDs.
And really, who wouldn’t be happy to receive an acrylic stand of their fave? So why not make one as a gift for a friend? Print the design you want to turn into an acrylic stand onto label paper and cut away the excess.
Stick it onto a rigid sheet, then apply a laminate sheet over the top and trim it to shape.
Attach the base design to thick cardstock and laminate that as well.
Punch a hole in the base, stand the acrylic piece up, and you’re done!
An acrylic stand with an underlay (desk pad)

Here’s how to make an acrylic stand without baking resin or plastic sheets.
First, neatly cut out the photo using a design cutter or similar tool.
Cut a shatterproof film slightly larger than the photo, and cut a backing sheet (like a plastic desk mat) to about the same size.
Carefully apply the film over the photo without trapping air bubbles, then stick that onto the backing sheet.
Once adhered, cut a few millimeters outside the photo, leaving the part that will serve as the stand base intact, and you’re done.
Since the backing sheet is hard, work slowly to avoid injuring your hands.
An acrylic stand made with shrink plastic that doesn’t require baking

What you’ll need are preferably thicker plastic sheets and stickers to attach—larger ones, like those that come as bonuses with snacks, work well.
After sticking the sticker onto the plastic sheet, coat it with resin.
The shape can warp during resin coating, so it’s best to secure it firmly to a base so it doesn’t deform while you work.
Once the front surface has cured, coat the back with resin in the same way.
Coat the base with resin as well, attach the main piece, and you’re done.
Definitely give it a try!
Acrylic-style stand made with stickers

Acrylic stands are appealing because they’re easy to carry around.
You can not only display them at home, but also take them out and enjoy outings together.
Try making an acrylic stand using stickers of your favorite characters from anime or games.
Copy the sticker, apply a wide piece of tape over the surface, and trim away the excess to fit the sticker.
Next, cut a plastic shrink sheet to match a larger, copied version of the sticker and place it in a toaster oven.
After the heat shrinks the plastic sheet, adhere it to the sticker.
Use UV resin on a stamping block or similar surface to secure the sticker, add any decorations you like, and you’re done.
Give it a try!
Acrylic stand made with resin

Acrylic stands—now commonly called “akusta”—have become the norm.
It’s standard to snap a photo overlaying your akusta with the venue when you go to a concert or theater performance to show, “I’m here for my fave!” For those saying, “My fave still doesn’t have an acrylic stand…,” this “Let’s make an akusta in the microwave” is a must-see! You’ll need quite a few materials—glossy paper, acrylic paints, PR sheets (double-sided glossy type), and more—but the power of love for your fave will get you through.
There’s also a how-to video available, so be sure to check it out for reference.