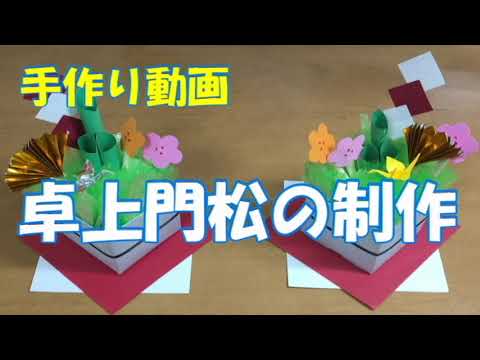
Welcome the New Year! Ideas for Handmade Kadomatsu

Kadomatsu, often displayed in front of homes and shops during the New Year, serve as markers to guide the Toshigami (New Year deity) to visit each household or business.
In this article, we introduce handmade kadomatsu ideas to help you welcome the new year filled with happiness.
We’ve gathered a variety of DIY kadomatsu options: easy-to-make versions, compact designs that don’t take up much space, and simple creations using materials other than bamboo.
Use these ideas as inspiration and try making your own kadomatsu to suit your display location and personal taste!
- Let's make New Year’s decorations by hand! A collection of ideas you can create with everyday materials.
- Let's make our own shimenawa! A collection of stylish ideas you can create with paper and artificial flowers
- Handmade New Year’s wreaths: A collection of festive ideas using shimenawa and mizuhiki
- [Handmade Winter Decorations] A collection of stylish, heartwarming creations you can make with everyday materials
- For New Year’s! A collection of fun origami ideas to make, decorate, and play with in childcare
- Handmade spinning tops with everyday materials! Easy ideas you can enjoy for New Year’s too
- Handmade decorations for Hinamatsuri. Ideas for decorations to celebrate the Peach Festival.
- A roundup of handmade Daruma ideas: making Daruma with various materials
- A collection of handmade ema ideas: easy crafts perfect for New Year’s
- [Handmade] Christmas trees you can make with everyday materials: a collection of eye-catching ideas
- Let's make a handmade tissue case: a collection of stylish and easy ideas
- Fun for kids and adults alike! A collection of DIY beanbag (otedama) ideas
- Let's make a DIY Fukuwarai! Simple ideas for fun with kids
Let’s welcome a great New Year! Handmade Kadomatsu ideas (1–10)
Kadomatsu made from milk cartons
A tabletop kadomatsu that you can easily make with a milk carton is perfect for kids’ crafts! Cut the milk carton about 10 cm up from the bottom and cover the sides with paper.
Take three green square sheets of construction paper, wrap each diagonally around a pen, slide them off, and tape the three together with cellophane tape—this creates diagonal cut ends that look just like a real kadomatsu! Attach plum blossoms, red-and-white ornaments, and a gold fan to the tips of short pieces of chopsticks.
Next, stand and pack vinyl strings (to resemble pine needles) inside the milk carton, then arrange the parts you made so they stand upright, and you’re done!
Decorated with flowers

This New Year’s kadomatsu features peonies as the star and is perfect for your entryway or room decor.
Fit a floral foam block into a flowerpot, then decorate it with a tassel and fern leaves attached to wire, peonies, a mini kadomatsu, nandina (heavenly bamboo), and white plum blossoms.
Fill in the gaps with pine needles and pinecones to balance the arrangement, and you’re done! All the materials are easy to find at 100-yen shops.
For items that can’t be directly inserted, thread wire through them and twist the ends so they can be secured firmly in the foam.
You can also swap materials to create your own variations, so give it a try!
Chikuwa kadomatsu

“We’ve finished all the osechi, but I still want to enjoy the New Year mood!” In that case, add a festive touch to your table with a kadomatsu made from ingredients in your fridge.
Cut three boiled green beans on the diagonal and insert them into the center of a chikuwa.
Tuck boiled broccoli into the gaps and sprinkle salmon roe on top, and your instant kadomatsu is complete.
It’s a recommended recipe that lets you savor the New Year spirit just by casually adding it to an everyday meal! It’s also perfect for using up leftover osechi ingredients like chikuwa and salmon roe, so give it a try.
Welcome the New Year! Handmade Kadomatsu Ideas (11–20)
Cloth kadomatsu
A fabric kadomatsu with a plump, rounded shape is irresistibly cute.
Try making one using chirimen crepe or scraps from old kimonos! Create the bamboo of the kadomatsu, the decorative flowers, and the base separately, then assemble them.
Stuff them lightly with batting as you would for a plush toy—this brings out that plump look even more, which I highly recommend.
For the final touch, add artificial pine and plum blossoms to make it even more stylish.
Mixing in different materials will give your piece a refined, polished look, so definitely give it a try!
A kadomatsu made with bamboo as its base
A miniature kadomatsu nestled inside a thick, magnificent bamboo stalk! This kadomatsu uses bamboo as its base and is perfect for gardening enthusiasts.
Pack soil inside a jointed bamboo section, then create a mixed planting with green bamboo shoots, ornamental cabbages, pine needles, nandina berries, and more.
Add a festive mizuhiki decoration for a New Year’s finish! It’s also great to carve characters like “Geshun” (Welcoming Spring) or the zodiac animal on the side of the bamboo.
Ornamental cabbage deepens in color from winter to spring, making New Year’s the peak viewing season.
It pairs beautifully with the bamboo vessel’s traditional Japanese feel, so be sure to include it with your handmade kadomatsu.
Kadomatsu made with cans
If you paint used paint containers or unwanted tin cans and turn them into pots, you’ll have a stylish kadomatsu! Match the “green bamboo” to the vibe of the can by giving it an antique finish or printing English letters—feel free to paint it without sticking strictly to traditional Japanese style.
Tie a ribbon onto the kadomatsu and plant succulents around it, and you’ll have a Western-style kadomatsu that pairs perfectly with a chic garden! Rather than sticking too closely to the standard look, why not create a New Year’s display with a kadomatsu that suits your home’s atmosphere?
A bamboo kadomatsu made of straw

In recent years, paper straws have been gaining attention from an environmental conservation perspective.
Let’s use those paper straws to make a kadomatsu that’s perfect for the New Year! The main materials you’ll need are a milk creamer cup, two bamboo blinds (sudare), paper straws, and decorative beads.
First, cut the bamboo blinds into pieces about 4 cm long and glue them around the milk cup.
This completes the pot portion of the kadomatsu.
Next, cut the paper straws diagonally to resemble bamboo.
After finishing each part in this way, place a piece of sponge inside the pot, insert the parts you made, and secure them with glue to complete your kadomatsu!