A collection of DIY stamp ideas you can easily make with everyday materials

You want to add a touch of originality to handmade cards or letters to friends…
In times like that, stamps are highly recommended! You can easily make your own original stamps using erasers, but you’ll also need an ink pad to use them.
While store-bought ink pads are available, making your own lets you freely mix your favorite colors and keep costs down.
In this article, we’ll introduce ideas for DIY stamp pads that are easy to make with everyday materials.
These are all ideas you can enjoy together with your children, so be sure to give them a try!
A collection of DIY stamp ideas you can easily make with everyday materials
Stamp pad made with gauze

Here’s an idea for a stamp pad made with gauze.
All the materials—gauze, paper plates, paints, etc.—can be found at a 100-yen shop.
When using the stamp pad with your child, it could be fun to shop together for the materials at the 100-yen store.
Place folded gauze on a paper plate and pour in some paint.
After adding the paint, add water and let it soak in.
If you add about four colors and then press your stamp, you’ll get interesting results.
Adding the colors in a rainbow order is also recommended.
Try getting creative with the stamps themselves too—like using cut vegetables as stamps—and have fun experimenting.
Stamp pad made with a tray and cotton

Let’s make a stamp pad using a tray and cotton so you can prepare only the colors you like.
It’s easy: wash a tray from vegetables or meat thoroughly, then place cotton soaked with paint on it.
Try to saturate the cotton with paint as much as possible.
If you’re worried about colors placed next to each other mixing, use aluminum foil or similar to divide the cotton.
You could also put cotton into small bento cups.
It’s easy to make, so try creating stamp pads in a variety of colors.
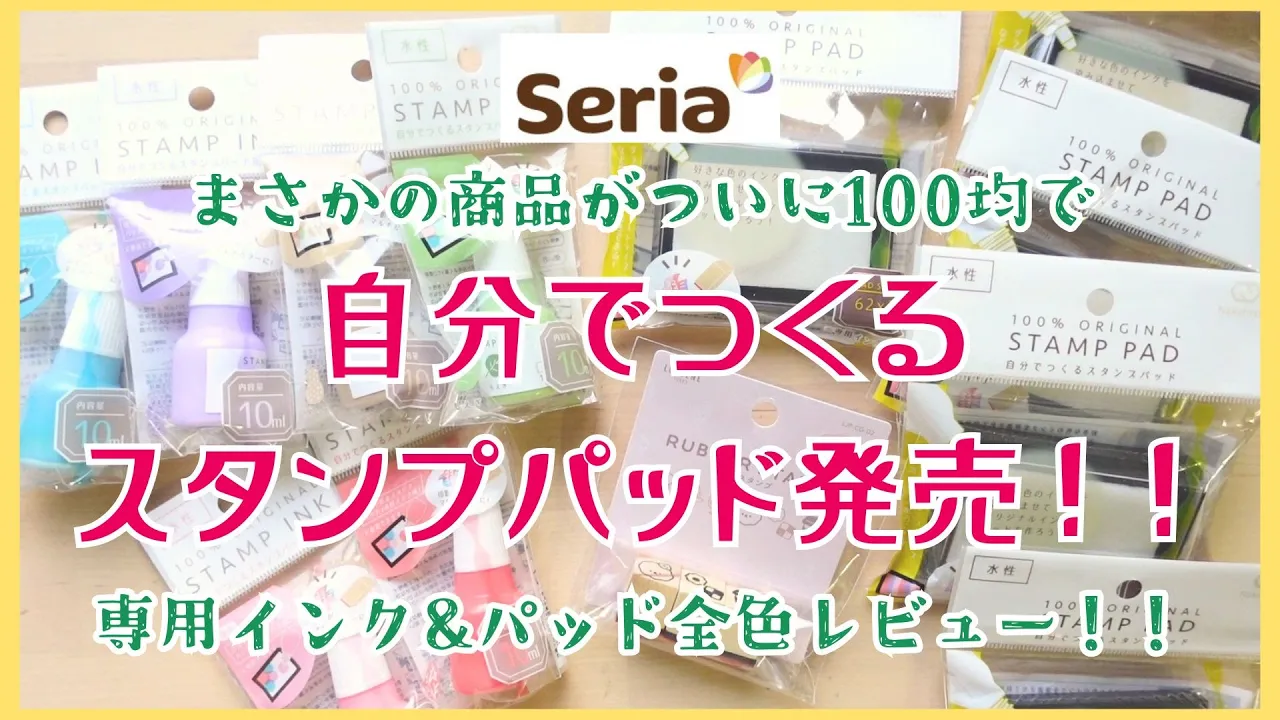
Stamp pad made with 100-yen store items

You can find all kinds of items at 100-yen shops.
They even sell stamp pads and ink, so you can make your own stamp pad.
Just drip the ink onto the pad and start stamping.
It’s convenient because you can fill the pad with your favorite colors.
By adding three or four colors of ink, you can create gradient stamps, too.
If you play around with how you drip the ink, you can get a marbled look, which is really fun.
It’ll make you look forward to stamping letters to friends or your planner.
Stamp pad for towels and gauze

Here’s a stamp pad you can make with everyday items.
You’ll need a polystyrene container, a towel, and gauze.
Wrap the towel with the gauze and place it in the polystyrene container.
Drip some water onto the gauze-wrapped towel to moisten it.
Add the coloring of your choice, and your stamp pad is ready.
You can also make projects where you dip your fingers and stamp away.
How about trying this when making crafts with small children? It’s fun to start by making the stamp pad together, too.
Frixion ink stamp pad

Some people may stamp their schedules in their planners, right? But if plans change midway, the stamps you’ve already pressed can become a problem.
So, let’s make a stamp pad using FriXion ink, which turns colorless at temperatures above 60°C.
We’ll put refill cartridges from pens that use FriXion ink into a stamp pad.
When you rub the stamp you want to erase with the special rubber, the frictional heat generated makes the ink turn transparent.
It seems like there could be many uses for erasable stamps beyond just planners.
An ink pad you can make in your favorite color scheme

Wouldn’t you like to try stamping your favorite stamps—or even your handmade ones—using an ink pad in your favorite color scheme? Let’s make a custom stamp pad with the colors you love.
Add ink to the stamp pad wherever you like.
With a bit of creativity in how you apply the ink, you can even create gradient stamps.
There are so many convenient products available these days.
Some kits include a stamp pad, inks, and stamps all together.
Since it’s easy to make your own stamp pad, trying one of these kits might be a good idea, too.
Large ink pad for handprints

Introducing a large ink pad that’s perfect for handprint crafts and gifts.
Place a backing board cut to size on top of a cushion, then wrap everything in white fabric.
Use a staple gun or sew the fabric so it stays securely closed.
Put the fabric-wrapped cushion into a plastic container, add ink or India ink, and you’re done.
When stamping, the container can shift as you put your hand in.
Using a non-slip mat underneath is key to preventing movement.
This ink pad will be very handy for pressing handprints on anniversaries and special celebrations.