Handmade ideas for Tanabata decorations: from classic ornaments to creative variations


On July 7, we hang tanzaku strips and Tanabata decorations on bamboo, right?
Streamers, net ornaments, and paper lanterns are the classics, aren’t they?
There are many other kinds of decorations too, and each one has its own meaning.
In this article, we’ll share some ideas for Tanabata decorations.
Along with the classics, there are arranged twists on the standards and cute decorations inspired by foods, so feel free to use these as references and try making them.
Most of these ideas can be made with origami, so it’s also a great activity to do with your children!
- [For Kids] Handmade Ideas for Hanging Hina Decorations You’ll Want to Display for the Hina Festival
- Simple and breezy handmade fans | A curated selection of ideas you can whip up in no time!
- Handmade ideas for summer decorations. Perfect for interior decor and craft activities!
- [Easy] Cute Origami Ideas Recommended for Tanabata Decorations
- Let's decorate the bamboo! Stylish handmade Tanabata ornaments
- A roundup of handmade decoration ideas perfect for summer festivals
- Handmade decoration ideas for summer festivals
- I want to decorate in summer! Handmade garland ideas
- Handmade Fireworks Festival: Easy Origami Firework Ideas
- Handmade lantern ideas. Let's make festival decorations!
- For New Year’s! A collection of fun origami ideas to make, decorate, and play with in childcare
- [For Kids] A Roundup of Perfect Origami Ideas for June [Rainy Season]
- Simple: A roundup of origami ideas perfect for Christmas
Handmade ideas for Tanabata decorations: from classic ornaments to creative variations (21–30)
Bamboo grass made with origami

On Tanabata, there’s also a custom of attaching paper strips with wishes written on them to decorated bamboo branches.
How about decorating with origami bamboo as well? Take several sheets of green origami paper cut into rectangles and fold them so they gradually become narrower.
When connecting the pieces, the key is to add white areas from the back side of the paper and fold lines to mimic real bamboo nodes.
Also make bamboo leaves and the slender branches that hold the leaves.
To give it a Tanabata feel, you can make stars, Orihime, and Hikoboshi and attach them to the bamboo—it should turn into a cute piece.
wreath

Let’s try making a classic handmade indoor decoration: paper chains.
To make a paper chain, you cut origami paper or construction paper into long, thin strips, then loop and glue them together to connect each ring.
Before cutting the strips, first fold the paper to create creases.
When the chain is finished, those creases add a nice accent and make it look more polished.
With just a bit of extra effort, the result turns out even lovelier.
Besides simple rings, you can also enjoy variations like forming hearts or adding stars.
Handmade ideas for Tanabata decorations: from classic ornaments to creative variations (31–40)
lantern garland
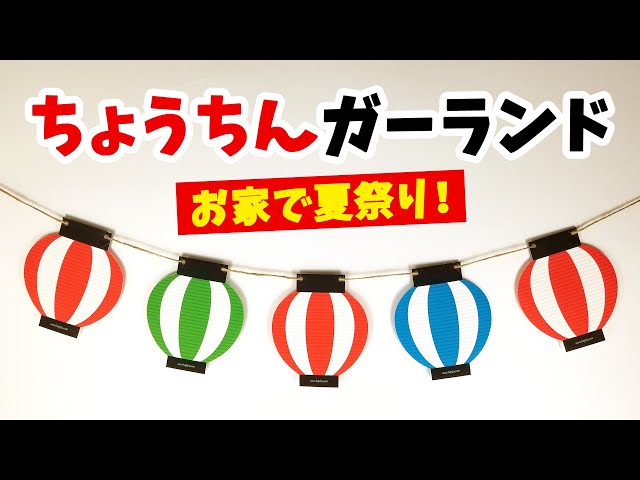
Getting real lanterns can be costly and bulky, which makes them a hassle.
In times like that, garland-style lanterns are a great option.
Cut lantern shapes out of construction paper or cardstock, thread them together, and you’re done! If you keep them flat, they’re easy to use as wall decorations; or make them a bit three-dimensional and string them across the ceiling.
Using lanterns in various colors and patterns will make the display look lively and festive.
Just a small arrangement on the wall can instantly create a festival mood, so give it a try!
Paper cup lantern

If you’re making crafts for kindergarten or elementary school events, these paper cup lanterns are a great choice.
There are many parts you can customize freely, and you can use a stapler for the joints, which helps shorten the working time.
There aren’t any difficult steps, so they’re perfect as a main event activity, too.
Here’s an easy way to make them: First, cut slits in a paper cup—imagine octopus legs.
Next, decorate it however you like.
Then, staple two finished cups together.
Finally, shape it and thread a string through, and you’re done.
Prepare plenty of decorations like glittery tape, pipe cleaners, shells, and beads, and have fun!
Watermelon streamers

This streamer is themed around watermelon, a symbol that instantly evokes summer and could be called a quintessential summer tradition.
Its spherical, watermelon-like shape and the design that recalls a sliced piece not only suit Tanabata decorations, but also bring out the feeling of summer itself.
Its cool, wind-chime-like appearance might even help take the edge off the heat.
It’s easy to make, so it’s recommended as a craft for children as well.
With its vivid look, it’s a decoration that sets the scene for the Tanabata season.
Spiral

A spiral decoration that twirls around and soothes the hearts of those who watch it.
It makes a lovely Tanabata ornament, of course, but it’s also great as a summertime indoor decoration.
The method isn’t complicated, and you can make it with a single sheet of origami paper—give it a try.
Cut one sheet of origami paper into six equal strips, then fold the tips on both ends so that one side becomes a rectangle and the other becomes a triangle.
Apply glue to one strip on the side folded into a triangle and stick another strip onto it; repeat the same steps until all six strips are glued together.
For the side folded into a rectangle, twist as you glue them together to finish.
If you fold both ends into triangles instead of making one end a rectangle, you can create a different shape.
Please give it a try!
Heart-shaped tanzaku

Let’s adorably decorate the essential Tanabata wish tag by adding a heart.
Using a single sheet of origami paper, you’ll make cuts and use reverse folds to finish it in a shape where a heart is placed at the top of the tag.
The key to making it look beautiful is to crease firmly and keep both sides symmetrical.
The heart will be on the front of the origami, while the space for writing your wish is on the back, so it’s recommended to use origami with a white reverse side to make your wish stand out clearly.