[For 5-year-olds] Crafts to try in July! Ideas that capture the season


Five-year-olds are getting better at using their hands to do all kinds of things.
At this stage, their desire to try new things really grows.
So here, we’re introducing July crafts that are perfect for five-year-olds.
We’ve prepared lots of ideas, from summer-themed transparent creations to fun Tanabata decorations.
Enjoy a fun time with the children while nurturing their creativity.
Because items made by children are treated as works, we consistently use the term “seisaku” (制作) in the main text.
- [For 5-year-olds] Let’s enjoy summer! Summer craft ideas for 5-year-olds
- Craft ideas to try in July for 3-year-olds
- Perfect Summer Craft Ideas to Try in July for 4-Year-Olds
- [For 4-year-olds] Crafts to make with preschoolers in July and August: Creative activities that let kids feel the summer
- August Craft Ideas for 5-Year-Olds
- [May] A collection of craft ideas to try with 5-year-olds
- Recommended in July! Summer craft play ideas
- [July] Recommended for 1-year-olds! Fun summer craft ideas
- Childcare: Ideas for activities to enjoy in July
- [5-Year-Olds] Creative Project Ideas to Try in June! Let's Broaden Their Range of Expression
- [Childcare] Playful craft ideas to enjoy with 5-year-olds
- Fun Origami Ideas for July That Older Kindergarteners Will Love
- Recommended for older preschoolers! A collection of origami craft ideas to enjoy summer in August
[5-year-olds] Crafts to try in July! Seasonal ideas (41–50)
Collage Ice Cream
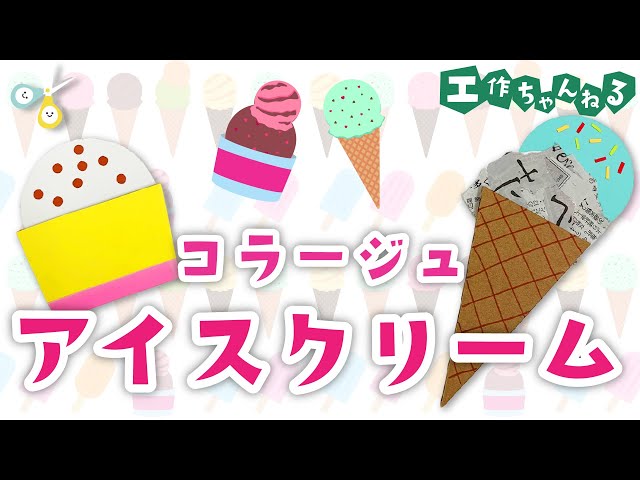
Here are some ice cream craft ideas that also let you enjoy making collages.
Cut the cup or cone bases out of cardboard, then decorate them by drawing patterns with pens or using colored paper.
For the ice cream scoops, basically cut circles out of construction paper, and have fun adding various toppings with small pieces of colored paper or stickers.
It’s also cute to make “collage ice cream” by gluing torn newspaper or flyers onto the round paper scoops.
Once your ice cream is done, attach it to the base to finish.
Summer item! Straw hat

Let me show you a simple way to fold a summery, breezy straw hat.
First, fold the origami paper into a triangle to make a crease.
Open it up, then fold the two left edges to meet the crease.
Next, fold the remaining corner inward to form an isosceles triangle.
Flip the paper over and fold up the base of the triangle by about 2 cm.
Fold that section down in half, then fold it up again in half to create the brim.
Fold down the top point of the triangle to shape the hat, tuck in both corners to round it out, and you’re done!
How to fold a classic summer watermelon (origami)

Here’s how to make a delicious summer favorite—an origami watermelon.
Attach red and green origami paper together so that both colored sides are visible.
Fold it in half and cut along the center with scissors.
With the red side facing up, fold up the bottom slightly.
Flip it over and fold it in half; then fold the sides inward along the center line so they’re symmetrical.
Flip it over again, fold in any parts that stick out, and tuck them into the pocket to finish the watermelon.
Use a felt-tip pen to draw the seeds and make your tasty-looking watermelon! Using yellow and green origami paper is also recommended.
Easy way to fold a seashell (origami)

Let’s make colorful, eye-catching summer seashells.
Start by folding the origami paper into a triangle twice.
Fold the left and right corners down to meet at the center bottom.
Next, fold the two middle corners outward to meet the outer corners.
Fold the left and right edges in to align with the center crease, then fold down the small triangular flap.
Again, fold the lower left and right corners in along the crease.
Fold the top corner so both sides are the same height, then tuck the corners to refine the seashell shape—and you’re done.
Enjoy crafting as you work with your hands.
Using colored pens to add patterns to the shell gives it extra dimension and is highly recommended.
Sea creatures made with bubble wrap
@hekimen_25 Sea creatures made with bubble wrap 🐙 Enjoy the texture of the material and make the most of its qualities 🎨✨ It’s also great because you can have fun with paints!#Childcare CraftingNursery teacher / Childcare workerSummer CraftChildcare#NurseryTeacherDailyLifework #Puchipuchi
It's okay to at least dream in a dream... – San Usagi
Let’s have fun creating an ocean scene using bubble wrap as cushioning material.
First, cut the bubble wrap into circles and stick them onto construction paper.
Be sure to leave some gaps between them.
Once you’ve painted the bubble wrap with colors, imagine them as octopuses, turtles, or fish, and use paint to add legs or heads around the bubble wrap.
Finally, stick on googly-eye stickers to finish.
It’s also cute and recommended to draw seaweed in the empty spaces or use holographic round stickers to represent bubbles in the water.
Let’s paint the ocean with PET bottle stamps
@hoiku.labo Perfect for Marine Day crafts! Let’s paint the ocean with plastic bottle stamps 🎶🫧 Preschool craft, childcare, ideas for childcare workers, making together with kids, easy craft, sea, stamps, construction paper, childcare worker
♪ Original Song – Hoiku Kyujin Labo – Hoiku Kyujin Labo | Nursery Teacher Job Changes and Helpful Information
Let’s have fun creating an ocean scene using a plastic bottle cap stamp that even young children can enjoy easily.
The materials are super simple! All you need is construction paper, a plastic bottle cap, paint, and a paper plate.
Squeeze your favorite paint colors onto the paper plate, dab the plastic bottle cap in the paint, and then stamp it onto the construction paper—that’s it! Using two or three colors like blue and light blue makes it look beautiful.
Finally, attach shell and fish shapes made from construction paper that you prepared in advance to complete the artwork.
It’s also lovely to add motifs you folded yourself with origami.
Give it a try for inspiration!
Sea creatures made with simple paper plates
https://www.tiktok.com/@hoiku.labo/video/7395030856965836050Let’s make a cute seagull sailor using a paper plate.
It’s super easy! Fold the paper plate in half and position it with the curve facing downward.
Glue on a face, wings, a hat, and other parts made from construction paper, then draw the face and body with crayons to finish.
If you use a blue crayon to draw the sailor’s outfit details, it’ll look even more refreshing and summery.
The gentle rocking motion is adorable.
Be sure to craft and play while singing the song “Kamome no Suihei-san” together!