

How about incorporating umbrella crafts at daycare centers and kindergartens during the rainy season? Umbrellas are familiar to children and have a cute shape, so there are many ways to arrange and decorate them.
Here, we’ll introduce umbrella craft ideas by age group.
There are lots of ideas, so please use them as a reference.
The umbrellas children make can also be enjoyed as decorations on walls and other displays.
Make fun umbrellas together with the children and enjoy the rainy season! Because the items the children make are treated as works (artworks), the term used in the text is “制作 (seisaku)” rather than “製作 (seisaku).”
- [4-year-olds] Craft ideas to enjoy with children in June
- [5-Year-Olds] Creative Project Ideas to Try in June! Let's Broaden Their Range of Expression
- [Childcare] Rainy days can be fun too! Recommended rainy-season craft ideas for June
- Preschool: Hydrangea craft ideas, including target ages and techniques
- [For 3-year-olds] Perfect for June! Craft ideas using various expressive techniques
- [Childcare] A roundup of summer craft ideas to enjoy with 2-year-olds
- [Childcare] Craft ideas perfect for June
- [Childcare] Ice Cream Craft Ideas! A Summary by Age Group
- [Childcare] Fun craft ideas and craft activities perfect for summer
- [Childcare] Teru-teru bozu craft ideas
- [Childcare] Cute Penguin Craft Ideas | Introduced by Age Group
- [For 3-year-olds] A roundup of craft ideas to enjoy in summer! Introducing various motifs and techniques
- [Childcare] Recommended for 3-year-olds! Craft activity ideas
Umbrella Craft Ideas by Age Group: Perfect for Rainy-Season Childcare (1–10)
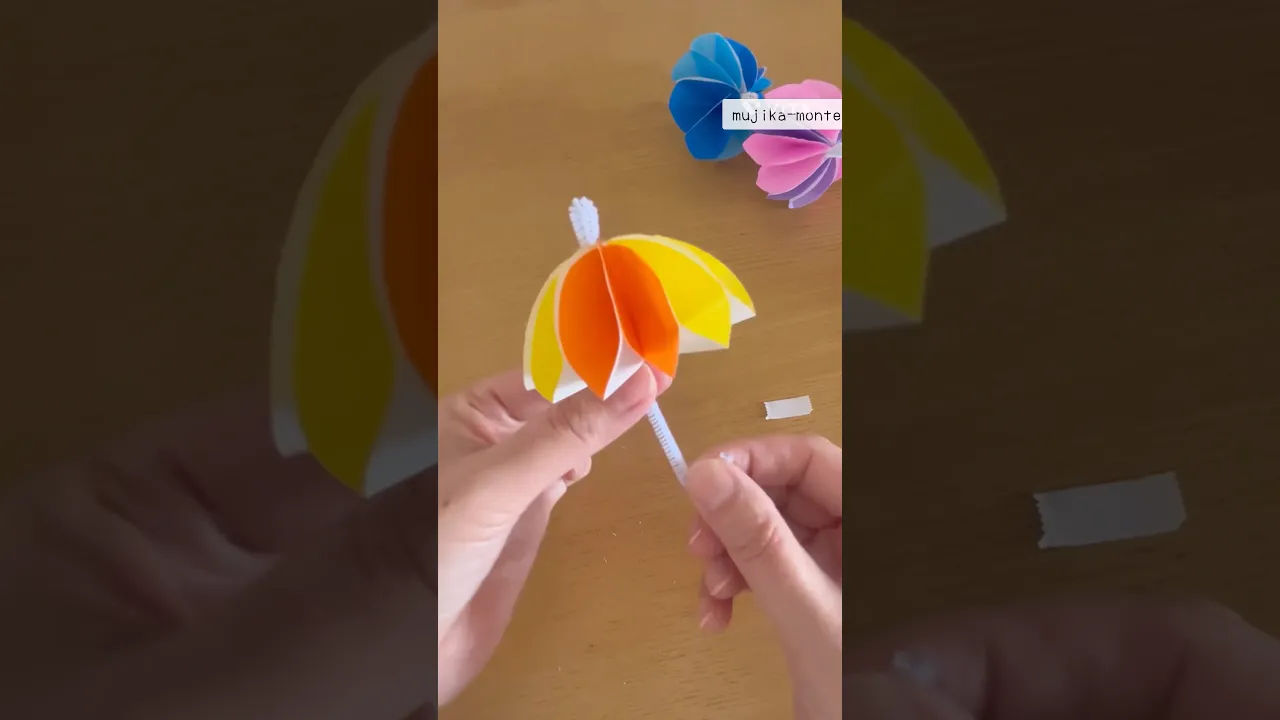
Rain Umbrella Made with Origami (Age 5)

Here’s an origami umbrella idea we’d love five-year-olds to try.
The canopy is made from origami paper, and the handle is made from a straw.
First, fold the origami paper in half into a square twice.
Then open the pocketed sections and squash-fold them to make two triangles.
Crease the center of each triangle, and next, open all four pocketed corners and squash them flat.
When you turn the paper over, you’ll see white triangular sections—cut along those areas.
Trim a little off the pointed tip, thread a straw through, and secure it to finish.
Prepare several kinds of origami paper and straws so children can choose their favorite colors and patterns.
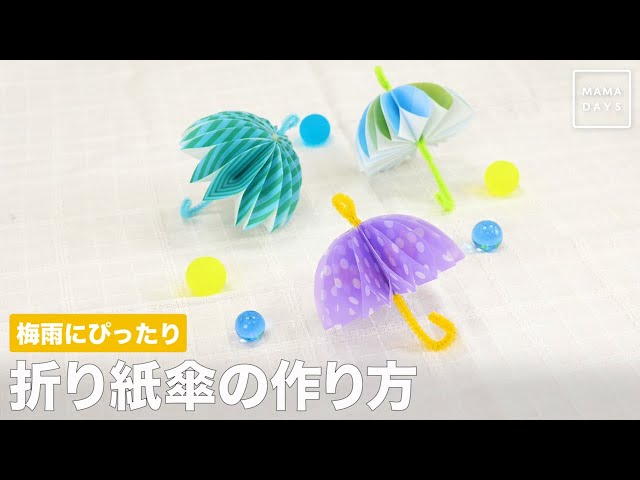
How to fold a swaying umbrella

Here’s how to make a three-dimensional umbrella with a cute, round, plump shape.
It looks lovely just placed as a decoration, but attaching it to a string to make a hanging ornament is great too.
Cut smaller origami paper into circles to create the parts.
With the white side facing out, fold in half, then fold in half again.
Make six of these parts, combine them, attach a chenille stem as the handle, and shape it into an umbrella.
Using two colors or mixing various colors will give you a vibrant finish.
Handcraft these umbrellas during the rainy season and enjoy a fun time.
Cute expandable umbrella origami
Let’s make an adorable umbrella with a softly puffed, three-dimensional canopy.
Fold a sheet of origami paper into a square twice, then sketch a curved line on the fluttery edge.
Cut along the line with scissors.
Make 10 parts using the same method.
Use double-sided tape to stick the 10 folded parts together, then attach a pipe-cleaner handle to the center and glue the final two parts together to finish.
Try using transparent origami, patterned origami—various papers—to create your own original umbrella.
It could also be nice to hang them indoors like a garland.
Perfect for the rainy season! How to fold an umbrella

Here’s a super cute way to fold a paper umbrella that’ll make you want to create lots and decorate with them.
Let’s use two 15-cm square sheets of origami paper.
Before you start, take one of the sheets and cut it into two strips, each one-quarter the width (long, narrow strips).
Using the uncut sheet, make the part where the umbrella opens—the canopy.
The pre-cut long strips will be used to make the handle and the shaft.
Although you assemble three separate parts, the steps are very simple, so it’s easy to complete.
It also looks adorable with patterned origami, so try making it with different papers!
Sparkly Clear Umbrella [Age 2]
How about making a sparkly transparent umbrella using clear folders? First, cut the clear folders to create two umbrella bases.
Also prepare the umbrella tip and handle out of construction paper.
Next, cut materials like curling ribbon (suzuran tape), color film, and glittery origami into small pieces.
An adult should handle the preparations up to this point.
Have the children tear flower paper and paste it onto the umbrella base together with the curling ribbon, color film, and so on.
Finally, layer the tip and handle pieces, sandwich them between the second base, and glue everything together to finish.
It glitters beautifully in the light, so try sticking it on a window!
[Age 1] Colorful Umbrellas and Frogs with Sticker-Pasting
Let’s try making a cute craft with a colorful umbrella and a little frog.
With this idea, kids can enjoy fingertip stamping and sticking stickers.
Have the children use finger stamps to make a rainy pattern on a sheet of construction paper that will serve as the background.
Next, cut out the umbrella and frog parts from construction paper.
An adult should do the cutting.
Once the parts are ready, decorate the umbrella by adding stickers to make patterns.
You can draw the frog’s face, but it’s also recommended to paste a photo of the child—this makes it look like they’re wearing the frog’s raincoat and it’s super cute.
Finally, glue the umbrella and frog parts onto the background sheet, and you’re done!
[Age 2] Finger-painted Rain and Teru Teru Bozu
Teru teru bozu hung up on rainy days look different depending on the angle, which makes them fun to observe.
Here’s a craft idea using finger painting.
Prepare white drawing paper and use crayons or stamps to depict rain.
If you’re using crayons, try drawing vertical lines.
Next, cut another sheet of paper into the shape of a teru teru bozu and add patterns with finger painting.
You can spread paint inside a sealable bag or put paint directly on your fingers and draw.
Attach paper-made facial parts to the painted teru teru bozu, then stick it onto the background to finish.
Adding an umbrella piece makes it extra cute!