

For elementary school summer break projects and crafts, we recommend starting with something your child is already interested in.
When it’s something they like, they can enjoy working on it.
Here, we introduce simple ideas for elementary school students! These are experiments and crafts you can do in a single day.
The materials are things you already have at home or can get quickly, so even if you’re short on time, no worries.
Perfect for those who are “stuck on a theme” or “looking for an easy and fun project”! Find your favorite and give it a try.
- Simple yet amazing crafts: craft ideas that elementary school students will want to make
- For summer vacation homework! Simple and amazing crafts for elementary school students that you’ll want to make after seeing them
- Recommended for elementary school students! Science fair topics & craft ideas
- For upper-grade boys! Simple yet awesome craft project [Don’t call it lazy]
- Simple but awesome! Craft ideas for upper-grade girls
- DIY science projects that elementary school boys will love: ideas you can make with everyday materials
- Simple and cute summer project crafts! A collection of ideas for girls that will make you want to create
- Fun crafts using straws
- [Middle School Students] Easy One-Day Science Projects and Crafts Ideas
- Recommended Independent Research Projects for 5th Graders [Elementary School Students]
- Recommended for lower elementary school students! A collection of plastic bottle craft ideas made with everyday materials.
- Paper cup crafts that elementary school kids will love! A collection of fun project ideas
- Toys you can make from cardboard crafts! Authentic ideas you can build and play with
[Elementary School] Simple One-Day Independent Research & Craft Ideas (1–10)
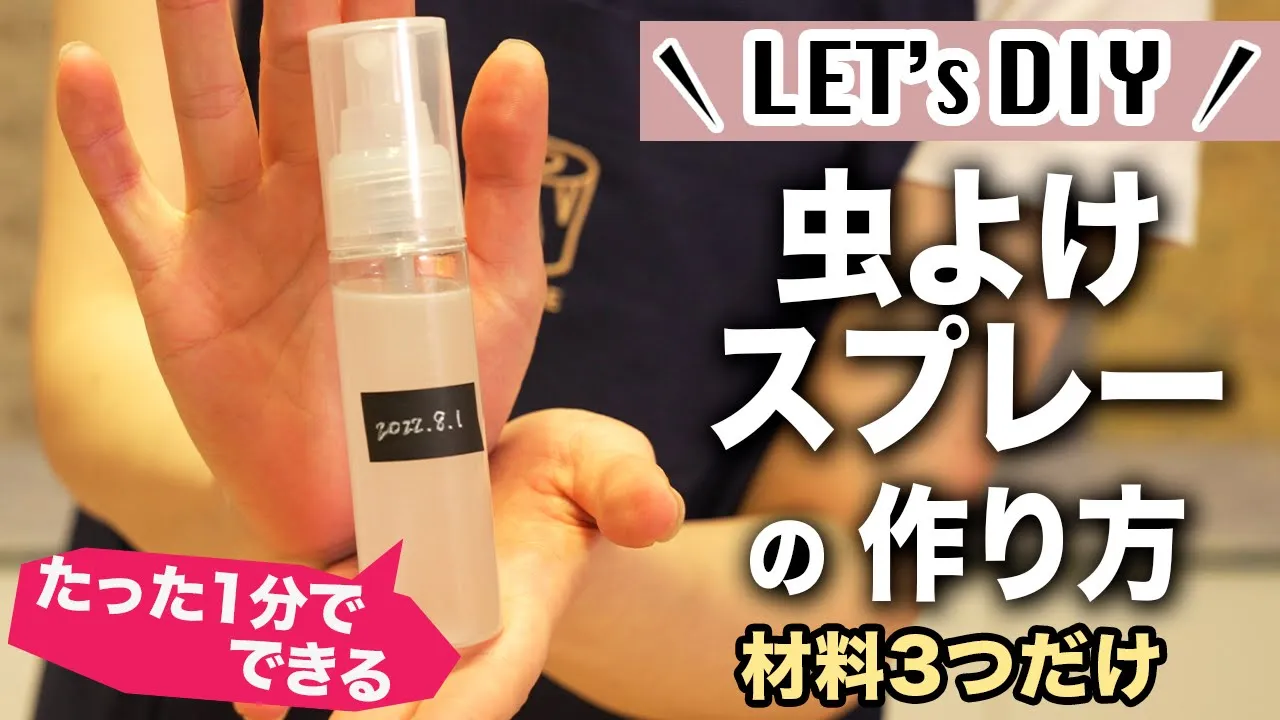
Making insect repellent spray

When playing outside in the summer, insect repellent spray is just as important as sunscreen.
It’s an essential item to avoid discomfort later! Here, we’re introducing a DIY insect repellent spray you can make with just three ingredients.
It only takes about 10 minutes to make, so it’s an easy science project even for lower elementary grades.
The ingredients are peppermint oil, water, and rubbing alcohol (ethanol).
Put the peppermint oil and ethanol into a container and shake well to mix.
Then add the water and shake again in the same way, and you’re done! Please summarize the steps and key points, such as the order in which to add the ingredients, when you write it up.
Palm-sized ocean diorama

Let’s try making a diorama that captures a summer scene.
It’s palm-sized, so you won’t have trouble finding a place for it, and it’s easy to bring to school.
Prepare a container you like, apply glue to the bottom, and lay down paper clay.
Use sand, powdered pastels, and resin to create the beach and the sea.
Add stones and moss, place parts made from paper clay, and you’re done.
You can depict any landscape you like, so try making it while recalling the fun things you did during summer vacation.
Simple kaleidoscope

Let’s make a kaleidoscope that shows rainbow colors.
Prepare three mirrors for a kaleidoscope and glue them together into a triangular prism with the mirror sides facing inward.
Place this inside a toilet paper tube, and seal one end with black construction paper that you’ve pierced with numerous holes using a pin.
Seal the other end with black construction paper that has a diffraction (rainbow) film attached at the center.
Finally, decorate the outside of the toilet paper tube with masking tape or similar, and you’re done! It’s very easy, so please give it a try.
It’s not a kaleidoscope with changing patterns, but the rainbow colors are truly beautiful.
Let’s make a kaleidoscope

The kaleidoscope is a classic, old-fashioned toy.
When you peer inside, a sparkling world unfolds—it’s so lovely, isn’t it? Believe it or not, you can make a kaleidoscope easily.
What’s more, you can make it using a milk carton, so it’s very eco-friendly! The materials are a milk carton, black construction paper, plastic sheets, and beads to put inside.
Here’s how to make it.
First, use tape to form the plastic sheets into a triangular prism.
Next, using plastic sheets again, make a smaller triangular prism about 1 centimeter tall.
This is where the beads will go.
Attach the large triangular prism and the small triangular prism together.
Put the beads inside and close the lid.
Finally, wrap the triangular prism with black construction paper and then with the milk carton, and you’re done!
Handheld fan made from scrap materials

Let’s make a realistic-looking handheld fan out of recycled materials! It won’t produce wind, but you can enjoy watching it spin.
First, poke a hole in the center of two popsicle sticks, thread a bamboo skewer through them to make the propeller, and connect two toilet paper rolls, covering them with origami paper to create the handle.
Cut a circle from thick paper, cover it with origami paper, and punch a hole in the center to make the part behind the propeller.
Slide a short piece of straw onto the bamboo skewer of the propeller, then pass it through the circular part and attach the circle to the handle.
Let the bamboo skewer extend out above the handle, wrap kite string around it, then cut a slit in the handle to guide and secure the string.
Make a hole on the side of the handle, thread the kite string through, and add a bead to the end of the string—and you’re done!
3 simple coasters

How about making coasters as a summer vacation craft? Here, we’ll introduce three methods.
The first is a coaster made by arranging tiles on top of paper clay.
The second is a coaster made by lining up beads and melting them in the microwave.
The third is a summery coaster that expresses a seasonal scene by placing shells, sequins, and stickers in resin.
They’re all easy to make, so give them a try.
You can buy most of the materials at 100-yen shops.
Let’s make gemstone soap

Here’s an introduction to making soaps with jewel-like shapes and colors that girls will love.
Gather the materials, tilt the mold and let it set as shown in the video, then cut it neatly and keep shaping it from the paper cup form to bring it closer and closer to a gemstone.
Once finished, you’ll have a semi-transparent, fancy gemstone soap.
Have a guardian handle the parts that require a utility knife to prevent injuries.