[For Elementary School Kids] Handmade Toy Craft Ideas

There are plenty of opportunities to make handmade toys, like indoor play items or independent research projects.
Some of you might be thinking, “Isn’t there a toy I can make with things I already have at home?”
In this article, we’ve compiled a bunch of handmade toy ideas for elementary school children.
These are not only fun to make, but also fun to play with once they’re finished.
It’s also great to incorporate your favorite characters or designs when making them.
Be sure to check out these handmade toy ideas that you can enjoy with family and friends.
- Simple yet amazing crafts: craft ideas that elementary school students will want to make
- Handmade games: DIY craft ideas you can make and play
- Paper cup crafts that elementary school kids will love! A collection of fun project ideas
- [Indoor Activities] A Collection of Craft Ideas Recommended for Elementary School Students
- [Let’s Make and Play!] Handmade Toy Ideas You Can Create Yourself
- DIY science projects that elementary school boys will love: ideas you can make with everyday materials
- Made of paper! A fun collection of DIY toy ideas you can play with
- Let's make toys with paper cups! Simple and fun handmade toys
- Let's make toys with straws! Easy and fun DIY toys
- For summer vacation homework! Simple and amazing crafts for elementary school students that you’ll want to make after seeing them
- Make It with Pipe Cleaners! A Collection of Simple, Fun, and Playable Toy Ideas
- Fun for Kids! A Collection of DIY Musical Instrument Ideas Using Everyday Materials
- [For Kids] Today’s Handmade Craft Ideas
[For Elementary School Students] Handmade Toy Craft Ideas (61–70)
Fly! Core Rocket

Here’s how to make an easy “core rocket.” You’ll need a plastic wrap core, a toilet paper core, two rubber bands, and a straw.
First, cut the straw so it’s just a little longer than the opening of the toilet paper core.
Link the two rubber bands by looping them together.
Tape the rubber bands to the straw, then tape the straw onto the plastic wrap core with cellophane tape.
Once it’s set up so the toilet paper core can be launched, you’re done! Decorate the toilet paper core however you like to make your own original rocket.
Have fun and get creative!
You can make it in 10 seconds! Marble run
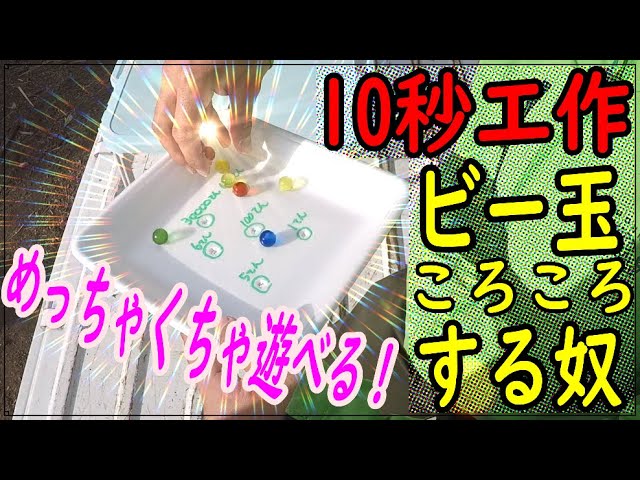
Want to play something right now? For you, here’s a marble-rolling game you can make in 10 seconds.
All you need is a food tray and a pencil.
A slightly larger tray might work better.
To make it, just poke several holes in the tray with the pencil.
Roll lots of marbles on the tray and fit them into the holes you made—done! You can also write point values next to each hole and turn it into a game to see how many points you can score by placing marbles in them.
It’s quick to make even if you don’t have much time, so give it a try!
You can make it in 10 seconds! Marble run
Want to play something right now? For you, here’s a marble-rolling game you can make in 10 seconds.
All you need is a food tray and a pencil.
A slightly larger tray might work better.
To make it, just poke several holes in the tray with the pencil.
Roll lots of marbles on the tray and fit them into the holes you made—done! You can also write point values next to each hole and turn it into a game to see how many points you can score by placing marbles in them.
It’s quick to make even if you don’t have much time, so give it a try!
Marble maze made from a candy box

Here’s a marble run you can make using an empty candy box! Prepare a box where the lid and the compartment for the candy are separate.
On the side that held the candy, glue cardboard strips along two opposite edges and cut a hole where you can retrieve marbles that fall through.
On the lid, sketch the course, glue cardboard where you want walls, punch a few holes, and mark a start and a goal.
Once it’s ready, stack the two parts with the lid on top, and you’re done.
Depending on how you design the course, you can create marble runs with various levels of difficulty!
Marble maze made from a candy box
Here’s a marble run you can make using an empty candy box! Prepare a box where the lid and the compartment for the candy are separate.
On the side that held the candy, glue cardboard strips along two opposite edges and cut a hole where you can retrieve marbles that fall through.
On the lid, sketch the course, glue cardboard where you want walls, punch a few holes, and mark a start and a goal.
Once it’s ready, stack the two parts with the lid on top, and you’re done.
Depending on how you design the course, you can create marble runs with various levels of difficulty!
A marble coaster with interchangeable tracks!

When you keep playing with the same toy, you can get bored, right? At times like that, try making a marble run with interchangeable courses so you can keep it fresh! First, build the base track out of cardboard.
Using bamboo skewers or similar materials, create features like an escalator-like lift that carries the marbles upward, or a spiral where the marbles twirl down.
For the swap-in courses, prepare pieces of cardboard shaped to fit into the base track, and on each one attach small cut pieces of cardboard, straws, or short wooden sticks to make a variety of course types.
By swapping these in and out, you can enjoy your marble run for a long time without getting bored!
Marble roll with a toilet paper core

This is a simple marble run you can make using toilet paper rolls.
Prepare eight toilet paper rolls.
Cut two of them in half to make two shorter pieces each.
For the remaining six rolls, make a single slit in each so they can be opened up.
Assemble these six into two vertical towers by stacking three each.
Attach the halved rolls diagonally across the openings of the towers to form slide-like chutes, and you’re done! To ensure the marble drops down properly, be careful not to glue one end of each chute completely to the tower—leave a slight gap at the end.
Decorate the toilet paper rolls by drawing on them or adding washi tape or patterned origami paper!