[For Seniors] Ideas for Winter Wall Decorations and Hanging Ornaments: Introducing Projects That Are Easy to Try

The cold season has arrived.
This time, we’d like to share ideas for winter wall decorations to create a warm atmosphere together with older adults.
There are plenty of projects that capture the changing season—not just Christmas, but also New Year’s kadomatsu, Mount Fuji, snowflakes, and more.
Why not make winter memories by enjoying crafts together using colorful origami and tissue paper? It’s also effective as finger-mobility rehabilitation, and displaying the finished pieces will brighten up the facility’s atmosphere.
Enjoy giving it a try!
- Recommended winter wall decorations for seniors: heartwarming ideas
- For seniors: Year-round ideas for wall decorations
- [For Seniors] Heartwarming and Cozy: Perfect Wall Decoration Ideas for Winter in Care Facilities
- For seniors: Decorate the December wall with a tree. Easy ideas using origami and yarn.
- [For Seniors] Decorate your January wall with rabbits! Packed with ideas like snowball fights, New Year’s festivities, and rice cake pounding
- For Seniors: Wall Decorations to Brighten Up February — Festive Ideas for Setsubun, Valentine’s Day, Plum Blossoms, and More
- [For Seniors] Recommended Wall Decorations and Crafts for January
- For seniors: Snowman crafts to brighten January wall displays—fun ideas using origami, paper plates, and papercutting.
- [For Seniors] Easy Origami Recommended for Winter
- [For Seniors] Lovely Decorations Made with Construction Paper: Ideas to Brighten Up Your Room
- [For Seniors] Brighten Up Hinamatsuri: Wall Decoration Ideas
- For Seniors: Fun and Engaging December Event and Recreation Ideas
- [For Seniors] Brighten Up December Walls! Christmas Decoration Ideas
[For Seniors] Ideas for Winter Wall and Hanging Decorations: Introducing Easy-to-Try Projects (61–70)
New Year wall decoration

First, make the base by diagonally attaching reversible red-and-gold crepe paper onto a rectangular sheet of black construction paper.
Then, decorate by adding paper flowers, a paper fan, and mizuhiki cords on top.
Create each flower by making the individual parts separately and then assembling them into a single bloom.
Arrange the parts for balance and attach them with a hot glue gun.
Adding gold glitter to the flower centers will give an even more glamorous finish.
Besides pine, bamboo, and plum, there are many flowers perfect for New Year’s, such as chrysanthemums, lilies, and ornamental cabbages, so it’s also recommended to arrange and create your favorite flowers.
Christmas Decorations with Paper Ring Garlands

This is about making a chain garland by turning long, thin strips of paper into loops and linking them together, giving it a Christmas feel.
Imagine connecting large loops with thin loops, arranging it so that only one side of each large loop is visible.
The motifs to create include Santa Claus, reindeer, and snowmen.
Each motif is completed in two segments—one for the face and one for the body—and then connected together.
Since you’ll make several long garlands, it’s recommended to vary the positions of the motifs on each one to achieve a more luxurious look.
Simple Christmas Tree

This is a Christmas tree decoration whose charm lies in the layered, three-dimensional look of the leaves.
The key is how you make the leaves: firmly crease the paper first, then cut it into leaf shapes, and bend them to create a 3D effect.
Next, make the conical base of the tree and layer the bent leaves onto it.
Once the green part of the Christmas tree is finished, add the trunk and decorations to make it even more festive.
It’s also recommended to arrange snowflakes around it to enhance the overall atmosphere.
Christmas mobile made from paper cups
https://www.tiktok.com/@rin_hoiku_idea/video/7443415321878301960Brighten your walls with an easy-to-make Christmas mobile.
The materials are paper cups, straws, jute twine, construction paper, round stickers, and present-shaped parts.
Use the paper cups, construction paper, and round stickers to make Santa Claus and a reindeer.
Create the base of the mobile with the straws and jute twine, then hang Santa, the reindeer, and the present parts to finish.
Use thick, sturdy straws designed for tapioca/boba.
Decorating with tape or origami paper will make it even more festive.
A Christmas garland that also works as a sun catcher
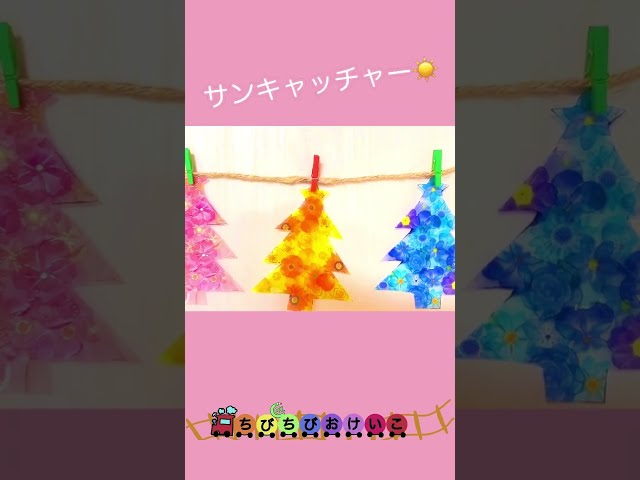
Recommended for anyone looking for an easy-to-make garland! First, draw a tree on a clear file folder and fill in the inside with your favorite stickers.
If you’d like to use it as a sun catcher, use translucent stickers.
Once the stickers are in place, cut it out in the shape of a tree and clip it together to complete your garland.
Using the same design with stickers in different colors can give you both a unified look and a festive touch.
It might also look cute to decorate the edge of the clear file with sparkly pipe cleaners.
Christmas tree using decalcomania

Fold a sheet of green construction paper in half and open it, then drop paint on only one side.
The paint will become the ornaments, so think about the colors and where you place the drops as you work.
After dropping the paint, fold it in half again to create a decalcomania— it will transfer to the other side.
Cut the construction paper into a tree shape and attach a trunk made from brown construction paper.
Finally, make a star from yellow construction paper and decorate the very top of the tree.
If you punch a hole at the top and thread a string through, it could also become a garland.
Poinsettia Origami Tree

Poinsettias are known as Christmas flowers.
In this idea, we’ll make a wall tree using origami poinsettias.
After folding the origami paper into a triangle three times, open it back up to the state of having been folded twice.
Starting from the outside toward the center, make cuts along the creases.
To round off the corners created by the cuts, trim in a curved line from both corners of the triangle toward the center to shape leaves.
When you open the paper, you’ll have four leaves; stack two of these to make a set of five leaves.
Finish by placing a yellow round sticker in the center to complete the poinsettia.
Make several and arrange them on the wall in the shape of a tree.