Brighten up your winter daycare room! A collection of recommended wall decoration ideas


Here are some recommended ideas for winter wall displays that will create a cheerful atmosphere in your daycare classroom.
From portraits of children snuggled in blankets and cute stenciled snowmen to traditional motifs like the shishimai lion dance and Mt.
Fuji, these projects are full of memories unique to the season! Using materials like cotton and tissue paper for fluffy textures, and lily-of-the-valley tape for added dimension, the decorations make the classroom feel warm and inviting.
With winter wall displays filled with teachers’ care and creativity, enjoy the changing seasons together with the children!
- [Childcare] Ideas for January wall decorations
- [Childcare] Ideas for snowman wall decorations. Recommended for January crafts.
- [Childcare] Cute to display! A collection of wall decoration ideas you’ll want to make in February
- [December Wall Displays] Cute Winter Craft Ideas You Can Use Beyond Christmas!
- [Nursery/Kindergarten] New Year’s wall decorations! A collection of craft ideas to enjoy with children
- [Childcare] Simple winter-themed origami craft ideas
- [January Childcare] Rabbit-Themed Wall Display Ideas
- December craft ideas! A collection of childcare activities to enjoy with Christmas and winter themes
- [Childcare] Perfect for December wall displays! A collection of Christmas tree ideas
- Recommended winter wall decorations for seniors: heartwarming ideas
- Perfect for January bulletin boards! A collection of Daruma craft ideas kids will love in childcare settings
- [February Bulletin Board] Perfect for Setsubun! A Collection of Oni (Demon) Craft Ideas to Enjoy in Early Childhood Education
- [February] Perfect for Valentine’s Day! Cute wall display ideas
Brighten up your winter daycare room! A collection of recommended wall decoration ideas (71–80)
3D Santa Claus made with colored construction paper
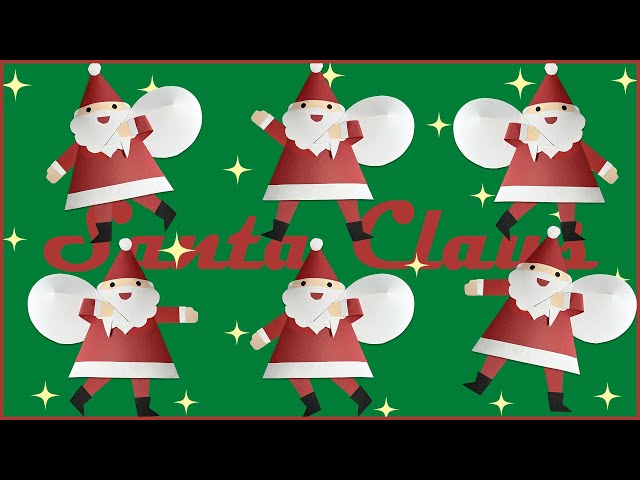
A cute, plump, three-dimensional Santa Claus made from construction paper.
Get your construction paper, scissors, and glue ready and let’s get started.
First, make Santa’s face by cutting and gluing the parts—eyes, mustache/beard, and mouth—out of construction paper.
When making the hat, glue it into a tube shape to create the hat, leaving some hollow space inside the back; that’s the key point.
For the body, roll a sheet of construction paper and glue it so that the tip is inserted into the back side of the hat.
Attach the arms, legs, and boots, then cut slits into white construction paper to make Santa’s sack, and you’re done.
It might also be fun to create your own original Santa by changing the direction of the parts, the facial expression, and the colors of the paper.
[Origami] Snowman
![[Origami] Snowman](https://i.ytimg.com/vi/WD6wH5QnP64/sddefault.jpg)
This origami snowman is perfect for December, when it’s also the season of snow.
A snowman is made by placing one snowball on top of another, right? With a clever folding method, you can express the two stacked snowballs using just a single sheet of origami paper.
You can also make a scarf around the snowman’s neck.
If you use polka-dot or patterned paper, the pattern becomes the scarf, making it extra cute.
You can draw the eyes and mouth yourself, so each snowman has its own personality.
You can stick them on a wreath or a calendar, so try arranging them in different ways to expand the range of your creations.
Tissue Paper: A Tree Made by Stuffing a Bag
Here’s an idea for a Christmas tree made by stuffing tissue paper into a bag.
The fun part is that kids can use their fingers a lot—crumpling the tissue, tearing it, and putting it into the bag! Once you crumple the tissue paper and pack it into a plastic bag, shape it into a triangle while securing it with tape, and it transforms into a tree.
For the finishing touch, add stickers you like or a star on top! If you’re hanging it on the wall, attach a ribbon.
You could also make a design where Santa peeks out, or even stick children’s photos where Santa’s face would be for a lovely result.
[Tanpo Stencil] Colorful Snowman
Let’s make a cute snowman using stencil dabbing.
Stenciling with a tampo (dauber) is fun like stamping, and many children will get absorbed in it.
First, as preparation, cut out a snowman template.
Place the snowman on white cardstock and apply color over it using the tampo stencil from above.
Limiting the colors to two or three will help children stay focused and enjoy the activity.
Remove the snowman template, then stick on twig arms, a face, and a bucket hat to finish!
[Crayon Resist Painting] Gloves
Let’s use the wax-resist technique to make cozy mittens.
First, as preparation, draw the shape of mitten-style gloves on construction paper.
Next, have the children draw patterns with a white crayon to match the mitten shapes.
When you paint over them with watercolor, the patterns they drew will emerge.
It’s nice to let them choose their favorite colors.
Once the paint is dry, cut the construction paper into the mitten shapes with scissors.
Add wrist decorations and pom-poms to finish.
It will be fun to see what kinds of patterns the children come up with.
Sponge Stamp: Valentine’s Chocolate
Valentine’s wall decorations made with sponge stamps turn out super cute, so I highly recommend them.
Start by stamping colors like red, deep pink, and pale yellow onto light pink construction paper using a sponge stamp.
When making your sponge stamp, try to shape it so the stamp marks come out round.
Once you’ve filled the paper with stamps, cut it into heart shapes with scissors.
Then paste the hearts onto construction paper, draw a bear or other motifs, and you’re done! They’d also make a nice gift for parents or guardians.
[Hanshi] A snowman made by stuffing a plastic bag
Put several crumpled-up sheets of hanshi paper into a plastic bag to make a three-dimensional snowman.
Compared to construction paper, hanshi feels softer to the touch, so it’s easier for children to handle.
Have them freely crumple the hanshi into balls and place them in the plastic bag while thinking about the sizes for the snowman’s head and body.
Once done, close the bag, then attach eyes, a mouth, and a bucket hat made from origami or construction paper to finish.
Prepare the small parts on the teacher’s side, and work together with the children to attach the pieces.