
Origami flowers that even 3-year-olds can easily enjoy.
Origami helps develop concentration and creativity by using the hands, so it’s recommended to incorporate simple flower origami into childcare activities.
As children fold, using different colored papers and varying shapes naturally nurtures their sense of color and expressive skills.
The flower folds are simple, and children can create pieces they feel proud of, giving them a sense of accomplishment.
Be sure to enjoy it together with the kids and make lots of lovely flowers.
- [Origami] Simple Origami Ideas to Feel the Spring with 3-Year-Olds
- Perfect for first-timers! A collection of origami that’s super popular with kids as young as three!
- Recommended for preschoolers! A collection of origami ideas perfect for April
- [Childcare] Simple origami ideas for kids, perfect for spring
- Origami Butterfly Ideas That Are Easy for 3-Year-Olds
- For Age 3: Have Fun Making with Your Child! A Collection of Easy Dinosaur Origami Ideas
- [Preschool] Recommended for 3-year-olds! Easy-to-make fall origami craft ideas
- [For 3-year-olds] Easy-to-make origami rabbit ideas collection
- [Age 3] Simple summer origami ideas. A roundup of classic summer motifs.
- [Origami] Easy spring-themed origami ideas to enjoy with 4-year-olds
- [Childcare] Recommended for 3-year-olds! Origami ideas with a winter theme
- Enjoy August with preschoolers using origami! A collection of summer-perfect ideas
- Easy for 3-year-olds! A collection of cute bear origami ideas
Fun for 3-year-olds! A collection of easy and enjoyable flower origami ideas (1–10)
Easy flat tulip

Let’s make a flat tulip.
We’ll make the flower on the first sheet, and the stem and leaves on the second.
First, for the flower: fold the origami paper into a triangle twice, then unfold it once.
Fold the left and right corners up diagonally to form the petals.
Tuck the left, right, and bottom corners slightly to the back, and the flower is done.
For the leaves and stem, follow the same steps up to unfolding after the first triangle.
This time, fold the left and right edges down to meet the center crease.
Fold the bottom corner up to meet the top corner, then pull the two small front triangles on the left and right outward—these will be the leaves, so adjust the angle to your liking.
Attach the flower and stem/leaves together, and you’re finished.
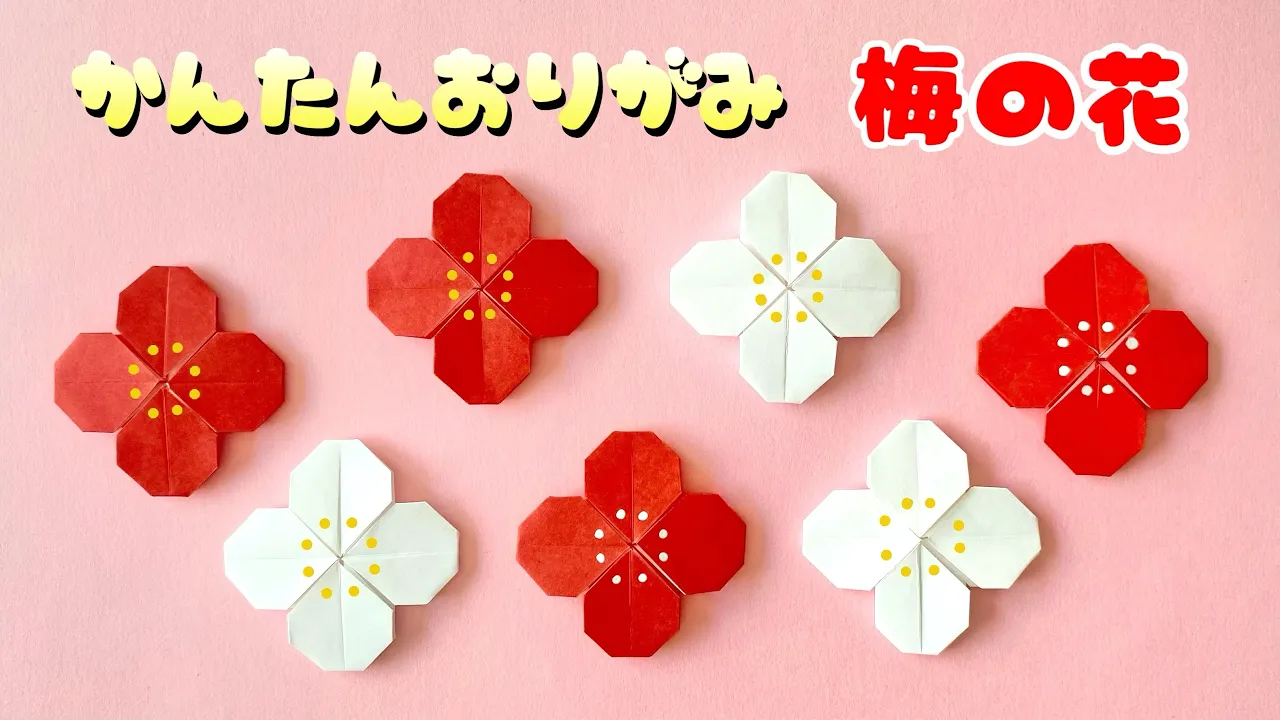
Plum blossoms perfect for the New Year

The video uses 7.5 cm origami paper, but that may be too small for a three-year-old, so try using regular-size origami paper.
Fold the paper in half into a square and open it, then fold the top and bottom edges to meet the crease.
Repeat the same process with the left and right edges.
Flatten the folded left and right sections to make two boat shapes, then squash both ends of each boat into squares to create four petals.
Turn the paper over and make cuts about halfway along the center creases on all four edges.
Fold the corners created by the cuts slightly inward.
Fold the front petals and the remaining four corners the same way.
Draw the stamen in the center with a pen, and you’re done.
A sunflower you can fold from a single sheet of origami paper

Here’s how to fold a sunflower, the symbol of summer.
Fold the origami paper in half into a square twice, then open it up and fold all four corners to the center.
Open those folds, and then fold each corner to match the nearest crease in front.
Using the creases where the corners meet, make four squash folds, then flip the paper over.
Finally, tuck each of the four corners slightly inward to finish.
Draw a mesh pattern in the white center to make it look more like a sunflower.
Why not fold lots of them and create a sunflower field on your wall?
How to fold a cute tulip

Many tulip origami designs have two leaves, but this one features a single-leaf design.
To make the flower, fold a square of origami paper into a triangle, then fold up both corners.
The stem and leaf are created together from a single sheet, without separating them.
First, fold the paper into a triangle to crease it, open it, and fold all four edges to meet the crease.
Then, fold only the right edge the same way once more.
Rotate the paper so the right edge is now at the bottom, and fold it in half by bringing the top and bottom corners together.
Next, fold it in half again along the first crease, then gently pull out the thin inner section slightly to the outside to finish.
Combine it with the flower to complete your tulip.
Easy Morning Glory Origami Instructions

Perfect for the rainy season! Let’s make a hydrangea.
After folding the origami into a triangle twice, squash the pocketed part into a square so that two squares overlap, and tidy the paper.
Round off the corner where all four corners of the origami meet, then open it up, keeping the center intact.
Shape it so that there are four petals, and your hydrangea is complete.
For the leaves, fold green origami into a triangle twice, then unfold one layer back once.
Fold the left and right edges down toward the central crease, then open the corners gathered at the center diagonally outward to form the leaves.
Easy Sunflower Origami

Even young children who are just starting with origami can enjoy this easily! First, fold a yellow piece of origami paper in half into a square twice to make crease lines.
From each corner, fold toward the center along the creases you made.
Then open each folded section outward, leaving a small edge, and the sunflower’s petals are complete.
Next, take green origami paper, fold it once into a triangle and unfold it, then fold both sides toward the center along the crease.
Fold one of the sides toward the center once more, and fold the sharpest tip upward to finish the leaf.
Combine it with the flower you made first and display it!
Easy! How to fold a tulip

Here’s how to fold a tulip that looks cute, comes together quickly, and is easy for anyone to make.
You’ll create it in parts: the flower, the stem, and the leaf.
First, fold the origami paper into a triangle to make a crease, then open it and fold the top corner down to meet the crease.
Next, fold the bottom corner up to meet the top edge; after creasing, unfold it.
Align the two existing creases on the paper and fold along them, then fold up the left and right corners to form the tulip shape.
Tuck in the corners and adjust the shape to finish the flower.
For the stem, fold the paper into a long, narrow strip.
For the leaf, make a “zabuton” (cushion) fold, then fold two opposite corners inward to complete it.