[For Toddlers] A Big Collection of Craft Ideas to Enjoy at Christmas [Part 3]

Christmas is a major event for kids! It’s a day packed with fun—getting presents, eating cake, and more.
How about enjoying some Christmas crafts as part of the preparations? In this article, we share perfect Christmas ideas for preschoolers.
Classic motifs like Santa Claus and reindeer are all here! After your crafting time, be sure to display the creations around your room.
Since children’s creations are treated as works, we use the term “seisaku (制作)” to mean “craft/work” in the text.
- [For 5-year-olds] Recommended for Christmas! A collection of fun crafts to make
- [Age 3] Let’s Make It at Nursery or Kindergarten! A Collection of Christmas Craft Ideas
- [For 4-year-olds] Fun Christmas! Craft Ideas Special
- [For 3-year-olds] December Christmas Crafts! A Collection of Fun Handmade Ideas
- [For Toddlers] A Big Roundup of Craft Ideas to Enjoy at Christmas
- For older kindergarteners: December crafts that 5-year-olds will love — ideas from flat to three-dimensional projects
- Christmas crafts for 2-year-olds! A collection of fun ideas using stamps and handprints
- Fun for 1-year-olds! A collection of cute Christmas craft ideas
- Preschool: Easy and cute Santa craft ideas
- Christmas wreaths to make in childcare! A collection of handmade ideas to enjoy with children
- Fun for 0-year-olds! A collection of cute Christmas craft ideas
- [For 3-year-olds] Winter craft activities and bulletin board decoration ideas for use in childcare
- December craft ideas! A collection of childcare activities to enjoy with Christmas and winter themes
[For Toddlers] Big Collection of Craft Ideas to Enjoy at Christmas [Part 3] (41–50)
Construction paper Christmas wreath

It would be wonderful if we could make a three-dimensional Christmas wreath using construction paper.
Let’s create a gorgeous, eye-catching wall display that makes you look forward to the Christmas season! You’ll need construction paper in various colors, scissors, a craft knife, glue, paste, tape, and so on.
One of the great things is that you can customize the method, size, and design.
How about making it together with the kids—perhaps a colorful tree, or a tree that looks snow-covered by using cotton? Wishing you a fun and festive Christmas!
Three-dimensional Christmas tree wall
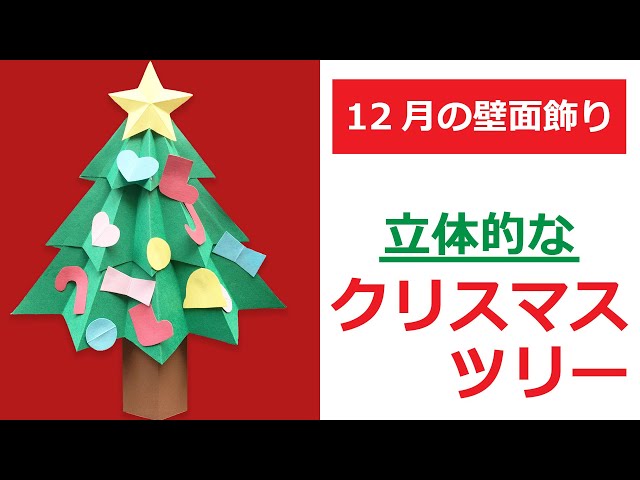
Even if you can’t display a real Christmas tree, this is a lovely idea to brighten up your room.
When you think of Christmas, many people probably picture a tree, right? This time, let’s make a three-dimensional, charming Christmas tree using construction paper.
The materials you’ll need are green construction paper, red construction paper (and other colors if you like), a template, scissors, a stapler, glue, and a ruler.
It’s also fine to choose any colors you like for the construction paper besides green.
Since some steps in making the tree involve small, detailed work, it’s best for children to do this together with a teacher or guardian.
Easy paper-plate Christmas tree

First, fold a paper plate and cut along the crease to divide it into four equal parts.
Tear green origami paper into small pieces, as you would for a collage, and paste them on to represent the leaves of a Christmas tree.
If you layer and attach the paper plate pieces with double-sided tape, you’ll create bumps and add a three-dimensional effect.
Stick on stickers in your favorite colors to light up the tree, then add a star ornament at the top.
Finally, make a trunk with orange origami paper and attach it, and your Christmas tree is complete.
It’s a Christmas craft that uses simple materials but can be made festive with a bit of creativity.
A Christmas present you can make with just one sheet!
@hoiku.labo [Christmas Origami] A simple Christmas present you can make with just one sheet of origami 🎁🎄ChildcareNursery teacher / Childcare workerKindergarten TeacherChildcare job openingsChildcare Column#NurseryTeacherThings#IWantToConnectWithChildcareWorkers#Nursery School Craft#DaycarePreparationNursery School PracticumChildcare studentAspiring childcare workerChildcare Job LabNursery teacher skillsJob change activities#JobChange#nursery_teacher_job_changeNursery teacher employmentProduction#CraftworkOrigami#ChristmasChristmas craftsChristmas presentEasy to make
♪ Original Song – Craft Ideas for Childcare ♪ Hoiku Kyujin Labo – Hoiku Kyujin Labo | Nursery Teacher Job Changes and Helpful Information
Let me show you how to make a present box with a ribbon.
Place the colored side of the origami paper facing up and fold it in half horizontally to make a crease in the center.
Open it, then fold the top and bottom edges inward by about 1 cm.
Turn the paper over and fold the top and bottom edges to meet the center crease.
Rotate the paper vertically, then turn it over again and fold down the top edge by about 2 cm.
Open and squash the white section in the center of the folded part to form the ribbon, then fold up the bottom edge and tuck it under the ribbon.
Your present box is complete!
Cute and easy Santa boots
https://www.tiktok.com/@hoiku.labo/video/7310107669031931138Fold the origami in half by bringing the top and bottom edges together to make a crease.
Open it up, place the colored side facing up, and fold the right edge inward by about 1 cm.
Flip the paper over again, then fold the top and bottom edges to meet the center crease.
Place it with the white side facing up, and fold the bottom edge up to align with the lower line of the white area.
Fold the paper in half by bringing the left and right edges together, then pinch the inside section and pull it outward 90 degrees.
Fold the pulled-out section upward on the front and the back to form a boot shape.
Finally, fold the tip of the boot to round it off, and you’re done!