[For Age 3] Let’s make it in April! A collection of craft ideas to feel spring events and nature


It’s April, and the children have moved up to the class for three-year-olds.
The preschool class brings a different kind of excitement than before.
At this age, they’re also getting used to handling scissors and glue during craft activities.
Here are some April craft ideas that three-year-olds can tackle with a sense of accomplishment.
There are plenty of familiar motifs for children, such as spring flowers and animals.
It’s also great to observe spring flowers and creatures outdoors alongside the craft activities.
Because the children’s creations are regarded as works, the term “seisaku” (制作) is used in the text to refer to them.
- For three-year-olds: A collection of craft ideas featuring spring events and creatures that you’ll want to make with your three-year-old
- [Origami] Simple Origami Ideas to Feel the Spring with 3-Year-Olds
- [Childcare] Let’s make things with various materials! A collection of recommended craft ideas for April
- [For 4-year-olds] A collection of April craft ideas that capture spring, such as Easter and cherry blossoms
- [Childcare] Recommended games to play in the warm month of April
- [4-year-olds] Craft ideas to enjoy with children in June
- [April] Cute spring-themed classroom wall decoration ideas for early childhood education
- [For 3-year-olds] Let’s make strawberries with origami! A collection of easy strawberry folding ideas
- [Childcare] Enjoy March! A collection of ideas for event-related activities and nature play
- [May] Have Fun with 3-Year-Olds! Craft Ideas Perfect for May
- [For 2-year-olds] Feel the warm spring! Fun April craft ideas collection
- [Childcare] Recommended crafts and activities for March, such as Hina Matsuri (Doll’s Festival) and cherry blossoms
- [Kindergarten (older class)] What kind of season is March? Let’s make events and natural objects with origami!
[For 3-year-olds] Let’s make it in April! A collection of craft ideas (31–40) to feel spring events and nature
Easter Eggs Made with Hole Punch Art

Let’s make it with a hole punch! Here’s how to create cute Easter egg punch art.
What you’ll need: construction paper, a hole punch, glue, a small container, and leftover scraps of construction paper.
First, punch holes in the leftover paper to make confetti shapes and collect them in the container.
Cut your favorite color of construction paper into an egg shape.
Apply glue to the colored paper in any pattern you like.
Make stripes, polka dots—any designs kids love.
Sprinkle the punched confetti onto the glued areas and tap gently—done! It also looks adorable as a wall decoration.
Broad beans you make by sticking (pieces) on

Broad beans, said to be in season from April to June, are perfect for spring crafts.
This time, we’ll introduce a craft that uses broad beans.
Pre-cut the pod and bean shapes from construction paper.
For children who are comfortable using scissors, it’s great to let them cut the pieces themselves.
Glue the pod and beans onto the base sheet, draw faces on the beans, and you’re done.
The steps are very simple, so even younger children can easily take part.
The bright green of the broad beans is sure to give kids an extra boost of energy.
Give it a try!
Fun to roll! Dandelion origami
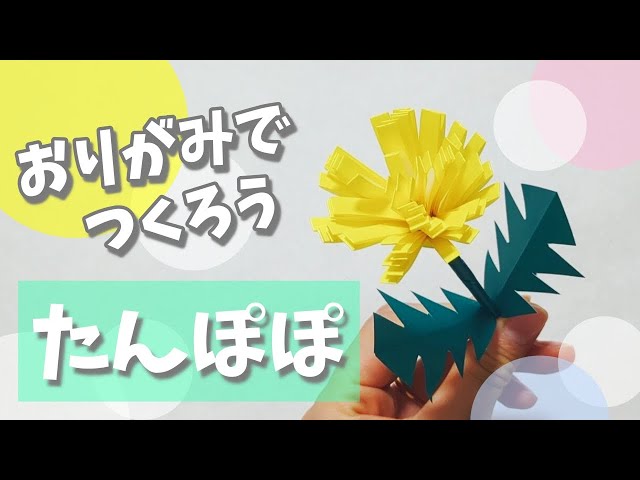
This is a voluminous dandelion origami made by rolling strips.
The petals spread out radially, giving a glamorous look.
Fold the origami paper in half and cut it, then fold each piece in half again.
Apply glue to the edge, join to form a ring, and make fine 5 mm cuts to create the petals.
Roll another piece of paper to make the stem, and fold and snip it to finish the leaves.
Wrap the petals around the stem and fluff them out for added dimension—it also works well as interior decor.
Combining yellow and orange will make it even more vibrant.
Let’s decorate with springtime natural items!
@hoikushisatomi Capture spring: Try preserving flowers and plants as a piece while they’re still beautiful! Note: They’ll last on display for about 2–3 weeks. If you want them to last longer, press the flowers first and then create your piece!work#LifeWithKids#NurseryTeacherDailyLifeCute#crafts#diyNursery teacher / Childcare workerTranslation
3:03 PM – Sharou
Let’s decorate with springtime treasures! Here’s a perfect spring craft you can make by collecting fallen flowers and wild grasses on a walk.
First, place a sheet of cooking paper (parchment paper) down and put a frame-shaped piece of construction paper on top.
Apply OPP tape (clear packaging tape) over the opening.
Peel the tape, flip it sticky-side up, and arrange the flowers you picked.
Seal it with another layer of OPP tape and trim off the excess—done! It will keep for about two to three weeks, so if you want it to last longer, it’s best to press the flowers first and then make it.
Decorating the paper frame is super cute, too, so give it a try!
Sakura tree made with transparent origami
https://www.tiktok.com/@pi_chan.sensei__hoiku/video/7355501146506595591I want to decorate a sunny windowsill! Here’s an idea for making a cherry blossom tree using transparent origami paper.
You’ll need brown construction paper, scissors, glue, transparent origami paper or colored cellophane, a clear file (plastic sleeve), and a cherry blossom-shaped frame made from construction paper.
Traditional-style cherry blossom crafts are lovely, but why not use this idea to create bright, stylish blossoms? Displayed by the window, they’ll sparkle in the sunlight and give off a different, delightful vibe.
[Age 3] Create in April! A collection of craft ideas (41–50) to feel the spring season and its events/nature
Colorful Strawberry

If you’re looking to add lots of spring vibes to your crafts, this is a must-see.
Here’s a cute and colorful strawberry craft.
First, cut red construction paper into the shape of a strawberry.
Next, use about three paint colors of your choice to paint a bubble wrap sheet.
Finally, lay the painted bubble wrap over the strawberry-shaped paper and stamp it, then glue on the strawberry’s calyx made from green construction paper—and you’re done.
You’ll end up with plenty of colorful strawberries that reflect each child’s unique personality.
It’s easy to make, so give it a try!
Also for Hinamatsuri! Cherry Blossom Papercut

Let’s cut origami paper and make lots of cherry blossoms! Fold the origami into a triangle twice, then open it once.
With the widest angle at the top, crease it in half from the top.
Fold both ends toward the far edge to form a shape like a triangle with three spiky points at the top.
Next, cut it into the shape of a single cherry blossom petal and unfold—done! If you want a papercut-style design, use the same folding method, but while cutting the petal shape, also cut out the center.
When you unfold it, each petal will look slightly hollowed out.
Make them in various colors and sizes, and decorate with plenty of them!