[Childcare] Make it in April! Recommended easy origami folds


In April, when the new school year begins, children at daycare and kindergarten start life in a new environment, and some may feel nervous or even cry.
So this time, we’re sharing origami ideas perfect for April that will bring smiles to their faces.
There are plenty of motifs that capture the warmth of spring—flowers and insects, of course, as well as fruits and animals associated with Easter! Find something you’d love to make with the children and give it a try.
If you display their creations on the wall, you can enjoy spring indoors, too! Surrounded by a springtime atmosphere, we hope you can start a wonderful year with warm, cheerful feelings.
- [Childcare] Simple origami ideas for kids, perfect for spring
- [Origami] Easy spring-themed origami ideas to enjoy with 4-year-olds
- [For Age 3] Let’s make it in April! A collection of craft ideas to feel spring events and nature
- [For preschoolers] A collection of origami ideas to enjoy February, including Setsubun and Valentine’s Day
- Simple origami for kids: cute, playable origami ideas
- Recommended for preschoolers! A collection of origami ideas perfect for April
- Origami perfect for April! A collection of ideas recommended for preschoolers (around age 4–5)
- Origami ideas perfect for April that will captivate older kindergarteners!
- [For 4–5 year olds] A collection of recommended origami ideas for March—featuring seasonal events and natural motifs
- [April] Cute spring-themed classroom wall decoration ideas for early childhood education
- [Origami] Simple Origami Ideas to Feel the Spring with 3-Year-Olds
- [Origami] Simple Origami Folding Ideas to Savor Spring with 5-Year-Olds
- [Childcare] Let’s make things with various materials! A collection of recommended craft ideas for April
[Childcare] Make it in April! Recommended easy origami folds (41–50)
Also great for walls! A cherry blossom made with 5 sheets of origami

Let’s make a cherry blossom using five sheets of origami.
Prepare five sheets of origami paper and start folding.
First, fold the paper into a triangle once; the key for the second triangle fold is to offset the tip slightly as you fold.
Fold up the side where the paper is not fluttering, and fold the opposite side to match the crease.
It’s also recommended to use glue to hold it in place so it doesn’t spread open.
Make five pieces in the same way, combine them, and finish as a single cherry blossom.
Using different colors of origami to create a variety of colorful cherry blossoms is also cute.
[Childcare] Make it in April! Recommended Easy Origami Folding Methods (51–60)
A 3D cherry blossom you can display on a flat surface!

I want to fill my room with cherry blossoms! In that case, let’s make blossoms that are easy to stick onto flat surfaces.
First, use small origami paper to make each petal one by one.
Once you’ve made five petal pieces, attach them together to form a single cherry blossom.
When joining them, pay attention to the orientation so each piece lines up perfectly.
After it’s assembled, open it up and glue the edges together.
Flatten any parts sticking out on the back, and you’re done! Because the back is flat, it’s easy to stick onto flat places like walls.
Make lots of them and decorate all kinds of spots!
A three-dimensional cherry blossom made from a single sheet of origami
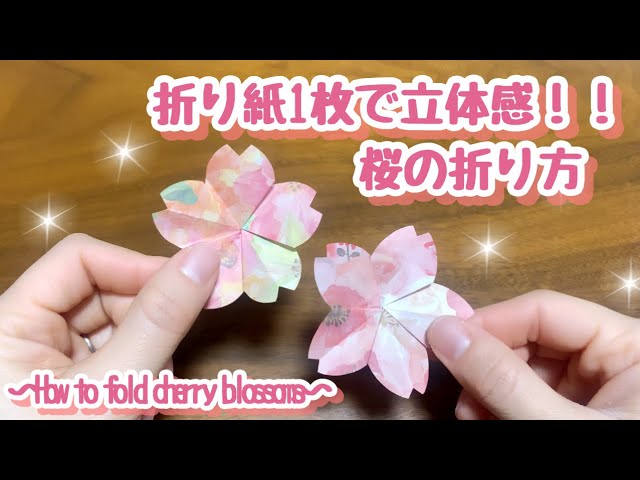
Let’s make a three-dimensional cherry blossom using just one sheet of origami paper.
First, fold the paper in half and crease an X on one side.
From the side without creases, fold toward the center of the X, then fold that side in half.
From the side with the creases, fold up to the edge of the section you just folded, then fold it outward in half from there.
When you have a shape like an irregular triangle, draw a petal-like outline of a cherry blossom, cut along that line, and unfold.
Following the creases on the flower, refold it into an accordion shape, then on both the front and back, make narrow creases from the left and right edges.
Using these creases as axes, unfold the flower again to complete a three-dimensional cherry blossom!
Sakura petal made of origami

Let’s make cherry blossom petals that look a bit like hearts, with a cute three-dimensional feel.
After folding the origami paper into a triangle twice, fold the tip inward along the center line.
Flatten the upper part to shape it into a petal.
Cut the center area while leaving the edges intact, then overlap one side over the corner-folded side, and overlap the other side to create depth; glue them together to finish.
If you make lots of petals and everyone assembles them into a big cherry blossom tree, the project will feel richer and more fun.
Fun for parents and kids! Origami cherry blossoms

Let’s make cherry blossom petals with origami.
Prepare one sheet of origami paper cut into a 3 cm-wide strip, then accordion-fold it into five equal sections.
Fold the edge of the tip of the accordion-folded strip into a triangle, draw a diagonal line and a curved line at the corner, and cut along the lines through all layers with scissors.
Crease as you go and open each layer to form individual petals.
Finally, glue the petals together, shaping them to add dimension, and you’re done.
They’re great for decorating walls for graduation or entrance ceremonies.
Dandelion candy holder

Here’s an origami idea for a cute candy holder inspired by dandelions.
It’s practical and perfect for small gifts.
Fold the paper into a triangle, divide it into three sections, then pull forward and fold to create leaf shapes.
Open the base into a square and pull along the diagonals to form a neat box shape—that’s the key.
Use a strip of masking tape wrapped around to represent the stem and bring the whole design together.
Handy for small snacks or trinkets.
It looks fun and is a recommended arrangement for everyone from kids to adults.
Dandelion flowers and fluff

This is a realistic dandelion origami that lets you make both the flower and the seed head.
By varying the colors and shapes, you can create a spring-like scene.
Take 5 cm or 7.5 cm origami paper, fold it in half twice and unfold, then fold the edges back toward the center.
Make four identical parts, trim them with scissors to form petals, and assemble them to complete a three-dimensional flower.
For the seed head, take white or pink origami paper, make fine cuts, and spread it out.
Display the flower and seed head side by side for a piece that brims with seasonal charm.
Adding a stem and leaves will make it look even more lifelike.