Popular characters that are easy to make with origami. A collection of creations you can enjoy with children.


How about making characters loved by all ages, from children to adults, with origami? Popular characters from TV anime and games can be easily made with familiar origami paper! You can create adorable pieces like Pikachu, Hello Kitty, and Anpanman—so cute you’ll want to show them off.
Origami play not only nurtures creativity but also sparks communication.
Try making them with friends and family, enjoying original expressions and personal touches as you go!
- Cute Origami Ideas for Girls
- Simple origami that can be folded from a single sheet
- [Origami] She’ll love it if you fold these! Simple ideas for girls
- Cool origami that boys will love and want to fold
- [For Kids] Easy Dragon Origami Collection
- Origami ideas boys will want to make!
- Kids will love it! Easy origami ideas—great as gifts too!
- Easy Cute Christmas Origami
- Cute origami ideas
- [For Kids] Let's Fold! Today's Origami Idea Collection
- Kids’ Origami: Cute and Easy Ideas to Make for a Birthday
- Children’s Origami: Easy Single-Sheet Flower Ideas
- [Kids] Let’s Make Origami! A Collection of Easy Goldfish Folding Methods
Popular Characters (11–20)
A slightly more detailed way to fold cheese
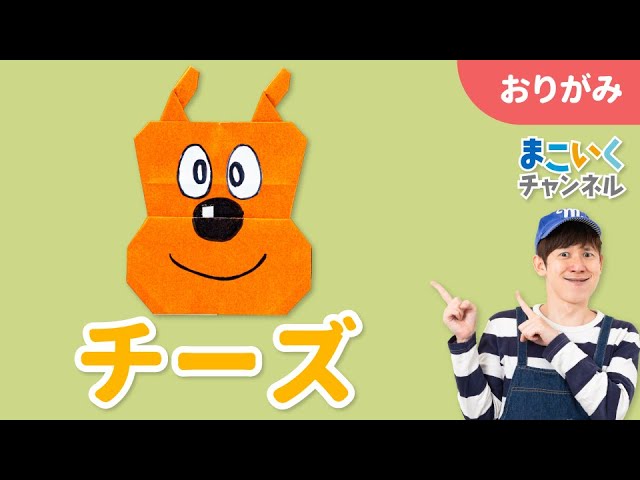
A dog named Meiken Cheese who lives in a bread factory.
You can make this origami idea with a single sheet, but since there’s one place where you need to make a cut, please prepare scissors.
First, fold the left and right edges of the origami to meet at the center to make a rectangle.
From there, create multiple horizontal crease lines and make two valley-mountain step folds to divide the paper into three sections: ears (top), the upper head, and the lower head.
The top section will be the ears, so make a cut at the center and split it into left and right.
While folding the left and right edges of the ears inward, squash the four lower corners into triangles.
Then, overlap the folded edges and tilt them diagonally to complete Meiken Cheese’s distinctive ears.
For the middle section, follow the same steps to form the outline, but fold the edges so they flare outward from the step line.
Finally, fold the lower left and right bottom corners of the bottom section into triangles, and you’re done!
Crayon Shin-chan

We’ll introduce how to make origami themed on characters from the nationally beloved anime Crayon Shin-chan.
Let’s handcraft the cute faces of popular characters like Shin-chan, Himawari, and Buriburizaemon! First, fold the origami in half vertically to make a crease, then fold the bottom into a boat-like silhouette.
From there, the key is to shape the face and hairstyle to match each character.
Use careful, detailed folds to express the differences in their facial shapes.
If you pay attention to which parts of the paper will become the hair and facial features as you fold, you’ll get great results.
Omusubi-man

A unique character from Anpanman! Here’s an idea featuring Omusubiman.
Speaking of “Omusubiman,” his traveler-like outfit and distinctive way of speaking are part of his charm, aren’t they? Since he appears in the story from time to time, it seems he has many hidden fans.
This time, let’s try making Omusubiman with origami.
All you need is one sheet of black origami paper and a black pen.
It’s also a good idea to have colored pencils ready.
Be sure to give it a try!
How to fold Rollpanna-chan

A reliable big sister to Melonpanna-chan! This is an origami piece of Rollpanna-chan.
The simple steps make it a great idea for kids to try! Place a light orange sheet of origami paper with the colored side facing up, then fold up the bottom edge about 1 cm.
Next, fold the paper in half into a square twice to make crease lines.
Once the creases are made, unfold back to the state with the bottom edge folded, and fold the left and right edges diagonally toward the center point where the creases intersect.
The remaining triangular section will be Rollpanna-chan’s face.
Finally, fold the three corners to the back with the outline in mind, and you’re done! Draw the face with a pen to finish.
Charizard That Moves Its Mouth!

Charizard, the final evolution of the first-generation starter Charmander, who was a major star under Ash in the anime.
Let’s fold a Charizard face you can chomp open and close after finishing.
Prepare two sheets of orange origami paper of the same size: use one for Charizard’s mouth and the other for the face above the mouth.
When making the upper part of the face, be sure to draw Charizard’s facial features partway through the process.
Use a stapler to fasten each part.
Shape it as you go to give it a three-dimensional finish.
Once it’s done, hold both corners of the mouth and move them to make the mouth open and close with a chomp!
So cute! Minccino

Chillarmy, a cute Pokémon that looks just like a chinchilla.
Prepare gray origami paper and make each part separately.
For the face, use one 15 cm × 15 cm sheet; for the ears, two 7.5 cm × 7.5 cm sheets; for the bangs, one 3.75 cm × 3.75 cm sheet; for the body, one 15 cm × 7.5 cm sheet; for the tail, one 7.5 cm × 7.5 cm sheet; and for the hands, one 7.5 cm × 7.5 cm sheet, which you’ll cut in half.
Take one of those halves and cut it in half again to make the feet.
Fold each part and glue them together, then finish by drawing Chillarmy’s cute face! Be careful not to lose the small parts.
Popular Characters (21–30)
How to fold Captain Pikachu

Captain Pikachu, the captain of the Rising Volt Tacklers, can amazingly be made from a single sheet of origami—hat included! Prepare a yellow sheet of origami paper.
First, fold it into a triangle twice, then open it once.
From the large corner, fold halfway toward the parallel edge to make a crease.
Fold from the long edge to that crease, then fold again to the new crease.
Fold both ends toward the center, then fold down slightly at an angle to form the ears.
Turn it over and make the hat in the area between the ears.
Cut a slit between the hat and the face, and trim the corners of each to finish.
Don’t forget to draw Captain Pikachu’s gallant face and the hat’s pattern!