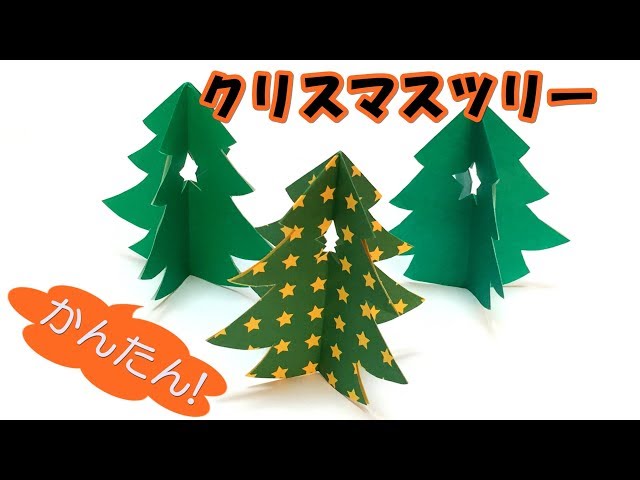
How to fold a Christmas tree using a single sheet of origami paper

If you want to incorporate something festive as Christmas approaches, how about enjoying a Christmas tree made with origami?
In this article, we introduce a variety of folding ideas—from simple methods that young children can make and enjoy, to adorable trees with a few more steps that you’ll still want to try.
Believe it or not, you can make one with just a single sheet of origami paper!
If you use patterned or colored foil origami paper, and decorate it with stickers or pens, you can create an even more beautiful tree-shaped origami.
Be sure to try making them with your family!
- December origami! Simple ideas for Santas and wreaths that kids can enjoy in childcare
- [Handmade] Christmas trees you can make with everyday materials: a collection of eye-catching ideas
- Christmas crafts for adults: stylish project ideas you'll want to display
- Easy Cute Christmas Origami
- [Simple & Cute] Let's make a handmade Christmas wreath with a paper plate!
- [Childcare] Perfect for December wall displays! A collection of Christmas tree ideas
- Christmas wreath crafting ideas: handmade projects that kids can enjoy too
- Christmas crafts with pinecones! A collection of ideas you can make with your kids
- Origami ideas for December! Easy Christmas and winter crafts to make with kids
- Simple: A roundup of origami ideas perfect for Christmas
- Simple origami that can be folded from a single sheet
- Easy Christmas crafts to enjoy with kids! Make them with everyday materials.
- Christmas Crafts to Enjoy with Kids: A Stylish and Easy Idea Collection
How to fold a Christmas tree from a single sheet of origami paper (11–20)
Simple Easy Tree

A simple Christmas tree you can make from a single sheet of origami paper.
It’s a perfect idea for Christmas-themed origami play and for getting ready for the holidays.
No difficult techniques are required, so anyone can make it with ease! Using patterned paper like polka dots or checks, or adding shapes with a craft punch, would make it look lovely.
You can also make several and use them as wall decorations, or display them on a panel or in a frame to instantly transform your room into a festive Christmas atmosphere!
Triangle tree

This is a triangular tree that’s easy to make and recommended for young children and seniors.
It’s a perfect idea for Christmas origami activities at kindergartens and preschools, as well as Christmas recreation in senior facilities.
All you do is fold a standard sheet of origami paper into a triangle shape! You can also enjoy decorating it freely by drawing illustrations with a pen or adding small stickers like rhinestone stickers.
Because it’s a simple triangle, you can arrange it however you like—so this Christmas, you’re sure to end up with lots of unique, personality-filled creations.
Simple Christmas Tree

This is an easy Christmas tree that kids can make with just one sheet of origami paper! It’s perfect for Christmas origami play.
There are a few small, precise folds at the end to shape the tree, but overall there aren’t many steps, so children should be able to try it on their own.
You can use plain origami paper and have fun decorating it with stickers or drawings.
It can also be interesting to use double-sided or patterned origami paper for a different look.
A Christmas tree made with scissors and glue
Let’s try making a Christmas tree you can whip up in no time using scissors and glue! Fold a sheet of origami paper, sketch the outline of the tree, and cut along the lines.
When you open it up, you’ll have four connected trees; glue the sections together and shape them so it can stand on its own—and you’re done! The design with a star cut out in the center is simple yet lovely.
Using patterned origami paper or cutting the center into a heart or ribbon shape would make it look even more festive, don’t you think?
A 3D tree made using scissors

We’ll show you how to make an easy 3D tree using just scissors and origami paper.
Since there are many small, detailed steps and you’ll be using scissors, be sure an adult helps if a child is making it.
Trim off the excess with scissors, then make three slits in the trunk section and fold them to create the tree shape.
Also, by making a small slit at the top and opening it upward, you can turn it into a star ornament! The trunk section will show the back side of the origami paper, so using double-sided origami will give you a neat finish.
A 3D tree you can make without cutting

Are you getting your Christmas decorations ready? Here’s a 3D tree you can make out of origami without any cutting.
Take it slow and enjoy a cozy Christmas craft session at home this winter! Any size of square paper will work.
If you make crisp creases as you fold, the following steps will go more smoothly.
Another perk of this project is that you won’t need scissors at all! You can also decorate it with pens or draw faces to give it a unique finish.
Simple Tree

I’ll show you how to make a cute Christmas tree out of a single sheet of origami paper! First, place the paper color-side down and fold it using the “octopus” base.
With the white side on the right, fold the top and bottom edges in to meet the center.
Next, turn the folded section to face upward, fold the bottom corner up to meet the top corner, then fold the bottom tip downward so it lines up with the two upper slanted corners.
Open and squash-fold the left and right corners toward the center so they form triangles.
Fold the lower left and right edges inward straight toward the center, imagining the trunk shape.
Finally, fold the bottom tip up to meet the bottom edge—and you’re done!
A single sheet with a tree and a snowman

Let’s make a tree and a snowman from a single sheet of origami! Place the paper with the colored side facing up, then fold up the bottom edge by one quarter of the whole sheet.
Flip the paper over, fold it in half horizontally, and open it back up.
Fold the left and right edges to meet the crease.
Flip the paper over again, and while opening the folded-in sides, use the white folded-up section to form snowmen on the left and right.
The colored section in the center will become the tree, so fold it into a triangle and neaten it, then make three tiers using accordion (step) folds.
Round out the snowmen to shape them nicely and draw their faces with a pen.
Finally, decorate the tree with your favorite stickers or items, and you’re done!
A Christmas tree that lets you fold the gift together in a single sheet

You can fold a Christmas tree with a present using a single sheet of origami! First, fold into a square and a triangle to make crease lines.
Add a cross-shaped crease in the lower-left area, then cut up to the first line.
Fold the left and right edges of the cut section toward the center, and fold the bottom tip diagonally toward the center.
Squash-fold the tip into a square, open the flap, then make a cut in the center of the tip to form the ribbon shape.
Turn it over and fold upward, then turn it over again and fold back the part you just folded to complete the present.
Fold the left and right edges into thirds, and fold the tip back.
Fold the top edge down to meet the center crease, then adjust the present section at the bottom so it’s straight.
Fold the top triangle’s corner diagonally in two steps, bring the present forward, and you’re done.
An easy-to-make tree

Here’s a Christmas tree craft idea you can make with your child.
Fold a sheet of origami paper into a triangle, then open it up and fold the left edge in half along the crease.
This part will become the tree’s leaves, so make a step fold to create two tiers.
The other side will be the trunk; the step where the leaves and trunk meet involves opening a corner and flattening it, which might be a bit tricky.
An adult should help with this step.
Once the tree is complete, finish it by adding round stickers or drawing patterns for decoration!