You can make a randoseru with origami! A collection of easy folding ideas

Did you know you can make a school backpack (randoseru) out of origami? Miniature randoseru are adorable for decorating during the school entrance season or as a little add-on to a small gift.
However, when it comes to three-dimensional pieces, many people may feel that the folding looks difficult.
In this article, we’ll introduce easy ways to make a randoseru with origami.
These are projects you’ll want to show someone—perfect to enjoy with your child or even to use as simple interior décor.
Give it a try and have fun!
You can make a randoseru with origami! A collection of easy folding ideas (1–10)
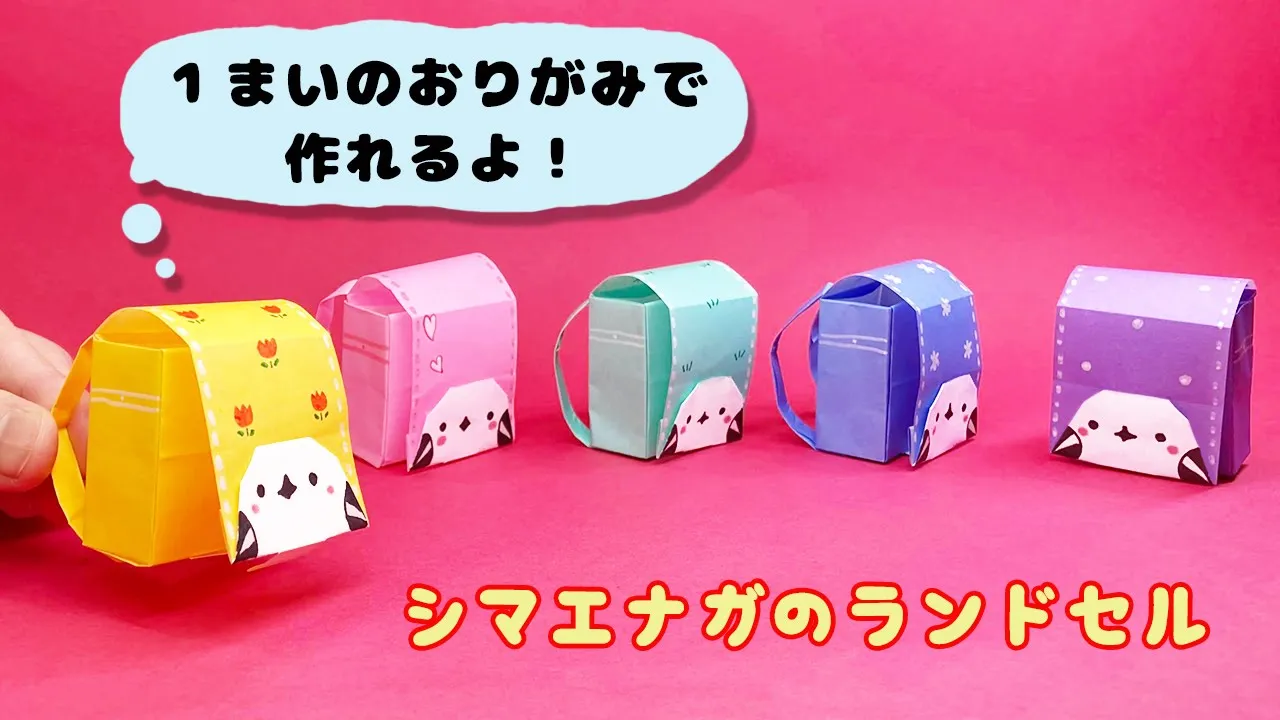
A long-tailed tit backpack

The illustration of the long-tailed tit is such a cute idea! You can make this with a single sheet of origami, but after creasing it, cut off the parts to be used for the lid and the shoulder straps with scissors.
Assemble the remaining part into a box to form the body.
For the long-tailed tit on the lid, use a piece of origami cut to one-quarter size.
Fold one corner on the short edge to round it, then fold it up so the white side shows, and draw the eyes and wing patterns with a pen.
It’s such a wonderful piece that makes you think, “I wish there were actually school backpacks like this!”
How to Fold a Randoseru Using 3 Sheets

This is an origami school backpack that you can actually put small items into.
Use two sheets of origami paper for the main body of the backpack, and one more sheet for the flap and shoulder straps.
For the flap, use a half-size sheet; for the shoulder straps, use a quarter-size sheet and then fold it in half again.
For the first sheet that becomes the main body, perform the “zabuton” fold three times.
After each fold, rotate the paper so you’re folding on a different face.
After the third fold, you should see four squares with crease lines on the reverse side; open these sections and squash-fold them into rectangles.
For the second sheet, continue folding so that you create three of these rectangles.
Combine it with the first sheet to form a box, then insert the flap into the one remaining rectangle.
Attach the narrowly folded shoulder straps to complete the backpack!
How to fold a flat randoseru

Here’s an introduction to a flat backpack (randoseru) that you can cutely customize by writing messages or adding parts.
You’ll make three pieces: the flap, the body, and the shoulder straps.
Use two 15 cm origami sheets and one half-size sheet.
For the flap, first fold the top and bottom edges to the same width, then fold again along the center line, and fold the top-right and bottom-right corners into triangles to form the shape.
For the body, fold the top edge down to the same width as the flap, then fold the left and right edges to the back the same way.
Next, fold those left and right edges inward to meet the center line, and fold the bottom edge up to the same width as the top.
Fold the whole piece in half top to bottom, then fold back the top edge of the front layer to finish.
For the shoulder straps, just fold to make long, thin strips.
Combine all the parts to assemble your randoseru.
Easy origami school backpack

This is an idea to make a complete randoseru (school backpack) from a single sheet of origami paper by creating the body, the flap, and the shoulder straps.
First, crease the origami paper and cut off one quarter.
Fold the short edge of the cut-off piece to make the flap.
Take the remaining origami, fold it in half by aligning the long edges, then fold it into thirds to make creases.
Open the tri-folded section, fold it in half by aligning the short edges to make creases; you should now have the paper divided into six blocks while folded in half.
Place it vertically with the creases on the right, and cut off the lower left end along the crease.
Fold this cut-off strip narrowly to make the shoulder straps, and assemble the remaining part into a box shape to form the body.
How to fold a colorful randoseru

A backpack made from a single sheet of origami paper! The finished piece is small, but it looks like you could tuck in a little candy and give it as a gift.
If you make several in different colors and line them up, they’ll make perfect April decorations! First, fold the origami paper in half, then fold it once more in the same direction to make creases.
Along the creases, cut off one quarter of the paper and use that part to make the flap.
After adding more creases, cut off the shoulder strap section as well.
Assemble the remaining paper into a box shape, then attach the flap and shoulder straps to finish!
Cute Randoseru Card
You can write a message on the inside of the flap and even put candy in the inner pocket! Here’s a perfect randoseru (school backpack) card for gifts.
You’ll make the body, the flap, and the shoulder straps.
Use 15 cm origami paper for the body and flap, and use a sheet that’s half of a half (1/2, then halved again) for the shoulder straps.
For the body, fold the bottom edge up to a point 3 cm from the top, flip the paper over, and fold the left and right edges to meet at the center line.
For the flap, fold the paper in half by overlapping the left and right sides, then fold both bottom corners into small triangles.
Tuck those triangles inward, insert the top part into the body, and finish assembling the backpack.
For the shoulder straps, just fold the origami in half and attach them!
Papercut school backpack

This is a paper-cutting craft where you fold origami in half and draw half of a school backpack (randoseru), then cut it out.
You can simply cut out the basic shape and the shoulder straps, but if you add some decorative patterns with a bit of care, it will look even nicer.
It’s easy to make, yet it’s a handy idea you can use in many situations, such as adding a creative touch to projects or making wall decorations.
Try making it with your favorite origami paper.
Writing a congratulatory message on the flap of the backpack is also recommended!