
If you want to incorporate something festive as Christmas approaches, how about enjoying a Christmas tree made with origami?
In this article, we introduce a variety of folding ideas—from simple methods that young children can make and enjoy, to adorable trees with a few more steps that you’ll still want to try.
Believe it or not, you can make one with just a single sheet of origami paper!
If you use patterned or colored foil origami paper, and decorate it with stickers or pens, you can create an even more beautiful tree-shaped origami.
Be sure to try making them with your family!
- December origami! Simple ideas for Santas and wreaths that kids can enjoy in childcare
- [Handmade] Christmas trees you can make with everyday materials: a collection of eye-catching ideas
- Christmas crafts for adults: stylish project ideas you'll want to display
- Easy Cute Christmas Origami
- [Simple & Cute] Let's make a handmade Christmas wreath with a paper plate!
- [Childcare] Perfect for December wall displays! A collection of Christmas tree ideas
- Christmas wreath crafting ideas: handmade projects that kids can enjoy too
- Christmas crafts with pinecones! A collection of ideas you can make with your kids
- Origami ideas for December! Easy Christmas and winter crafts to make with kids
- Simple: A roundup of origami ideas perfect for Christmas
- Simple origami that can be folded from a single sheet
- Easy Christmas crafts to enjoy with kids! Make them with everyday materials.
- Christmas Crafts to Enjoy with Kids: A Stylish and Easy Idea Collection
How to fold a Christmas tree from a single sheet of origami paper (1–10)
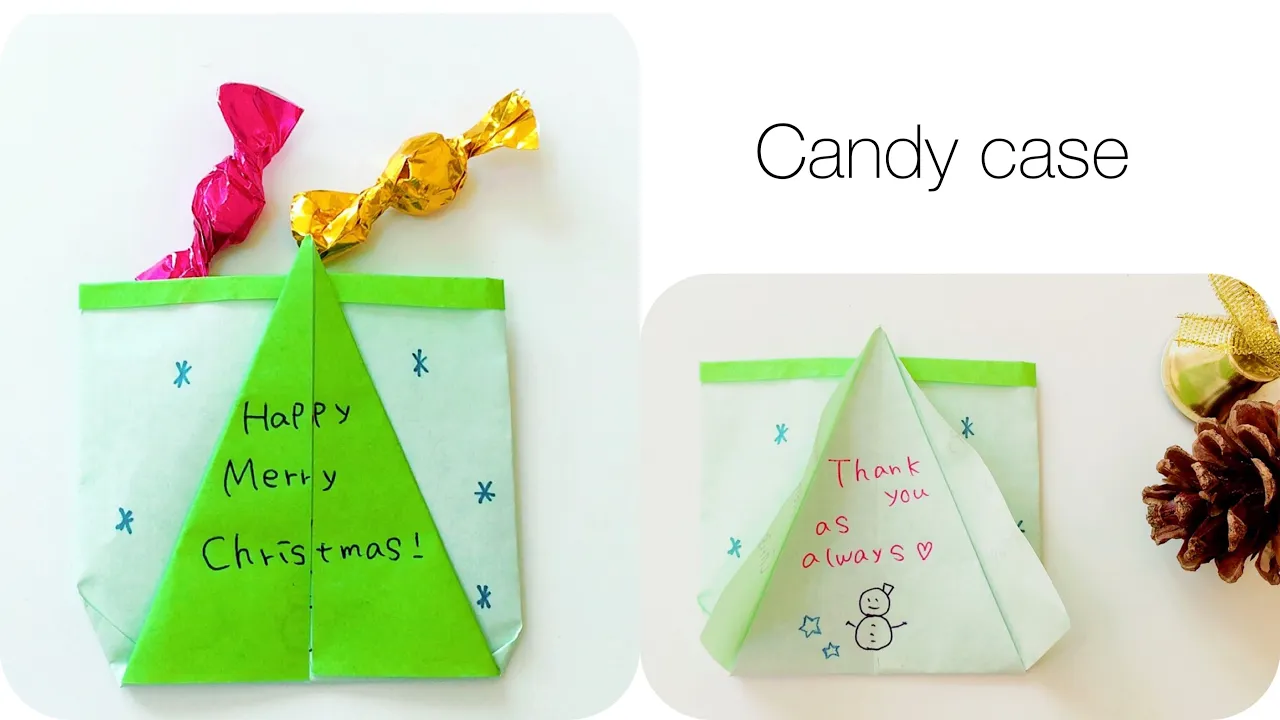
A pocket-sized tree you can also write messages on

It’s a pocket-style tree that’s perfect as a casual Christmas gift and even lets you write a message.
You can jot a note on the Christmas tree and tuck in a small present—an idea that grants the wishes of anyone who wants it all! You can make it with just one sheet of origami, so give it a try.
The trick when folding the pocket part is to overlap the origami pieces just a little.
You’ll end up with a bag-like pocket featuring a tree design on the front.
The tree section opens to the left and right, so you can write your message inside! Using double-sided or patterned origami will change the vibe and make it look lovely, too.
Ribbon Fir Tree

This is a cute Christmas tree with a ribbon featured on the front.
If you want to try a design that’s different from the rest, this is highly recommended! Since you unfold after creasing and then fold again, and there are many small, detailed folds, it might feel a bit difficult at first if you’re not used to it.
Finally, shape the ribbon part and secure it with glue.
The three-dimensional ribbon gives it an adorable look.
The back side of the origami paper will show on the ribbon, so double-sided origami paper works especially well! You can also stand it up for display, making it a perfect accent for your room.
Accordion-fold tree

This is a unique Christmas tree that uses an accordion fold.
It’s great for making with children as a Christmas craft, and it’s also recommended for craft activities in day-service settings.
First, connect two sheets of origami paper and fold them into an accordion, then secure one end with tape.
Open the accordion, and decorate it with pompoms, beads, or torn pieces of origami paper—and you’re done! Have fun using any materials you like for the decorations.
If you attach a tree trunk at the bottom, it can stand on its own, so give it a try!
Simple fir tree

Here’s a simple fir tree you can make using two sheets of origami paper.
First, make the base tree, then use the second sheet to create the leaf section and place it over the top.
The base alone already looks like a tree, so if you’re not particular, that’s fine too! If you want a more realistic look, try making the leaf part as well.
Using not just green but also light green, yellow, or red will make it more vibrant.
Add decorations as you like to create a unique, personalized tree.
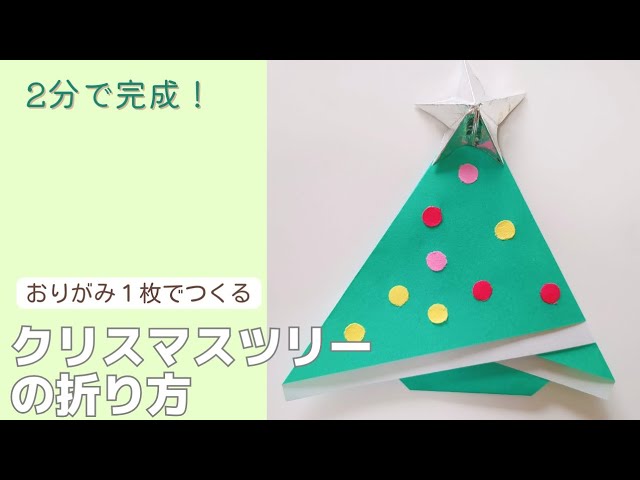
3D tree made just by making slits

Let’s make a 3D tree you can display and enjoy as soon as it’s finished! The key to this 3D tree is that after creating the base, you make three slits and fold them diagonally to create the shape of a fir tree.
Although it’s a bit of detailed work, it doesn’t require any particularly difficult techniques, so you can enjoy making it with your child! You can decorate it with a star on top, or add beads and cotton.
It’s also lovely to place it on your desk for a small taste of Christmas, or make several and decorate your whole room!
An easy flat Christmas tree

Here’s a Christmas tree you can make with simple steps.
Basically, you fold straight along the creases, with just two places where you’ll do a pleat fold.
First, fold the origami paper into a triangle to make a crease, then open it.
Fold the two left edges in toward the crease.
Rotate the paper so that the newly formed point is at the bottom, then fold the bottom point up to meet the top point.
Next, make a pleat fold to fold it downward, swap the top and bottom of the paper, and turn it over.
Fold the lower triangle upward, then make another pleat fold.
Finally, fold up the bottom point by about 2 cm, and you’re done.
Draw a mesh pattern on the bottom part of the tree.
A Christmas tree with just four folds
You can make this Christmas tree by folding a single sheet of origami paper just four times! It’s perfect if you want an easy project or a fun Christmas craft to do with kids.
First, fold the paper into a triangle so a little of the white back side shows, then flip it over and fold two points so their tips stick out slightly.
Finally, flip it over again and fold the bottom into a triangle—and you’re done! The white edges become an accent, giving it a simple yet stylish look.
You can also decorate it with round pieces made using a hole punch, or add a star made of origami at the top for a lovely touch!
Simple 3D tree

Why not try making a 3D tree that stands on its own and can be displayed in your room? You only need a single sheet of origami paper, so give it a try during your cozy winter time at home! If you make crisp, careful creases, it will look better when it stands.
Solid-color origami is simple and lovely, but using floral, polka-dot, or striped patterns can make it even more festive.
It’s also fun to decorate and customize it with beads or star-shaped sequins!
Christmas tree made with double-sided origami

How about making an easy Christmas tree using double-sided origami? Since the tree trunk uses the reverse side of the paper, this method is perfect for double-sided sheets! It’s fun to make with children, so give it a try.
Toward the end there are a few finer folds to shape the fir tree, but overall there aren’t many steps.
It might be fun to experiment with different color combinations of double-sided origami paper! Make lots and decorate a wall, or arrange them into a garland or hanging ornaments for a lovely touch.
three-tier tree

Why not try making a three-tier tree with just one sheet of origami paper? It’s perfect for a fun parent-child Christmas craft! It might look tricky to fold in tiers, but the steps are surprisingly simple.
If a child is folding it, drawing guide lines in advance can make the process smoother.
If three tiers feel too hard, start with two! You can also add stickers or use pens to decorate it—your tree will turn out even more fun.