Take-Home Craft Ideas for Winter: Perfect for Day Services for Seniors


Many people enjoy doing crafts at nursing homes and day service centers, don’t they?
This time, we’re introducing craft ideas for seniors to make in winter that they can take home from day service!
We’ve gathered easy-to-prepare projects, including those that use recycled materials and supplies from 100-yen shops.
When it comes to crafts, aside from large decorations to hang on the wall, most items can be taken home.
More intricate projects that require fine motor skills may take several days to complete, but the sense of accomplishment and joy when they’re finished is exceptional.
Of course, there are also cute crafts that can be made in a single day, so please use these ideas as a reference for craft activities at nursing homes and day service centers.
- For Seniors: Auspicious Handmade Zodiac Ornament Craft Ideas
- [For Seniors] Perfect for winter events! Easy craft ideas
- For Seniors: Simple and Lovely Crafts – A Collection of Take-Home Project Ideas for Day Service
- [For Day Service Centers] February Craft Ideas: Decorations for Setsubun, Valentine’s Day, and the Feeling of Spring
- [For Seniors] Practical Crafts to Make in Day-Service Recreation: Idea Roundup
- [For Seniors] Enjoy the Cold Winter! Simple, Recommended Crafts
- [For Seniors] Fun Crafts Recommended for December
- [For Seniors] Recommended for day services! Simple and cute small craft ideas
- [For Seniors] Fun to Make, Soothing to Display! Snowman Craft Ideas
- [For Seniors] Small craft ideas: for yourself and as gifts!
- [For Seniors] Easy Origami Recommended for Winter
- [For Seniors] Introducing Fun Crafts Made with Plastic Bottle Caps
- [For Seniors] DIY Strap Craft Ideas. Great as Gifts, Too!
[For Seniors] Winter Take-Home Craft Ideas for Day Service (1–10)
reindeer

You can make reindeer and Santa decorations using Yakult containers.
To remove the dent in the middle of the container after peeling off the label, wrap felt around it twice, then stick double-sided tape on the outside of the container and wrap yarn tightly around it without gaps.
Attach a bell to a felt strip for the collar and fix it to the reindeer’s neck area with double-sided tape.
Make the antlers from felt reinforced with a cardboard template, and attach them.
For the ears, use felt without a backing and attach them with a hot glue gun.
For the eyes, use stick-on pearl embellishments colored with a black marker.
Finish by attaching a red pom-pom for the nose.
Winter Postcard
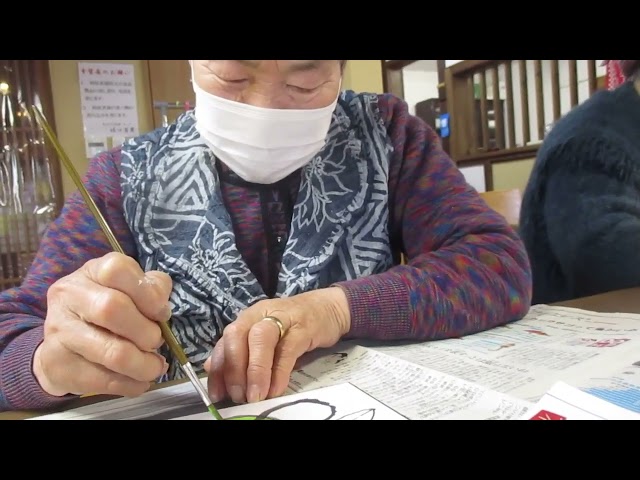
A design that pairs a message with a winter-themed illustration—because it’s handwritten, you can truly express originality.
If you frame it as designing a postcard, they can think about both the design and the message, including who they want to send it to.
Since they’ll be writing both an image and text on a small piece of paper, it also encourages them to focus closely on their hands.
Imagining the design and turning it into an illustration through precise brushwork helps develop both creativity and fine motor skills.
Finger-knitted eco scrubber

A scrubber made from warm yarn often used for winter clothing.
Let’s try making this handy item, perfect for doing the dishes! The method is simple: keep looping the yarn around the fingers of one hand and knit it steadily.
Once you’ve knitted it to a certain length, roll it up and shape it like a scrubber.
And there you have it—a cute yarn scrubber! Be sure to use 100% acrylic yarn.
Using your fingers stimulates the brain and can contribute to better health.
It’s easy to make, so it’s a good idea to prepare plenty in advance so you always have some on hand.
[For Seniors] Take-Home Craft Ideas for Day Services to Make in Winter (11–20)
Bookmark made from a milk carton

Bookmarks mark how far you’ve read in a book, and when the design is nice, it makes you want to keep reading.
This project shows how to easily make an essential bookmark using a milk carton and a plastic bag.
The base is the thick milk carton; you layer a plastic bag over the design you’ve added to the base and press it with an iron to create a coating.
Using pressed leaves for the design is also recommended—the green really stands out against the white of the milk carton and gives a seasonal feel.
For the string you attach later, it’s best to choose a color that makes those two hues pop.
Setsubun wreath with an oni (ogre) and an okame (folk mask)

During the cold winter months, you’ll likely spend more time enjoying crafts indoors.
Here’s a recommended wreath that lets you soak up the Setsubun atmosphere.
All you need is origami paper, so why not incorporate it into craft activities at your day service? The wreath base is made by creating several parts and assembling them.
By changing the colors and patterns of the parts, you can completely transform the look of the wreath—give it a try! The oni (ogre) and okame (traditional female mask) can also be made with simple folds.
Adding these instantly brings out the Setsubun vibe.
It’s perfect to take home and display in a room or by the entrance, and it also makes a delightful gift.
accordion-fold demon

A festive craft themed around oni (demons) that really captures the Setsubun atmosphere—the three-dimensional effect created by folding and layering is part of its charm.
The key step is combining accordion-folded paper into a circle, which forms the oni’s base and contributes to the overall dimensionality.
Once the circular accordion is complete, attach facial features and other parts to create the oni, then mount it on a base that evokes good fortune—like a folding screen or a fan—to finish the piece.
The essence of the accordion fold is keeping the folds even, so be sure to focus carefully on your hand movements during this part.
snow globe

You can make a sparkly, beautiful snow globe using materials all from the 100-yen shop! All you need is a jar, liquid glue, a small figurine to place inside, glitter, and some adhesive.
Glue the figurine to the inside of the jar and let it dry.
Then fill the jar halfway with water.
Next, pour in liquid glue until the jar is full, add your favorite glitter or sequins, and mix thoroughly with a chopstick.
If you add fine nail glitter, it will create a powdery snow effect and give the globe a beautifully shimmering finish.