![[For Seniors] Perfect Finger Exercises! Seasonal Flower Origami](https://i.ytimg.com/vi_webp/EdVY9X34KZc/maxresdefault.webp)


We’d like to introduce various flower origami projects especially for seniors.
In Japan, beautiful flowers bloom with each of the four seasons.
In spring, there are cherry blossoms; during the rainy season, hydrangeas; in summer, sunflowers; in autumn, cosmos; and in winter, Christmas roses.
Why not try making seasonal flowers with origami?
We’ve gathered many easy projects so that even beginners can enjoy them.
If you love flowers—or if you’re looking for a fine-motor rehab activity—please join us in creating lovely origami flowers together.
- [For Seniors] Add Color to Your Room: A Collection of Flower Craft Ideas
- Easy origami that delights the elderly. Enjoy a heart-lifting time with seasonal origami.
- [For Seniors] Easy Origami Recommended for Winter
- Recommended Origami for Seniors: Fun December Theme
- [For Seniors] Autumn Origami to Enjoy in October
- [For Seniors] Lovely Crafts Made with Tissue Paper: Ideas Collection
- [For Seniors] Enjoy Something New Every Day! Today’s Origami
- Craft ideas with plum blossoms for seniors
- [Recreation] Summary of Recommended Origami Ideas for Seniors
- [For Seniors] Make with Origami: Enchanting Wisteria Hanging Decoration Ideas
- [For Seniors] Easy Sunflower Origami Craft
- [For Seniors] Make an April Calendar: Fun Ideas to Brighten Your Mood
- [For Seniors] Recommended September Origami to Feel the Autumn Season
[For Seniors] Perfect Finger Exercises! Seasonal Flower Origami (1–10)
cosmos

Origami cosmos flowers are lovely, aren’t they? If everyone gathers and makes these autumn-inspired blooms together in a friendly atmosphere, that alone becomes a fun time.
Choosing colorful origami paper and creating them in your favorite shades—pink, white, yellow, and more—is part of the charm.
The folding method is simple, so if you take your time and fold carefully, you’re sure to end up with a beautiful piece.
The finished cosmos can be displayed in your room or given as a gift to someone special—there are many ways to use them.
It’s also wonderful that origami lets you feel the changing seasons.
peach blossoms

Peach blossoms, which bloom as spring grows warmer, are known to share many similarities with cherry blossoms, such as their small pink flowers.
Let’s create peach blossoms that capture that beauty and warmth by making a three-dimensional version with origami.
First, cut the origami paper into a pentagon.
Using the creases—which also serve as guides—fold it into a shape with five pointed directions.
From there, shape each tip into a petal, and you’re done.
It’s a design where precise small refolds are key.
The reverse side of the paper also becomes part of the design, so the impression will change depending on the color you choose.
Nemophila

Nemophila, with its gentle blue blossoms and petite size, softly colors the spring season.
This project recreates nemophila flowers with origami, combining pieces to bring out their delicate charm.
Fold the paper finely toward the center to form five petals, then stack and assemble them to create the nemophila bloom.
Adding small touches—like staggering the layers during assembly or slightly bending the front edges—helps create a three-dimensional look.
Lining up flowers in different shades to make a gradient also seems like a lovely idea.
Yuri

Lilies, which are in season from early summer through summer, come in various colors, but they’re often associated with a beautiful white image.
This piece shows how to create such a white, beautiful lily in three dimensions by combining origami.
The idea is to fold with the final spreading in mind, and making precise, even folds will lead to a beautiful result.
When you spread it open, curving the petals is also key—this helps create a solid sense of three-dimensionality.
Adding a stem afterward makes it easier to display, so it’s highly recommended.
A basket of daisies

Daisies are striking for the way they bloom in a variety of colors, and their colorful appearance really conveys the exhilaration of spring.
This craft features a basket filled with daisy flowers, appealing for its colorful and playful look.
The key is how to make the daisies: fold a strip of origami paper in half, make slits, then roll it up and finally shape it into a flower.
As you carefully spread out the petals, the daisy becomes three-dimensional.
By varying the size and how much you spread the petals, and arranging a range of colors, you can achieve an even more vibrant result.
Simple bouquet
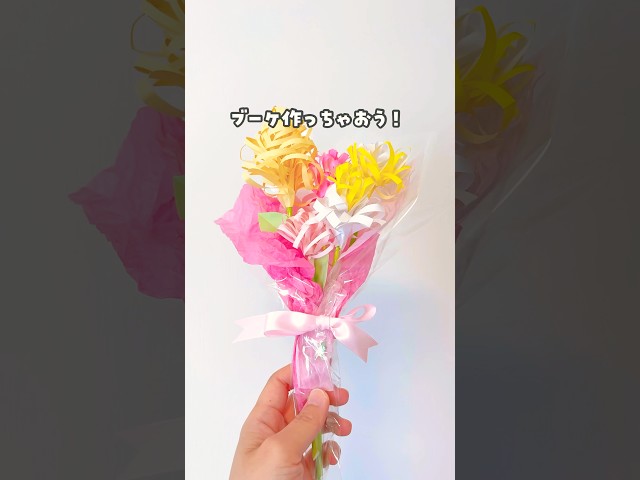
This origami piece stands out for its three-dimensional look, achieved by adding creative touches to the petal expression.
By leaving a border and making vertical slits in the paper, then curling them to create petals that clearly convey the feel of the seasonal event, a softly spreading flower shape emerges.
The work isn’t overly intricate, but the degree of opening changes depending on how you curl the strips, so it’s important to proceed with the final result in mind.
Bundling several together adds volume and creates a bouquet-like form.
Varying the color combinations changes the impression, allowing you to enjoy arrangements tailored to where you’ll display them.
Paper cutouts of osmanthus flowers

Kinmokusei (fragrant orange osmanthus) is a plant that blooms with orange flowers in autumn and is known as one of Japan’s three great fragrant trees—its scent is very popular.
This project shows how to create a pattern resembling a chain of tiny kinmokusei flowers by cutting folded origami.
Fold the origami into a triangle, mark flower shapes on it, then cut along the marks and unfold to reveal a connected row of kinmokusei.
Since it can look flat on its own, it’s also recommended to layer the pieces, glue them onto a backing sheet, or add decorations like stickers to give it a more three-dimensional look.