[For 3-year-olds] Perfect for June! Craft ideas using various expressive techniques


When June arrives, there are so many things that make us feel the rainy season—like rain, frogs, umbrellas, and snails.
Here, we introduce craft ideas that three-year-olds can enjoy at daycare and kindergarten while having fun with the rain.
By making things together, you’ll create more happy memories and kids will gain new skills along the way.
Be sure to dive in with excitement and enjoy these fun crafts with the children.
Since the children’s creations are treated as works, we use the term “seisaku” (creative production) in the text.
- [Childcare] Rainy days can be fun too! Recommended rainy-season craft ideas for June
- [Childcare] Craft ideas perfect for June
- Craft ideas perfect for June for 2-year-olds
- [4-year-olds] Craft ideas to enjoy with children in June
- [For 1-year-olds] Craft ideas to enjoy in June | Various expressive play activities
- [For 3-year-olds] A roundup of craft ideas to enjoy in summer! Introducing various motifs and techniques
- [May] Have Fun with 3-Year-Olds! Craft Ideas Perfect for May
- [5-Year-Olds] Creative Project Ideas to Try in June! Let's Broaden Their Range of Expression
- Umbrella Craft Ideas by Age Group: Perfect for Rainy-Season Childcare
- Craft ideas to try in July for 3-year-olds
- [For 2-Year-Olds] Craft Ideas to Enjoy in August! Incorporate Summery Motifs and Techniques
- [Childcare] Recommended for 3-year-olds! Craft activity ideas
- [Crafts] A special feature on ideas to try with three-year-olds in August! Choose from a variety of motifs
[Age 3] Perfect for June! Craft ideas using a variety of expressive techniques (11–20)
Coffee Filter: Blotted-Painting Umbrella

Let’s make an umbrella using a coffee filter.
First, draw patterns on the filter with water-based markers, then mist it with water to let the colors bleed.
Let the filter dry, cut a slit at the bottom, and thread a pipe cleaner through it.
Curl the end of the pipe cleaner and staple the pipe cleaner and filter together.
Flip the filter inside out to form the umbrella, bend the handle, and you’re done.
Try using water-based markers in different colors to enjoy a variety of tie-dye-style patterns.
[Marbling] Umbrella and Frog
![[Marbling] Umbrella and Frog](https://i.ytimg.com/vi/-YR4hVt3svc/sddefault.jpg)
Let me share an idea for making “Umbrellas and Frogs” with marbling.
Marbling is a technique where you drip paint onto water to create patterns, then transfer them onto paper.
Fill a tray with water, then drip marbling paints onto it as you like.
Use a toothpick or skewer to create a pattern, and gently lay the paper on top.
Lift the paper, and if the pattern has transferred, let it dry.
Cut the marbled paper into an umbrella shape, glue it onto a backing sheet, and draw the umbrella handle and raindrops with a pen.
Finally, add an origami frog, and you’re done.
It’s a fun project that makes you excited to see what kind of umbrella pattern you’ll get, so give it a try in June!
Handprint: Frog and Hydrangea

Here’s a craft idea to make a frog and hydrangeas using handprints.
Stamp both of your handprints onto white construction paper and cut them out with scissors.
Cut a frog shape from green construction paper and draw its face.
After cutting out the hydrangea base, glue on pieces of torn origami paper.
Cut out hydrangea leaves from construction paper as well and draw the veins.
Glue the handprints to both ends of the frog piece, then attach the hydrangea in the center—done! You can put it straight on the wall, or draw raindrops on a backing sheet and stick it on top for a cute touch.
Paper Plate Resist-Painting Umbrella

Here’s a perfect craft idea for June: a resist painting umbrella.
First, use crayons to draw umbrella patterns on the back of a paper plate.
Once you’ve finished the patterns, paint over them and enjoy the resist effect.
If you thin the paint with plenty of water, it will repel nicely from the crayon.
Cut a slit in the paper plate and overlap the cut edges to form the umbrella shape.
Make a small cut on one end of a straw and open it up; then tape it to the back of the umbrella-shaped paper plate, and you’re done! If you bend the accordion part of the straw, it becomes the umbrella handle.
Stained-glass-style snail made with plastic cups

Let’s make a stained-glass-style snail using clear plastic cups.
Cut cellophane into suitable shapes with scissors and place the pieces inside a cup.
When you stack another cup on top, it looks like stained glass.
Make the snail’s face and tail from cardboard, and tuck the ends between the cups.
Create eyes from construction paper, draw the pupils, attach them to a pipe cleaner, and fix it to the snail’s head to finish.
When stacking the cups, adjust the cellophane so it sits along the sides rather than collecting at the bottom.
Hydrangeas made with torn-paper collage
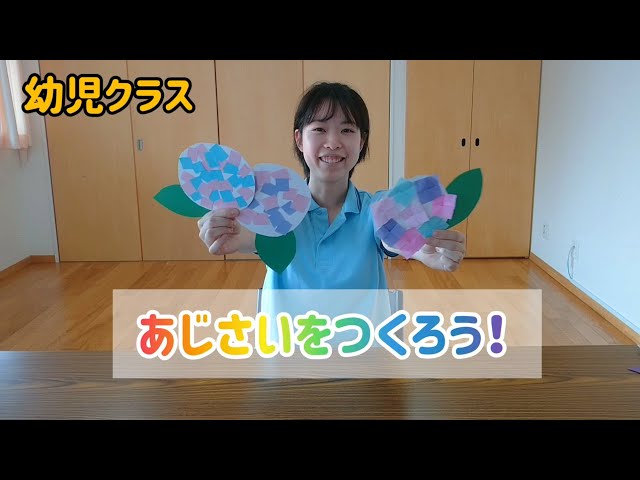
Would you like to try making hydrangeas with torn-paper art? Cut construction paper into strips, then into small squares.
Next, cut out a hydrangea base with scissors, and glue the small squares onto it.
Finally, cut leaves from construction paper and attach them behind the base.
Your hydrangea is complete! Using two colors of paper for the petals will make it look nicer.
Since three-year-olds may not be used to scissors yet, proceed gradually when cutting.
[Age 3] Perfect for June! Craft ideas using a variety of expressive techniques (21–30)
Paper Plate Umbrella Decoration Made with Paint

Let’s make colorful, pop-style umbrellas using paper plates.
The process is super simple! Start by painting the paper plate with your favorite colors.
Try incorporating techniques like finger painting, resist painting, or stamping—whatever you like.
Once you’ve painted it, cut the paper plate in half.
You can leave the edge as is, but it’s also fun to cut the rim into zigzags or wavy shapes.
Finally, roll each cut half into a cone shape, and insert a pipe cleaner—bent into an umbrella handle—through the center to finish.
A nice bonus is that one paper plate makes two umbrellas.
Display your lively, unique umbrella creations by the window or around the room to brighten up your space!