
We’re introducing easy and fun toy-making ideas you can create with construction paper.
Construction paper comes in many colors, is easy to cut with scissors, and works well with glue or tape—so the possibilities are endless!
In this article, we share lots of toy ideas that will make you want to start crafting right away.
From toys made using only construction paper to creations that combine other materials, there’s plenty to explore.
Find your favorite toy idea and have fun making and playing with it!
- Introducing easy-to-make newspaper toys! Once they're finished, you can play with them.
- Recommended for 5-year-olds! Simple DIY toy ideas
- Simple origami for kids: cute, playable origami ideas
- Fun DIY Toy Ideas You Can Make with 100-Yen Store Materials
- Disposable chopsticks transformed! Fun toy-making using chopsticks!
- Let's make it with origami! A collection of ways to fold “dinosaurs”
- An empty box becomes a toy! A collection of ideas for handmade toys
- Age 4: Simple and Fun! Handmade Toy Ideas
- Toddler-approved fun! DIY toy ideas for 2-year-olds
- Handkerchief and Towel Play! A Collection of Fun Play Ideas
- It moves! You can play with it! Fun origami. How to make origami toys.
- Let’s make it with 3-year-olds! Fun handmade toy ideas
- [Educational] Spark and nurture curiosity: simple and fun DIY toys
Fun to play! A collection of handmade toy ideas made with construction paper (1–10)
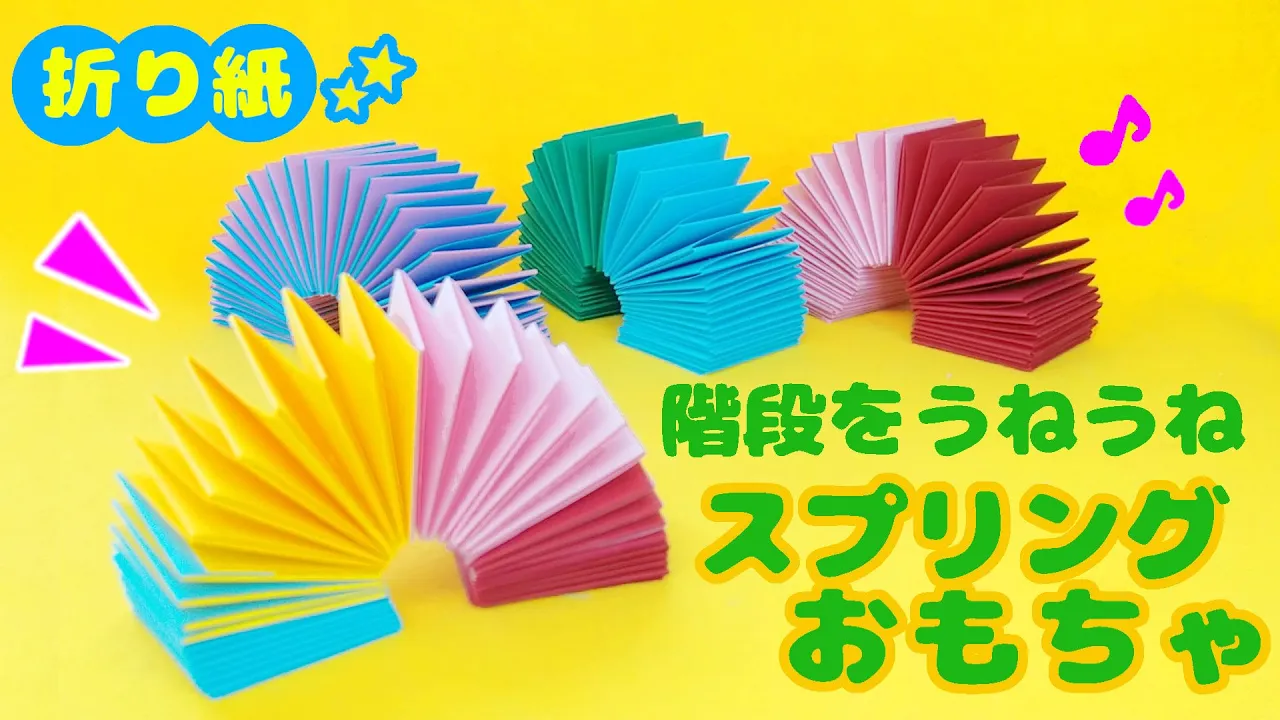
spring

Here’s how to make a rainbow spring.
Prepare four colors of B4-size construction paper and a piece of thick paper measuring 4.5 cm × 4.5 cm.
You can get five strips from one sheet, so cut all four sheets into 5 cm-wide strips.
Once you have two strips of the same color, glue their ends together.
Fold the lower strip forward, then fold the one that’s now on the bottom to the right.
Continue folding alternately in the same way.
When you finish, connect the yellow strip and keep folding in the same alternating pattern.
Connect all the colors to complete the length.
Finally, trim any excess, glue the ends, and attach the thick paper in between to finish.
Try playing with it on the stairs!
Magic Theater

Even kids will be amazed! Here’s how to make a mysterious magic theater.
All you need are your favorite illustration, a clear file (plastic sleeve), and felt-tip pens.
Place the illustration under the clear file and trace the drawing.
To keep it from shifting, tape or clip one side—it makes tracing easier.
Cut out a window in a sheet of cardstock to create a frame so the illustration is visible, then prepare a colored sheet for a divider and add 1.5 cm glue flaps on both sides of the 16.0 cm edges.
Glue it to the side without the window.
Slide the illustration in with the white sheet as the separator, and you’re done.
This curious and fun magic theater is sure to be a hit as a performance at events!
Accessory storage basket

Let me show you how to make a cute little storage basket.
Prepare scissors, glue, and colored construction paper.
Fold the paper in half vertically and cut along the fold.
We’ll use just one of the halves.
Fold it in half again, crease to make four fold lines, and cut along those lines.
Then take the pieces you cut, fold them lengthwise, and cut again into long, narrow strips so you have 8 strips.
On just one strip, apply about 1 cm of glue at the end and make it into a ring.
Fold the remaining strips in half and cut them.
Now glue the eight short strips and the ring together.
Apply glue to the first short strip and attach it to the ring so it forms a semicircle.
Attach the second strip so it crosses like an X.
For the rest, glue them so they intersect in the centers of the gaps.
Next, take the long strips, weave them from bottom to top and out through the opposite gaps, repeating the process.
When you can’t pass the strip through anymore, glue it in place.
As you continue, make sure the starting position alternates with the previous row so the weaving pattern stays consistent.
Finally, adjust the shape, glue on a handle, and your basket is complete!
UFO catcher

I’ll show you how to make a simple and cute snake crane game.
You’ll need a long strip of colored construction paper, some red construction paper, clear tape, scissors, and a felt-tip pen.
Let’s get started! Fold the long strip of paper in half so a little bit sticks out at the bottom, and use scissors to cut a slit in the center.
If you fold it in half and hold the middle part, you can move it up and down with your hand.
Cut the red paper into a thin strip for the snake’s tongue and tape it onto the paper you just made—the snake is done.
Next, take another long piece of paper, fold it, and make two vertical slits.
Fold it into thirds lengthwise, then fold the tip slightly—your crane is complete! Roll up any leftover paper to make a “goal,” then try catching it and have fun playing!
Swaying Bunny
https://www.tiktok.com/@niconico_mama/video/7213342478085131522Let me show you how to make a gently wiggling bunny that’s soothing just to look at.
Prepare pink construction paper, scissors, and double-sided tape.
Cut the construction paper vertically into six strips.
Make each strip into a loop, then connect four loops vertically.
Gently flatten the second loop from the top and the bottom loop.
Stretch the remaining two loops into bunny ear shapes, adjust the shapes, and attach them with double-sided tape.
Your cute, wobbly bunny is complete! Gently flattening the loops can be a bit tricky, but I think it’s a craft that kids around 18 months can enjoy.
It’s simple to make, so give it a try!
Wobbling Yacht

This time, we’ll show you how to make a wobbly yacht using colored construction paper.
For the hull, cut one blue circle with an 8 cm radius; for the cabin, cut one white rectangle 6 cm by 7 cm; for the window, cut one yellow rectangle 3 cm by 5 cm; and for the funnel, cut one blue rectangle 5 cm by 3 cm.
Fold the hull piece in half, then assemble everything while gluing the parts together.
As you work, you might tell the children the names of the ship’s parts to increase their interest in boats.
Adjust the steps to suit the children’s ages.
Once it’s finished, have fun playing with your gently rocking yacht!
Flappy butterfly

Here’s how to make a flappy butterfly.
Prepare the materials: regular straws, one smoothie straw, one sheet of construction paper, cellophane tape, scissors, glue, colored pens, and a pencil.
Fold the construction paper in half and make a crease 2 cm from the folded edge.
Draw a butterfly shape you like with colored pens and cut it out.
Keeping the fold intact, open only the wing sections, draw patterns with colored pens, and glue the center—now it transforms into a butterfly! Make a slit 1.5 cm from the end of a regular straw, insert the tip of another straw into the slit, and secure with tape.
Make a slit in the smoothie straw as well, fit it over the thinner straw, and secure with cellophane tape.
You’re done!