[Childcare] Recommended for toddlers! Toy ideas you can make and play with


Toys you can make and play with can be created from everyday materials if you match them to your child’s age and interests.
Through crafting, kids can have fun, grow attached to what they make, and even find opportunities to communicate with friends.
Here, we’ll introduce simple, easy-to-make toy ideas for toddlers.
There are plenty of options for indoor play and for enjoying outside!
Many can be made easily using familiar recyclable materials, so please use this as a reference and try making them together with your children!
- [For toddlers] Simple but amazing craft ideas — including toys they can play with
- Age 4: Simple and Fun! Handmade Toy Ideas
- [Nursery/Kindergarten] Crafts you can play with after making them
- Recommended for 5-year-olds! Simple DIY toy ideas
- Toddler-approved fun! DIY toy ideas for 2-year-olds
- [Childcare] Easy! Make a DIY target game. Playful craft and fun game
- [Childcare] Recommended for 3-year-olds! Craft activity ideas
- Paper cup crafts that elementary school kids will love! A collection of fun project ideas
- Make it with everyday materials! A collection of DIY toy ideas recommended for 1-year-olds
- An empty box becomes a toy! A collection of ideas for handmade toys
- Let’s make it with 3-year-olds! Fun handmade toy ideas
- [For 4-year-olds] Ideas for group games and craft activities that can be done indoors
- Fun crafts using straws
[Childcare] Recommended for toddlers! Toy ideas you can make and play with (21–30)
A mysterious horse that walks without power

Here’s an idea for making a moving horse out of construction paper! First, cut a rectangle from construction paper that’s 3 cm wide and 15 cm long.
Then, on both the left and right sides, make two slits each, 1 cm wide and 5 cm long.
Fold the middle of the slit sections into a valley fold to form the head and tail, and make mountain folds on the sides to create the legs.
Use scissors to round off the corners of the legs.
This will allow the horse to move.
Color it with crayons and draw the face to finish.
Try letting it walk down a slope and have fun!
Craft Challenge! Clippity-Clop Horse Riding

Let me introduce an idea for making a horse that makes a clacking sound when it moves.
Use one milk carton each for the head and neck, and two cartons each for the body and legs.
Use Meiji “Oishii Gyunyu,” the type with a screw cap.
The main step in this idea is connecting the milk cartons to form the shape of a horse.
Use masking tape to fix each part in place, and attach rubber bands to the caps of the milk cartons where the head connects to the neck and the body connects to the legs.
This creates a restoring force that returns the parts to their original position after moving, making the motion smoother.
Draw eyes on the face, attach a string, and it’s complete.
[Childcare] Recommended for toddlers! Toy ideas you can make and play with (31–40)
Let’s make it together as a parent and child! A rocking horse craft

Let’s make a wooden hobbyhorse that toddlers can play with.
You’ll need two 1-meter pieces of wood and one 50-centimeter piece.
First, cross the two 1-meter pieces and fasten them together with screws.
Next, attach the 50-centimeter piece horizontally near the bottom of the crossed pieces to serve as a footrest.
That’s all for the steps, so as long as you have the tools, even beginners can make it.
When you cross the wood, adjust the lengths so that the intersection is about shoulder height for the rider.
Also, make sure the ends of the crossed wood do not extend beyond the rider’s shoulders.
The higher the footrest is, the harder it will be to mount, so it’s recommended to attach it at a low position.
Handmade triangle puzzle
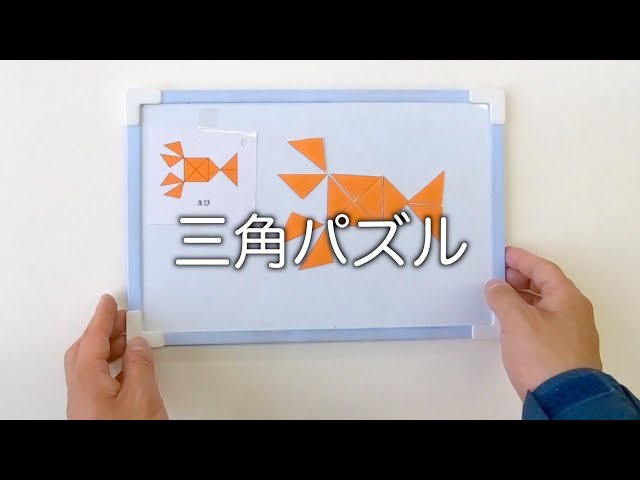
This is an indoor activity where you use colorful construction paper to make triangles of various sizes and combine them to complete pictures and shapes.
Children can work at their own pace and freely, which helps them enjoyably develop concentration, spatial awareness, and creativity.
Because there are few chances to fail and it’s easy to experience success, it’s also effective for boosting self-esteem.
The materials are simple and you can start right away, which is a big plus.
With a little ingenuity, kids can create their favorite animals, vehicles, or even story worlds—so adults, too, should dive in and enjoy it together!
Target practice with a candy box

Let’s make and play! Here are some ideas for a target-shooting game using candy boxes.
Target games are one of those corners that really excite kids, right? This time, let’s try making one with candy boxes.
You’ll need empty candy boxes, a stapler, rubber bands, and double-sided tape or regular tape.
It seems you can even make a rubber band gun and a festival-style headband out of empty candy boxes, so give it a try! For the targets, just line up the candy boxes and assign point values to each—easy to set up and play.
caterpillar fishing
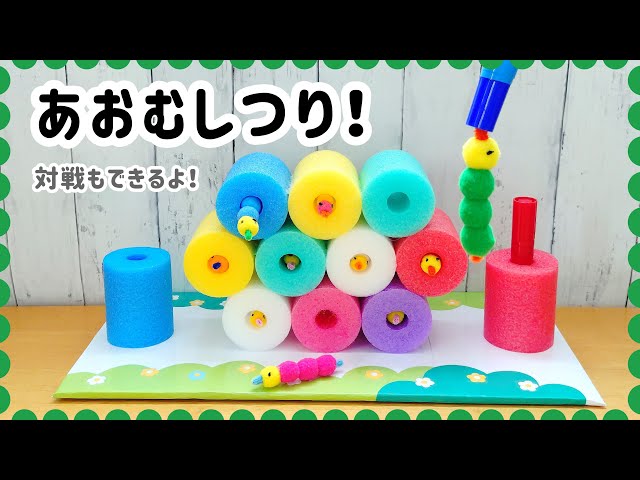
This is a “caterpillar fishing” game you can make with pool noodles! First, cut the pool noodle into 8 cm-wide pieces.
A template makes it easier! Cut about 10 pieces, arrange them to balance your little “houses,” and glue them together.
Next, make a base out of cardboard.
Attach the pool noodle houses to the base, then make caterpillars using pom-poms and pipe cleaners.
Finally, put a magnet inside a pen cap.
Place the caterpillars inside the houses, and slowly bring the magnet in the cap close to the pipe cleaner—your caterpillar will get “caught”! You can also flip the setup and compete against each other, so get creative and have fun playing!
It’s fun to blow, cock-a-doodle-doo!
@welbe.co.jp Simple Craft Series: Blow and “Cock-a-doodle-doo” — Mr. Clucky#NeurodevelopmentalDisordersParenting# developmental support (ryōiku)HabiShizuka Midorikawa
♬ Dino Song – Mr. Popolo
On the fingertips of a disposable glove, draw feathers with a pen, and put a beak, eyes, and comb on the thumb area.
Next, make a hole near the bottom of a paper cup and secure the glove over the cup.
Thread a straw through the hole, and when you blow, it looks as if a bird is inflating and taking off from inside the cup! It’s also cute to draw a beak and wings on the cup.
Using mouth strength helps practice breathing and vocalization, and it gives a sense of accomplishment.
The materials are easy to find, so preparation is simple.
Children can participate at their own pace.
Be sure to make it together with the kids and have fun!