Preschool: Ladybug Craft Ideas

Ladybugs that we see more often in spring.
Their round red shape with black polka dots is distinctive, and they’re popular with children.
So this time, we’re sharing plenty of ideas for making ladybug crafts.
From perfect wall decorations to playable toys and wearable items, we’ve packed in lots of craft ideas that make the most of a ladybug’s cuteness!
Be sure to try making them together with the children.
It’s especially recommended to go outside, observe real ladybugs, and then create—the children’s interest will deepen even more!
Enjoy crafting while incorporating the children’s discoveries—like the number of spots and how the wings move!
[Childcare] Ladybug Craft Ideas (1–10)
Easy! Flapping Ladybug

When the weather gets warm, you feel like running around in meadows and flower fields, don’t you? It’s also the season when animals and insects become active.
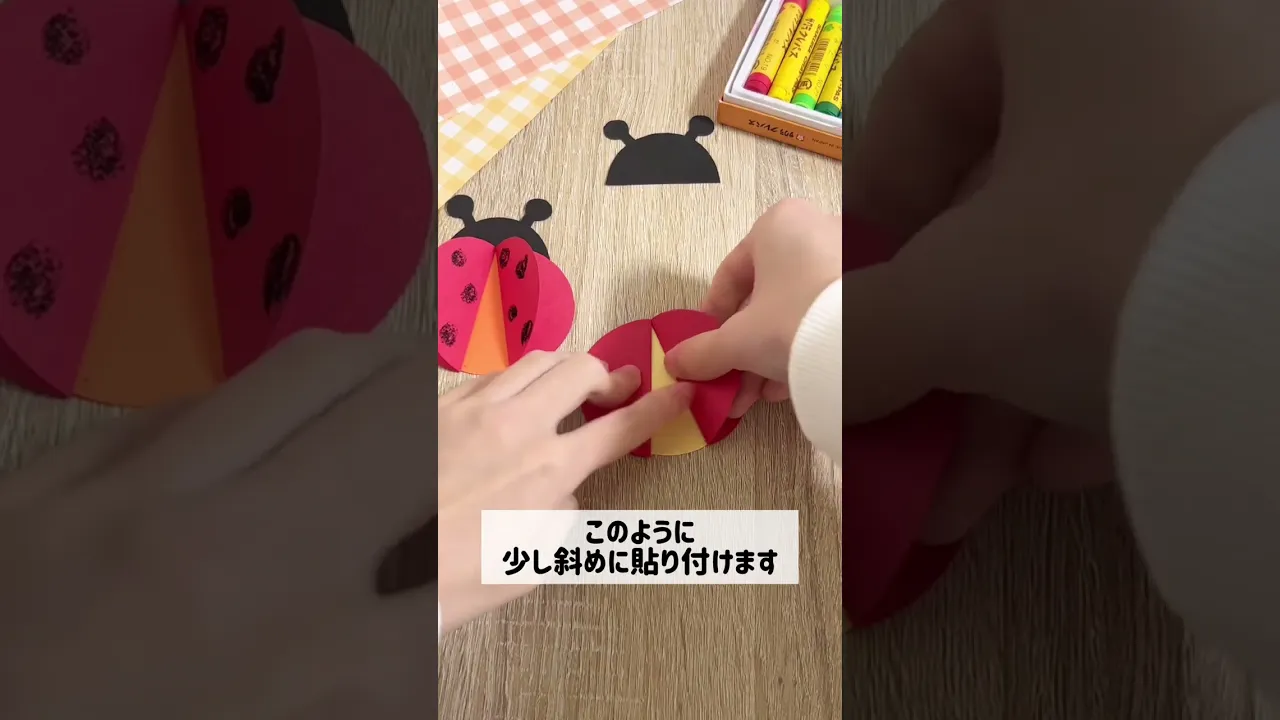
Let’s try making a ladybug craft that’s perfect for March! Cut out three circles from red and beige construction paper.
Fold the two red circles in half and stick them onto the beige circle.
Attach them to a head made from black construction paper, draw patterns on the wings, and you’re done.
The fluttering wings are so cute—why not make a bunch and use them as wall decorations?
Ladybug with finger stamps

These are ladybugs made by dabbing finger paint onto drawing paper.
Let’s create an activity that moves children’s fingers and encourages free, creative ideas.
First, cut red and black construction paper into circles and glue them together along with the face parts.
Next, dip a finger in black paint and add the ladybug’s spots.
You can make a seven-spotted ladybug, or vary the size of the fingerprints to customize the pattern.
Try making these cute ladybugs—they’re perfect for spring wall decorations.
Tissue paper ladybug
https://www.instagram.com/p/CM4OaO2Jz-Y/Would you like to make a ladybug using tissue paper that will soothe you with its gentle colors? Because it uses soft, fluffy materials, it’s perfect for the warm, sunny feel of spring.
First, cut off both corners of the tissue paper after folding it into an accordion pattern, then unfold it.
Next, prepare the ladybug parts and attach them with stickers or construction paper.
Using black round stickers to create the ladybug’s spots is also recommended.
It makes a lovely decoration that can brighten children’s spring-themed projects or be displayed just as it is.
Flower field and ladybug
https://www.instagram.com/p/Cc1z1RuLRda/Here’s a ladybug craft idea with the theme of a flower field bursting with spring colors.
Let’s make ladybugs that let children move their fingers freely and expand their creativity.
First, glue torn pieces of origami paper onto a paper plate to create the look of grass.
Next, make the flower and ladybug parts using origami paper and stickers.
When coloring paper with paint, it’s recommended to use soft materials like sponges.
You could also create flowers that symbolize spring, such as tulips and rapeseed blossoms.
Try making an item that lets you feel the arrival of spring indoors.
Dandelion and Ladybug
https://www.instagram.com/p/CZgtM80rtdc/These are dandelion and ladybug decorations that capture the warm, gentle feeling of spring.
They’re also great for anyone looking for spring wall decor to brighten up kindergartens or nurseries.
First, attach leaves and petals made from origami or construction paper onto a backing sheet.
Next, glue torn pieces of construction paper in the center of the petals to complete the dandelion.
Then, assemble the ladybug by attaching the face and body parts, decorated with stickers or pen-drawn patterns.
Finally, stick the dandelions and ladybugs onto the backing sheet to finish.
It’s also a good idea to display them together with illustrations or lettering that depict a spring scene.
Capsule ladybug
https://www.instagram.com/p/CeCYChPBdNG/A ladybug you can make from a gashapon capsule that works as a tabletop ornament or wall decoration.
Use the capsule’s round shape to create a three-dimensional ladybug! First, place crumpled tissue paper inside the capsule and secure the edge of the base cardboard.
Next, attach stickers or construction paper pieces for the ladybug’s antennae, spots, and eyes, and you’re done.
A bonus is that, aside from the base and antenna sections, you can make it without using scissors.
Display it with a four-leaf clover or dandelions to bring out a springtime feel.
Try making this cute ladybug that looks like it could start moving any moment!
Twisty Ladybug
https://www.instagram.com/p/Coj0xhtJt2i/Let’s make an adorable ladybug that spins around! First, prepare a piece of construction paper the same size as a paper plate, and attach the parts for the ladybug’s eyes and spots.
Next, glue a plastic bottle cap to the back of a paper plate, then attach another paper plate on top—and it’s done! When you spin it, the key is to tuck in the ladybug’s antennae.
Let it roll in any direction, and you’ll be soothed by how straight it travels.
You can also try changing the color of the paper or customizing the pattern.
How about making this ladybug toy that you can play with over and over again?