Perfect for spring crafts! A collection of recommended ceiling decoration ideas for childcare rooms


In this season when we can feel the arrival of spring, I’ve gathered some ideas for making handmade mobiles and garlands with children! Hang the mobiles from the ceiling, and decorate walls or windows with the garlands to bring a touch of spring.
By using colorful materials and designing freely, you can nurture children’s creativity.
Enjoy the spring atmosphere by hanging and displaying your creations.
Along with the warm spring sunshine, create wonderful memories filled with smiles by spending fun, hands-on crafting time with your children.
Perfect for spring crafts! Recommended ceiling decoration ideas for daycare rooms (1–10)
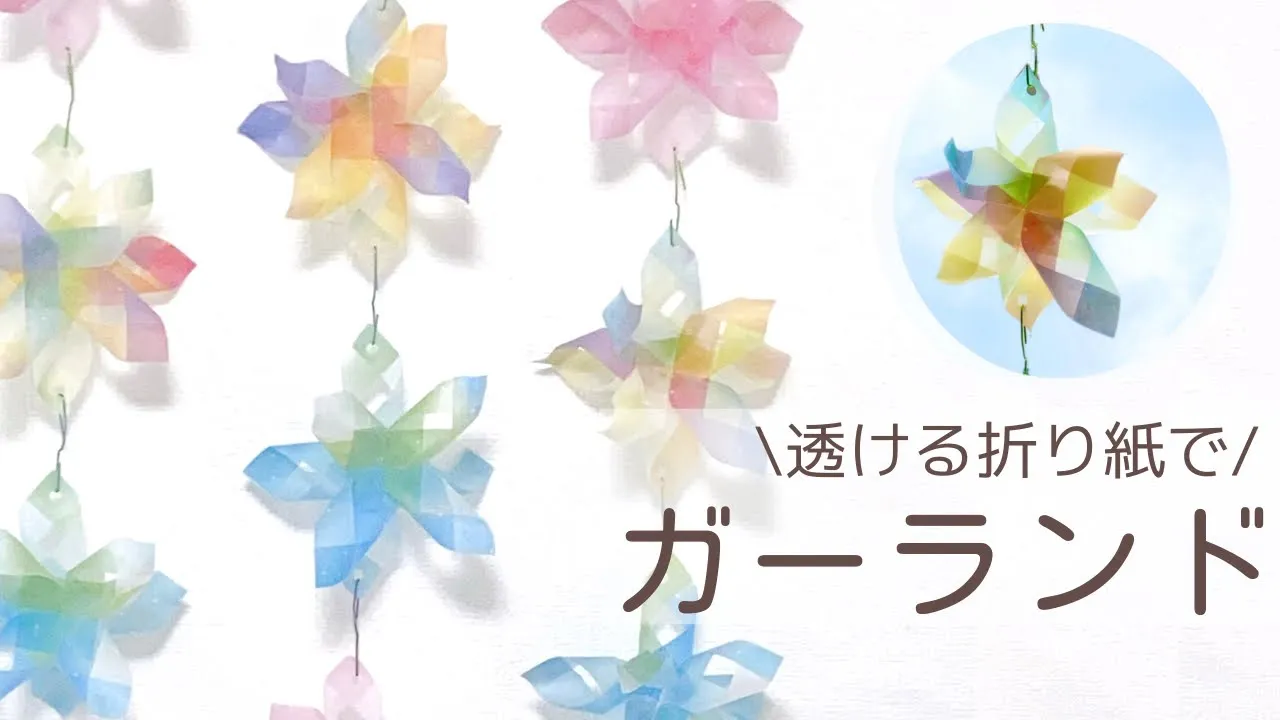
Sparkling garland made of sheer material

How about making a beautiful gradient garland using translucent colored origami paper? First, cut the origami into eight equal vertical strips.
Stack and glue them together.
Since it’s origami paper, regular glue works fine.
Then glue two of those units together again to form a flower that looks like a three-dimensional object.
Where the glued layers overlap, the color may deepen or create a different texture, and depending on the light, it can look even more transparent.
Enjoy the beauty woven by colors with your children!
flower field mobile

Let’s make it with a paper cup! Here’s an idea for a cute flower-field mobile with fluttering butterflies.
You’ll need a paper cup, scissors, colored construction paper, round stickers, pens, tape, thread, decorative materials, and ribbon.
First, cut six slits evenly around the paper cup.
Open the slits, turn the cup upside down, and round off the tips of the slit sections.
Next, use the colored paper to make butterflies and flowers, and add patterns with round stickers and pens.
Finally, connect the paper cup and the paper motifs with thread, decorate the paper cup, and you’re done!
Garland made with paper strips

Here’s a charming cherry blossom decoration made from paper strips.
You’ll need pink construction paper, a stapler, scissors, a pencil, a ruler, and thread.
Prepare one strip measuring 2 cm by 30 cm and another strip measuring 2 cm by 20 cm from the pink paper.
Fold the 20 cm strip in half, then fold each half again to form an M shape.
Fold the 30 cm strip in half as well, mark 5 cm from the loose/fluttering end, fold at the mark, then continue folding it into an accordion with 5 cm-wide sections.
Slightly fold the mountain-fold edges to shape them like cherry blossom petals, staple the ends together, and finally turn the loop inside out to finish.
Make lots of them and thread them onto a string to decorate!
No-sew felt cherry blossoms

When a room is decorated with pink cherry blossoms, it feels so festive and exciting, doesn’t it? Here’s an idea for making cherry blossoms out of felt—and you can do it without any sewing! Prepare a piece of pink felt measuring 4 cm by 20 cm.
Mark it at 4 cm intervals along the length to make four sections, then make vertical cuts at each mark, cutting about two-thirds of the way down.
Round the edges of the five frilly sections into gentle arches, then fold each arch in half and cut it diagonally to form petal shapes.
Apply glue to the base of the petal on the side without slits, and glue the ends together as well to finish.
You can customize it however you like, so try adapting the basic shape to create all kinds of variations!
3D butterfly made with construction paper
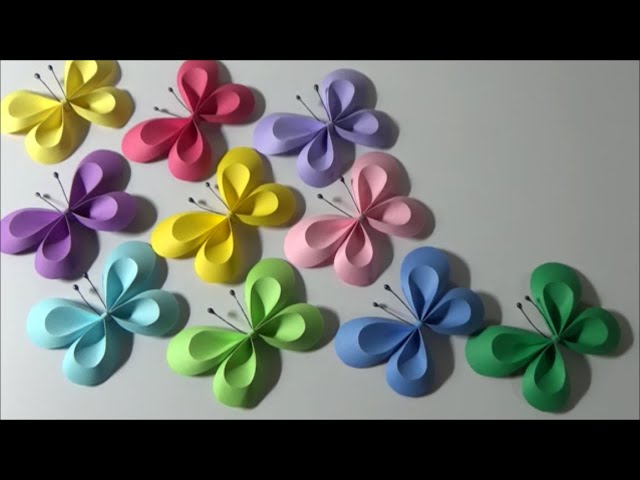
These puffy, three-dimensional paper butterflies are stylish and cute.
All you need is construction paper measured and cut to sizes like 2 cm × 6 cm, 2 cm × 7 cm, and 6 cm × 10 cm, and you can create pieces that look like impressive objets d’art.
The technique of using a ballpoint pen that no longer writes to score the paper is a clever trick you can apply to other projects, too.
Fix the butterfly’s shape with glue and clothespins, attach craft wire for the antennae, and it’s done! Display them with spring flowers like cherry blossoms or tulips to make them look even more charming.
A mobile made with your favorite characters

Why not decorate the room with your children’s favorite characters? You can use characters from anime or games as materials, or—if characters aren’t allowed at your school—use animals or picture books they love instead! Once you’ve chosen the materials, print them out on a computer.
Also print one reversed copy so you can glue the front and back together.
Laminate the finished pieces and cut them out, then punch holes so you can attach strings.
Try decorating them like a mobile, using branches the children found in the yard or during outdoor activities.
Swaying gently in the pleasant spring breeze, they’ll look absolutely lovely.
Sakura mobile made of origami

Here’s an introduction to making a hanging cherry blossom ornament with origami.
You fold it the same way as when making an origami star to create a five-petaled cherry blossom.
Make four blossoms with the same pattern, stack them, and glue them together at the center.
When you gently open it up, the cherry blossom becomes three-dimensional and looks adorable from every angle! The key is to make four identical pieces, so when you cut patterns into the petals, create a template and use it to make four matching petals.
Decorating with clear fishing line or spring-colored yarn will brighten up your room.