Simple origami for kids: cute, playable origami ideas


This time, we’re introducing lots of cute, playable origami that are perfect for kids.
Origami is a great indoor activity that you can focus on regardless of the weather, making it perfect for time at home.
Seasonal animals, creatures, and toys you can play with after folding are fun for adults too!
You can watch videos to check each step, so even if you find origami difficult, don’t worry.
If it’s too hard for your child to do alone, a parent or guardian can fold together with them and show them how fun origami can be.
- It moves! You can play with it! Fun origami. How to make origami toys.
- Let's make it with origami! A collection of ways to fold “dinosaurs”
- [For toddlers] Simple but amazing craft ideas — including toys they can play with
- [Childcare] Make and play! Origami ideas
- Cute Origami Ideas for Girls
- [For 5-year-olds] Let’s make origami! A collection of fun folding ideas
- Origami for 2-Year-Olds: Fun and Educational! Origami Ideas for Toddlers
- [Nursery/Kindergarten] Crafts you can play with after making them
- Origami perfect for summer. Fun and easy for kids to make!
- [Childcare] A roundup of easy summer origami ideas to enjoy with 5-year-olds
- [Childcare] Today’s Fun Origami Play
- [For preschoolers] A collection of origami ideas to enjoy February, including Setsubun and Valentine’s Day
- [Childcare] Let's make toys you can play with using origami!
Simple origami for kids: cute, playable origami ideas (21–30)
cracker

A cracker that’s a big hit at birthday parties and Christmas parties! You can easily make it with a single sheet of origami paper.
Fold the paper in half vertically, rotate it, and fold it in half again to make a square.
Then open the side with the opening into a triangle, and do the same on the back.
Once opened, fold it in half into a triangle, and it’s done! Hold the folded inner section and shake it—it will open with a “pop!” like a party cracker.
Real crackers can only be used once, but this origami cracker can be refolded and used again and again, so you can enjoy it many times during the party!
cat
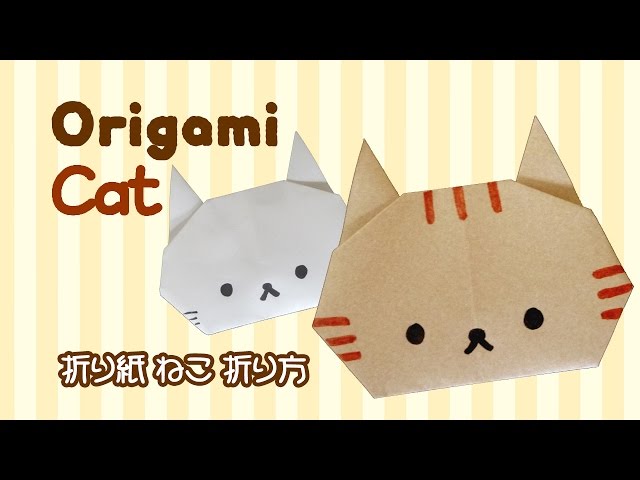
Cats are animals that are very familiar to children.
Let’s try folding a cat with origami! If you search for how to fold a cat, you’ll find many different methods, but this one is relatively simple and doesn’t use scissors or glue.
If an adult folds it slowly and carefully together with the child, even small children can enjoy it.
After you finish folding, draw the face with a pen or colored pencils.
Try using different colors of origami paper or adding patterns to make all kinds of cats.
Monkey’s Mountain Climb

It’s a whimsical toy where a little monkey climbs a mountain and appears from the summit.
First, make crease lines in both vertical and diagonal X shapes, then fold along those lines to form a square.
Fold the unopened section into a small triangle and cut it off as is.
The cut piece is the monkey.
Next, slightly fold up the edges of the opening part on both sides (front and back) to finish the monkey.
Place the monkey origami between the lower piece that represents the mountain’s foothills, and by moving the foothill section with small, quick motions, the monkey will climb the mountain and reach the top!
Spins round and round! A flying toy

It’s an easy-to-make toy that you’ll want to play with over and over.
First, fold the origami paper into a triangle, then roll it up tightly into a long, thin shape starting from the center.
That’s all there is to making it! To play, simply snap open the final folded tip and let go—the piece will shoot off with great speed.
The direction you unfold it affects how well it spins, so experiment and see what works best.
Once it has opened up, you can fold it back the same way and play again and again!
Spins like crazy! Hand spinner

The hand spinner became extremely popular with both children and adults and even went out of stock for a time.
Believe it or not, you can make one from a single sheet of origami paper! First, make vertical and horizontal crease lines to form a cross, then fold both ends toward these creases.
Rotate it and fold both ends toward the other central line, then fold each end back into a triangle.
Open along those creases, fold back only the two on the diagonal, and form a pinwheel-like shape.
Add creases to each blade-like part, shape it by creating a triangular peak in the center, and you’re done! Pinch the peaked part between your fingers and blow on it—the spinner will whirl around.
How to fold blinking eyes
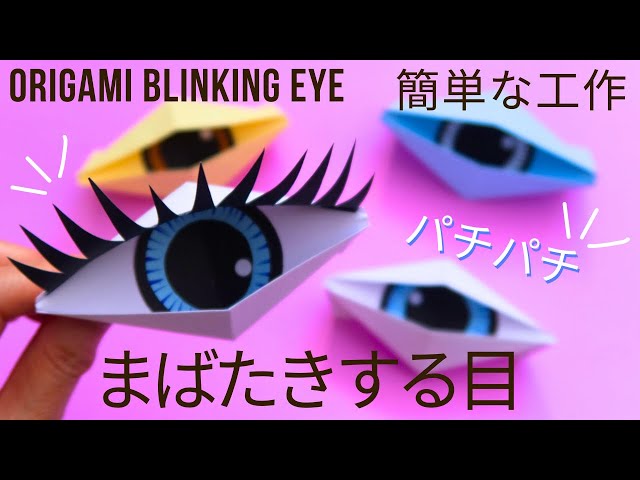
How about some blinking eyes that look a bit eerie in the dark? They’re perfect for Halloween toys, too! First, fold a piece of origami paper in half into a triangle to make a crease, then fold both ends inward toward this crease three times.
Next, fold it in half from the other direction to make another crease, and fold both ends toward the center along that crease.
Shape the whole piece into an eye by folding the straight edges diagonally.
Attach a handle, and the eye is complete! Finish it by adding a separately made drawing of an eye in the center and gluing on eyelashes around it.
Basketball game

Let’s make 36 of these and combine them to complete it.
The way it stretches, shrinks, and wiggles as it changes shape is sure to be addictive.
It will be fun to use lots of colors and make it colorful.