Let’s make cherry blossoms with origami! A collection of simple folding ideas that both kids and adults can enjoy

When you feel the arrival of spring, you can’t help but want to make cherry blossom–themed decorations with origami, right? Still, when you actually try to fold them, some of you may find that “the petal shapes don’t come out well” or “the steps are complicated and I get lost along the way.” So here, we’ll introduce plenty of ideas for cherry blossom origami that you can fold with simple steps.
There are many ways to enjoy them once they’re finished, such as decorating your room or adding them to cards.
Be sure to give these seasonally charming cherry blossom origami projects a try.
- [April] Spring Origami for Kids: A Collection of Simple and Cute Ideas
- [For Kids] Easy to Fold! Origami Ideas for Hinamatsuri (Girls’ Day)
- Children’s Origami: Easy Single-Sheet Flower Ideas
- [For Kids] Recommended in March! Easy Origami Ideas for Hinamatsuri (Girls’ Day) and Graduation Ceremonies
- Easy flower craft ideas you can make with a single sheet of origami paper
- Easy origami! A cute collection of heart-folding ideas
- Kids will love it! Easy origami ideas—great as gifts too!
- [For Kids] Easy Origami Ideas to Enjoy in May
- [Origami] Easy-to-fold Tulips! A collection of ideas that both kids and adults can enjoy
- Three-dimensional carnations made with origami: a collection of simple, cute ideas
- Let's make an origami umbrella! A collection of easy folding ideas that both kids and adults can enjoy
- Fun for kids and adults alike! A collection of easy dandelion origami ideas!
- Let’s make cosmos flowers with origami! A collection of simple ideas that both kids and adults can enjoy
Let's make cherry blossoms with origami! A collection of easy folding ideas (1–10) that kids and adults can enjoy
Sakura hanging ornaments

Bring a breath of spring into your room with hanging cherry blossom decorations.
In this idea, you fold origami paper into a specified shape, draw half a petal, and cut away the excess with scissors.
Make four identical pieces, sandwich thread at the center, glue them together, and you’ve got a lovely ornament.
To shape the origami paper as specified: first fold it into a triangle, then overlap left and right and fold into a triangle again to create a crease.
Unfold once the crease is made, then fold the top corner down to meet the base and crease, then unfold again.
Next, fold the top corner once more along the crease you just made, and crease it.
Now, fold the right side of the paper inward along a line connecting the very bottom of the vertical center line with the far right end of the last crease you made.
Then fold it back outward along the crease, and repeat the same steps on the left side to finish.
A 3D cherry blossom you can display on a flat surface!

I want to fill my room with cherry blossoms! In that case, let’s make blossoms that are easy to stick onto flat surfaces.
First, use small origami paper to make each petal one by one.
Once you’ve made five petal pieces, attach them together to form a single cherry blossom.
When joining them, pay attention to the orientation so each piece lines up perfectly.
After it’s assembled, open it up and glue the edges together.
Flatten any parts sticking out on the back, and you’re done! Because the back is flat, it’s easy to stick onto flat places like walls.
Make lots of them and decorate all kinds of spots!
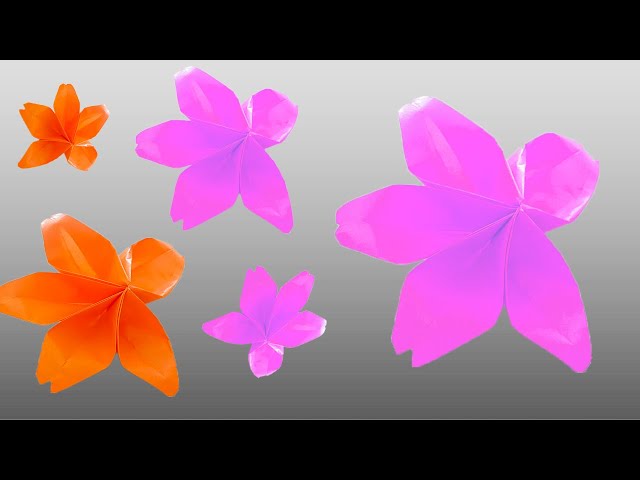
Cute three-dimensional cherry blossoms!

Three-dimensional decorations really catch the eye at various events! This cherry blossom made with five sheets of origami lets you enjoy both depth and realism.
First, fold the origami into a triangle, then fold both ends up toward the center.
Crease from the lifted sections toward the outer edges, and open each one into a pocket shape along those creases.
Fold the protruding parts inward and fold the whole piece in half, then apply glue to the folded section to shape it into a rounded, bouquet-like form.
That completes one cherry blossom petal; make five of these and glue them together to finish the cherry blossom.
You can hang it, set it down, and display it in various ways!
Let’s make cherry blossoms with origami! A collection of easy folding ideas (11–20) that kids and adults can enjoy
Sakura petal made of origami

Let’s make cherry blossom petals that look a bit like hearts, with a cute three-dimensional feel.
After folding the origami paper into a triangle twice, fold the tip inward along the center line.
Flatten the upper part to shape it into a petal.
Cut the center area while leaving the edges intact, then overlap one side over the corner-folded side, and overlap the other side to create depth; glue them together to finish.
If you make lots of petals and everyone assembles them into a big cherry blossom tree, the project will feel richer and more fun.
Assemble and cute cherry blossom origami

Prepare five sheets of origami paper and fold them to make a three-dimensional cherry blossom you’ll want to show off when it’s finished.
Fold the paper into a triangle, then fold the left and right corners toward the center line.
Fold the top triangular tip downward, then fold both sides further toward the center.
Fold the tip of the center section up to meet the top corner and tuck it into the pocket.
Shape the whole piece into a cherry blossom petal and open the pocketed section to create a 3D form—one petal is complete.
Make five petals in the same way, glue them together, and you’ll have one cherry blossom.
The blossom’s three-dimensional look and color will enhance the feeling of spring.
Display it in your room or entryway and enjoy the season.
Fun for parents and kids! Origami cherry blossoms

Let’s make cherry blossom petals with origami.
Prepare one sheet of origami paper cut into a 3 cm-wide strip, then accordion-fold it into five equal sections.
Fold the edge of the tip of the accordion-folded strip into a triangle, draw a diagonal line and a curved line at the corner, and cut along the lines through all layers with scissors.
Crease as you go and open each layer to form individual petals.
Finally, glue the petals together, shaping them to add dimension, and you’re done.
They’re great for decorating walls for graduation or entrance ceremonies.
A three-dimensional cherry blossom made from a single sheet
Let’s make a three-dimensional cherry blossom using a single square sheet of origami paper.
Fold the paper into a triangle, and create crease lines as you shape it into a cherry blossom.
When cutting with scissors, be careful not to make mistakes—cut along the fold lines.
Once you open it up, fold along the creases so it forms a three-dimensional flower shape.
Using a toothpick to lift and shape the petals may help the process go more smoothly.
Changing the color of the origami to make colorful cherry blossoms could make it brighter and more fun.