Elementary School Students: Simple One-Day Science Project and Craft Ideas


For elementary school summer break projects and crafts, we recommend starting with something your child is already interested in.
When it’s something they like, they can enjoy working on it.
Here, we introduce simple ideas for elementary school students! These are experiments and crafts you can do in a single day.
The materials are things you already have at home or can get quickly, so even if you’re short on time, no worries.
Perfect for those who are “stuck on a theme” or “looking for an easy and fun project”! Find your favorite and give it a try.
- Simple yet amazing crafts: craft ideas that elementary school students will want to make
- For summer vacation homework! Simple and amazing crafts for elementary school students that you’ll want to make after seeing them
- Recommended for elementary school students! Science fair topics & craft ideas
- For upper-grade boys! Simple yet awesome craft project [Don’t call it lazy]
- Simple but awesome! Craft ideas for upper-grade girls
- DIY science projects that elementary school boys will love: ideas you can make with everyday materials
- Simple and cute summer project crafts! A collection of ideas for girls that will make you want to create
- Fun crafts using straws
- [Middle School Students] Easy One-Day Science Projects and Crafts Ideas
- Recommended Independent Research Projects for 5th Graders [Elementary School Students]
- Recommended for lower elementary school students! A collection of plastic bottle craft ideas made with everyday materials.
- Paper cup crafts that elementary school kids will love! A collection of fun project ideas
- Toys you can make from cardboard crafts! Authentic ideas you can build and play with
[Elementary School Students] Simple One-Day Independent Research and Craft Ideas (131–140)
10 Musical Instruments You Can Make with Plastic Bottles
@kajiijapn We’re introducing 10 types of instruments you can make with plastic bottles!Plastic bottle#Summer vacation homeworkSummer Vacation CraftIndependent Research
Original Song – Everyday-Item Instrument Unit kajii – kajii / Future Instruments Lab
Plastic bottles are often used as materials for crafts.
So this time, how about making musical instruments with plastic bottles? Empty bottles can become drums, flutes, or maracas… With a bit of creativity, they can transform into instruments you can actually play! Bottle caps can also be turned into instruments by combining them with other materials, so don’t throw them away—save them.
It’s also a great idea to keep notes on how the sound changes depending on where you make holes and what you put inside.
Handmade Happy Noodles
https://www.tiktok.com/@n.annlee321/video/7317570138859900162Looks just like the real thing! Let’s handcraft some happy noodles.
Flatten a cotton ball made from yellow embroidery thread to form a lump of noodles.
Also, wrap another embroidery thread around chopsticks and soak it in water mixed with liquid starch.
Once it dries and you remove it, it will turn into curly noodles, so make some of those too.
Use a small paper cup as the container and attach a package label you designed with a design app.
Put in the noodles and a packet of toppings, then stick on the lid to finish! You might even be able to use it as a keychain if you add some parts.
Cute mysterious bottle

A mysterious bottle where two liquids won’t mix even when tilted.
It’s a fun idea that works great as interior decor or a small gift.
First, fill the bottle about halfway with baby oil.
Next, add colored water tinted with food coloring.
Put in glitter or holograms as you like, cap it, and decorate the bottle to make it cute—and you’re done! The method is very simple, so even younger elementary school children can enjoy making it.
Along with the craft, try summarizing both your own ideas and the correct explanation for why baby oil and water don’t mix.
Cute goldfish scooping

When you think of summer, you think of festivals—and goldfish scooping, right? Let’s make a cute, handmade goldfish scooping game and have some fun! Prepare a cardboard box as the base and cut several slits into the sides.
Thread a thick blue string across the slits to represent water and create an aquarium.
Next, cut a paper cup to make a ring from the rim.
Attach a popsicle stick as the handle, and glue tissue paper to the inside of the ring to complete the poi (scooper).
Finally, tie individually wrapped candies with rubber bands, add eyes to make goldfish, and you’re done.
Arrange the goldfish in the aquarium and try scooping them up with the poi!
Puru-Koro Soap
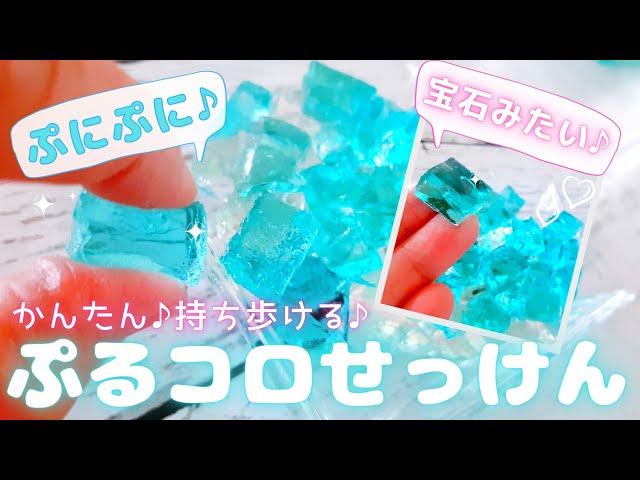
It’s like a jewel! Let me show you how to make cute, jiggly soap.
You’ll need liquid hand soap, gelatin, hot water, and food coloring.
Dissolve the gelatin in hot water, then mix in the liquid hand soap.
The trick is to stir slowly so it doesn’t foam.
Add food coloring, pour into a flat container, and chill in the refrigerator for 1–2 hours.
Then just cut it into your favorite shapes and you’re done! It looks adorable and might make handwashing more fun.
Just be careful to prevent small children from accidentally swallowing it.
Sparkling Kaleidoscope

If you’re unsure what to make for your summer vacation craft project, why not try a sparkling kaleidoscope? You can make this kaleidoscope with recycled materials and items from the 100-yen shop.
Cut a hard plastic case and form it into a triangular prism, then place beads in the bottom and secure them.
On the opposite end, attach a piece of black construction paper with a peephole.
Glue a milk carton—lined on the inside with black construction paper—around the triangular prism, and decorate it as you like to finish.
While kaleidoscopes typically use mirrors, in this idea the hard plastic case serves that role.
lampshade

Here’s a lampshade idea that also works as room decor.
Brush glue mixed with water onto an inflated balloon, then stick on small torn pieces of washi paper.
For sturdiness, layer the washi several times until the balloon’s color isn’t very visible.
Be sure to leave an opening where the light will go.
Since washi is white, use tissue paper if you want to add color.
Once it’s completely dry, pop the balloon and remove it, then secure a wire along the inside edge of the opening for the light to finish it off.