For summer vacation homework! Simple and amazing crafts for elementary school students that you’ll want to make after seeing them


A fun summer vacation homework project for kids: crafts! But as children move into the upper grades, they can run out of ideas and worry about making something that doesn’t end up being the same as their friends’.
So here, we’re introducing craft ideas recommended for elementary school students from lower to upper grades.
Many use materials you already have at home or can buy at a 100-yen shop, so they’re easy to try.
The ideas are designed to help kids discover their own unique projects and express their creativity.
Use these as a reference and make some wonderful summer vacation memories!
- Simple yet amazing crafts: craft ideas that elementary school students will want to make
- Elementary School Students: Simple One-Day Science Project and Craft Ideas
- Simple but awesome! Craft ideas for upper-grade girls
- Recommended for elementary school students! Science fair topics & craft ideas
- DIY science projects that elementary school boys will love: ideas you can make with everyday materials
- For upper-grade boys! Simple yet awesome craft project [Don’t call it lazy]
- Paper cup crafts that elementary school kids will love! A collection of fun project ideas
- Fun crafts using straws
- Toys you can make from cardboard crafts! Authentic ideas you can build and play with
- Simple and cute summer project crafts! A collection of ideas for girls that will make you want to create
- Crafts parents and kids can enjoy together. Recommended craft ideas to keep children entertained.
- [For Adults] Simple yet Impressive Crafts: A Stylish, Eye-Catching Collection
- Craft ideas using plastic bottle caps [for boys]
[Summer Vacation Homework!] Simple and Amazing Crafts for Elementary School Kids That Make You Want to Create (81–90)
How to make a paper popper

Here’s how to make a simple paper pop gun using a plastic wrap core.
First, roll up some paper to make a small ball about 1 cm in diameter.
Cut a balloon around the middle and attach it to the end of the wrap core.
Secure it with a rubber band so it doesn’t come off, and you’re done! Put the paper ball inside, pull the balloon back, and launch the paper ball you made.
You can also decorate the gun however you like or use cardboard to give it a cool gun shape.
Have fun with your own original ideas!
How to make a paper popper
Here’s how to make a simple paper pop gun using a plastic wrap core.
First, roll up some paper to make a small ball about 1 cm in diameter.
Cut a balloon around the middle and attach it to the end of the wrap core.
Secure it with a rubber band so it doesn’t come off, and you’re done! Put the paper ball inside, pull the balloon back, and launch the paper ball you made.
You can also decorate the gun however you like or use cardboard to give it a cool gun shape.
Have fun with your own original ideas!
Balloon pistol

You can play a fun target game using the power of a balloon! Use decorative pom-poms as the balls.
First, cut a balloon around the middle and attach it to a paper towel roll core.
Secure it with a rubber band so it won’t come off, and it’s ready! Put the decorative balls inside, pull back the balloon, and launch the balls to play.
Make the targets out of milk cartons.
It’s also recommended to decorate the launcher and shape it like a cool pistol using cardboard or any decorations you like.
Have fun with your own original ideas!
Balloon pistol
You can play a fun target game using the power of a balloon! Use decorative pom-poms as the balls.
First, cut a balloon around the middle and attach it to a paper towel roll core.
Secure it with a rubber band so it won’t come off, and it’s ready! Put the decorative balls inside, pull back the balloon, and launch the balls to play.
Make the targets out of milk cartons.
It’s also recommended to decorate the launcher and shape it like a cool pistol using cardboard or any decorations you like.
Have fun with your own original ideas!
glue gun basket

This is a craft project where you use a hot glue gun to draw lines along a mold to create a three-dimensional basket.
Draw lines around a bowl turned upside down, and once the glue hardens, simply peel it off to get a basket shape.
A key point is that you can aim for your own design by choosing the glue color and adding decorations.
If it seems like the glue might stick to the mold, it’s also recommended to wrap it in parchment paper before drawing the lines.
Because the steps are simple, you can enjoy many variations by changing the basket shape and the arrangement of the lines.
Easy! A chopstick rubber band gun that can even use hair ties

This rubber band gun made from disposable chopsticks is very simple—you just bundle the chopsticks together and fasten them with rubber bands.
First, stack four chopsticks and secure them in two places with rubber bands.
To catch the rubber band that will serve as the projectile, leave the top and bottom sticks of the four sticking out a bit longer.
Attach a clothespin together with the topmost rubber band at the rear.
The rubber band projectile is gripped by both the clothespin and the chopsticks; when you pull the clothespin, the band shoots out.
Try using a hair tie as the projectile—it won’t hurt much even if it hits you.
[For Summer Vacation Homework!] Easy and Amazing Crafts for Elementary School Kids That You’ll Want to Make When You See Them (91–100)
Make it with disposable chopsticks! Sniper rifle
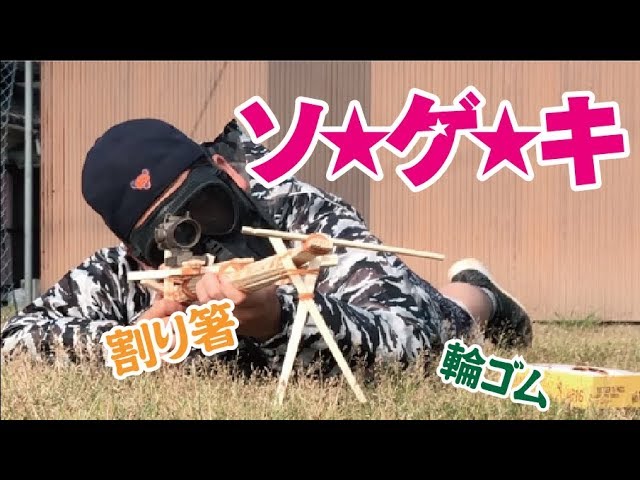
Simple yet profound, it features a mechanism as authentic as a sniper rifle! This is an idea for a cool chopstick rubber-band gun that you can make using just disposable chopsticks and rubber bands.
It’s so realistic to play with that adults are sure to get hooked.
It’s a craft that both adults and kids can enjoy, easy to make and fun to play with.
Create your own original toy gun and enjoy group battles together.
Be sure to prioritize safety, and you’ll love the excitement of both the crafting and the play.
Give it a try!