[For 4-Year-Olds] Feel the Spring Up Close! Fun and Easy Craft Ideas You’ll Love


Spring is when colorful flowers bloom and insects begin to move about energetically.
Many teachers may be thinking, “I want children to feel the charms of spring!”
So this time, we’ve gathered spring-themed craft ideas recommended for four-year-olds.
Packed with fun projects that incorporate spring motifs familiar to children—like cherry blossoms, dandelions, butterflies, and ladybugs!
These ideas focus on enjoying self-expression while expanding their imaginations, as well as experiencing a variety of techniques and materials, so be sure to check them out.
Because the children’s creations are treated as artworks, the term used in the text is “制作” (seisaku), meaning “art/craft production.”
- [For 4-year-olds] A collection of April craft ideas that capture spring, such as Easter and cherry blossoms
- [Origami] Easy spring-themed origami ideas to enjoy with 4-year-olds
- [Childcare] Recommended crafts and activities for March, such as Hina Matsuri (Doll’s Festival) and cherry blossoms
- [Childcare] Recommended for nurseries and kindergartens! Cherry blossom craft ideas
- [For Age 3] Let’s make it in April! A collection of craft ideas to feel spring events and nature
- [Childcare] Spring craft ideas to enjoy with 2-year-olds! Techniques and materials included
- [For 5-year-olds] Let's make it in April! A collection of craft ideas using recycled and natural materials
- [Childcare] Fun Spring Activities: Ideas for Nature, Movement, and Crafts
- [April Crafts] Useful for childcare! Spring craft ideas for 1-year-olds
- May: Craft Ideas That Excite 4-Year-Olds!
- [Childcare] Simple origami ideas for kids, perfect for spring
- [For 4-5-year-olds] Folding is fun! A collection of January origami ideas to enjoy with preschoolers
- [Childcare] Recommended for March! A Collection of Craft Ideas to Enjoy with 4-Year-Olds
[For 4-year-olds] Feel the arrival of spring up close! Fun-to-make recommended craft ideas (1–10)
Make Rapeseed Blossoms and Horsetails with Torn Paper Collage and Cotton Swabs

This is a craft project featuring rapeseed blossoms and horsetails that lets you feel the arrival of spring.
First, as a preparation step, paste origami rapeseed flowers and horsetails onto construction paper.
Then, apply pieces of paper in a torn-paper collage style and add color with cotton swabs.
Both steps are great for stimulating imagination.
Depending on the children’s ages, you might also have them try the preparation step.
Observing rapeseed blossoms and horsetails while wondering “What do they look like?” can spark interest in plants.
Cute and easy! 4 butterfly picks
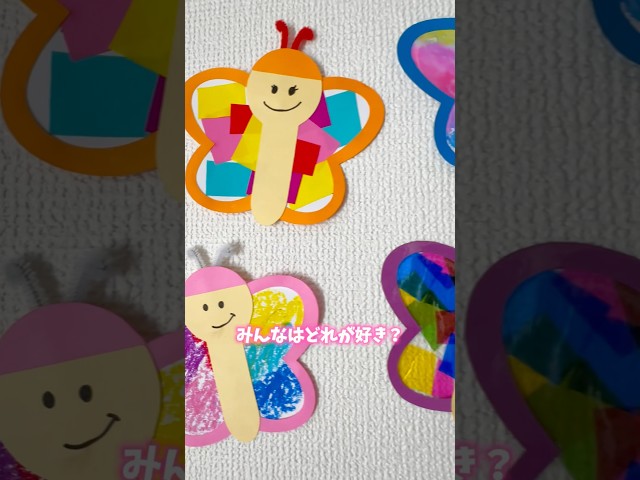
Here’s how to make butterflies in four different, fun ways.
The first is to draw swirling patterns with crayons on construction paper.
The second is torn-paper art: glue small pieces of origami paper onto construction paper.
The third is to color aluminum foil with color markers, spray it with water, and then transfer the color onto construction paper.
The last idea uses cooking parchment: attach pieces of colored cellophane to it.
Each method is lovely and results in a uniquely personal piece.
Finish by attaching pipe-cleaner antennae and gluing on the body with a drawn face.
Pop-up! Fluttering Tulip

This is a tulip craft with a charming, fluttering, raised look.
Fold the origami paper in half horizontally, then fold both sides toward the crease.
Fold back along the previous crease, and fold so the piece becomes one-third its size vertically.
Draw half of a tulip on it, cut along the line with scissors, and you’ll have six parts.
Glue each part together, attach them to a backing sheet, and adjust the shape to complete the flower.
Making a stem and leaves as you like will make it even nicer.
It’s a tulip craft that makes your heart flutter with the coming of warm spring—please give it a try.
[For 4-year-olds] Feel the spring close to you! Fun-to-make recommended craft ideas (11–20)
Tear-and-enjoy! Butterfly decorations

Let’s try making a cute butterfly decoration.
First, cut paper into the shape of a butterfly and paste it onto a backing sheet.
Then tear pieces of paper and stick them onto the wings to decorate.
Finally, attach the parts for the butterfly’s body and face, and you’re done.
It sounds fun to imagine what kinds of paper to tear, and the very sensation of tearing will be interesting too.
Once finished, it can also be used as a wall decoration.
Your room will be filled with a springtime atmosphere.
Origami four-leaf clover
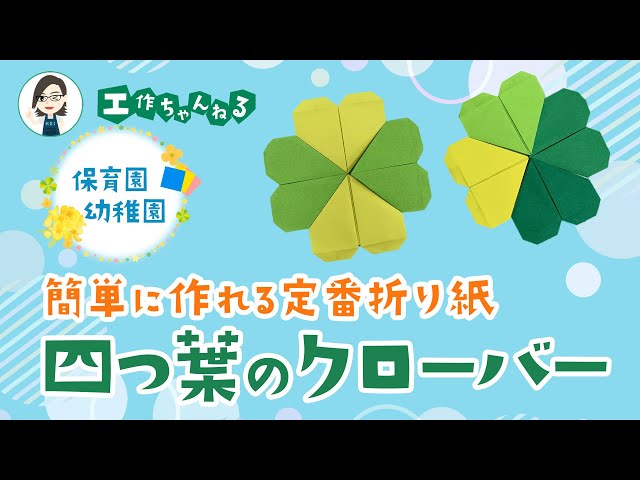
Let’s make a lucky four-leaf clover.
You’ll combine four sheets of origami to create it, but the folding itself is simple, so even children who aren’t used to origami should be able to do it.
Think of it as folding a heart-shaped origami four times.
Once it’s done, you can use it as a wall decoration or paste it onto construction paper as part of a picture.
By the way, the key is to make crisp initial creases.
If they’re misaligned, the whole piece will end up distorted, so be careful.
Rainbow Bubble Art

How about trying “Rainbow Bubble Art,” an activity that’s likely to make many kids’ eyes sparkle with excitement because it’s different from the usual play? Cut off the mouth of a plastic bottle, cover the opening with a towel, and secure it with a rubber band.
In a bowl, mix neutral dish soap and water at a 1:1 ratio and stir well.
Dab some food coloring onto the towel attached to the bottle, then dip it into the soapy mixture—and you’re ready.
Blow through the bottle’s mouth, and fluffy rainbow-colored bubbles will appear.
It’s a fun way to strengthen oral muscles, so it’s also recommended for children who tend to breathe through their mouths or keep their mouths open.
Connect the loops to make a ring caterpillar

Here’s a craft idea for making a caterpillar using classic loop chains, often used as birthday decorations.
Cut construction paper into long strips, form a loop and glue it; then thread the next strip through that loop, form another loop, and glue it the same way.
Repeat to create the caterpillar’s body.
Draw a face on a circle cut from construction paper, and attach antennae made by wrapping pipe cleaners around a pom-pom.
Once you fix the face to the body with double-sided tape, it’s complete! If you connect a stick with a tied string, you might be able to take it for a little walk around the room.