[For Upper Elementary Students] Simple but Awesome! A Collection of Summer Vacation Craft Ideas


Summer vacation crafts—especially for older elementary students—can feel like a dilemma: “Simple projects aren’t satisfying,” but “overly difficult ones are a problem,” too, right? The truth is, by getting creative with materials and tools, you can make projects that look and function like the real deal.
Here, we’re sharing craft ideas—like coin banks, motor-based projects, and food replicas—that will make your friends say, “Wow!” They’re simple to build, yet fun to use even after they’re finished.
Use these as inspiration and add your own twists to create an original masterpiece!
- For upper-grade boys! Simple yet awesome craft project [Don’t call it lazy]
- Simple but awesome! Craft ideas for upper-grade girls
- Simple yet amazing crafts: craft ideas that elementary school students will want to make
- For summer vacation homework! Simple and amazing crafts for elementary school students that you’ll want to make after seeing them
- Craft ideas using plastic bottle caps [for boys]
- Recommended for elementary school students! Science fair topics & craft ideas
- [Middle School Students] Easy One-Day Science Projects and Crafts Ideas
- DIY science projects that elementary school boys will love: ideas you can make with everyday materials
- Elementary School Students: Simple One-Day Science Project and Craft Ideas
- Toys you can make from cardboard crafts! Authentic ideas you can build and play with
- Simple and cute summer project crafts! A collection of ideas for girls that will make you want to create
- [For Kids] Today’s Handmade Craft Ideas
- [For Middle Grades] Simple Magic Tricks for Elementary School Students: Fun Magic Everyone Will Love!
[For Upper Elementary Students] Simple but Awesome! Summer Vacation Craft Ideas (71–80)
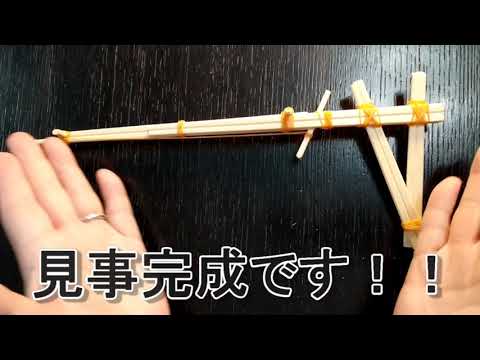
A rapid-fire chopstick rubber-band gun

This is a rubber band gun made from chopsticks, finished with a mechanism that allows rapid fire by combining small pieces cut from disposable chopsticks with rubber bands.
The base is essentially a bundle of chopsticks tied together with rubber bands, to which you attach parts such as the rubber band hook (which serves as the ammunition), the grip, and the trigger components.
Although the structure is complex, the only tools you need are chopsticks, rubber bands, and scissors, so once you get used to the steps, it feels fairly simple.
It’s also important to firmly secure each part so it can withstand the tension of the loaded rubber bands.
An exceedingly simple chopstick gun
A simple rubber band gun made from disposable chopsticks and rubber bands is a craft project that both kids and adults can get hooked on.
However, the one introduced here is surprisingly authentic, with steps that even involve using a utility knife and a screwdriver.
Kids should make it together with an adult and enjoy the process.
You can also make targets easily with chopsticks, so once you’re done, you can have fun playing a target-shooting game! It’s simple, but you can customize it with a bit of creativity, letting you experience the fun of making things.
Be sure to build and play together—kids and adults alike—and enjoy a great time!
An hourglass made of straws
@silk_haru3mama Summer vacation craft 🌻 It's fun—when you flip it over like an hourglass, the straws flow down! ⌛️#Summer VacationSummer Vacation Craft#AtHomePlay#HandmadeToysworkEducational toy#craft
♬ Another Day of Sun from La La Land [ORIGINAL COVER] – SoundWorks
Let’s make a toy where short straws fall like an hourglass.
First, cut a wire to 40 cm and wrap it around a pencil to make a spring.
Prepare two small paper cups and make a hole in the center of each bottom; thread one cup onto one end of the spring and secure it.
Stretch the spring and thread short, cut pieces of straw onto it.
Then thread and secure the other paper cup on the opposite end.
To prevent the spring from expanding and contracting, bridge two chopsticks between the two cups and glue them in place, and you’re done! Decorate the paper cups and chopsticks with masking tape or stickers to make it cute.
[For Upper Elementary Students] Simple but Amazing! Summer Vacation Craft Ideas (81–90)
Paper slingshot made from origami and chopstick sleeves

A slingshot is a Y-shaped gadget used to launch pebbles or paper far into the distance.
At first glance it might seem like just a toy, but similar hunting tools have existed all over the world since ancient times.
The need to propel objects far is what gave rise to that shape.
Let’s try making such a slingshot using chopsticks.
The key to building a sturdy slingshot is reinforcing the space between the Y-shape with a toothpick.
There aren’t any particularly difficult steps, so even younger elementary school children should be able to make it.
You can switch up what you launch—paper, stones, clay, slime, and more—and turn it into a science project-style exploration.
Paper cup cracker

Party poppers are a must-have at celebrations—the loud pop and the confetti bursting into the air really bring the fun.
This project shows how to make a popper that bursts confetti using a paper cup.
First, make a hole in the bottom of the paper cup and insert a rubber band that’s been tied to a toothpick, anchoring it to the bottom and securing it with tape so it catches firmly.
Wrap one end of the rubber band with folded aluminum foil to create a piece that can strike the bottom of the cup—this completes the base.
Next, put confetti or finely cut pieces of straw inside.
When you pull and release the rubber band to deliver an impact, the contents shoot out like a party popper.
As you build it, experiment to see how the confetti scatters and rises.
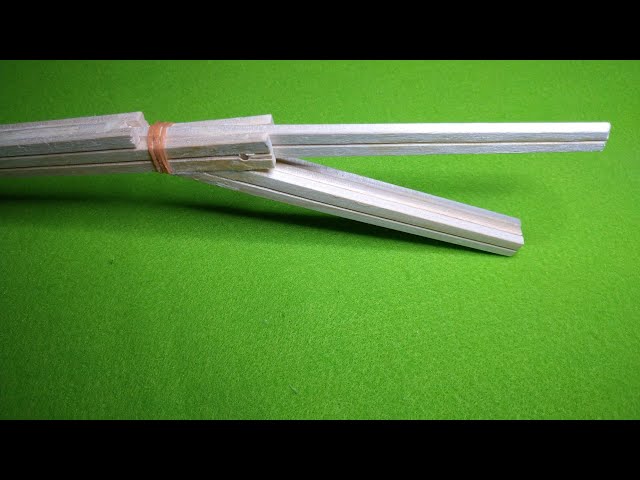
Five-shot rubber band chopstick gun
With five disposable chopsticks and sixteen rubber bands, you can make a five-shot rubber band chopstick gun! Cut the chopsticks to the required lengths for the main body, trigger, and grip, then assemble them into a gun shape while securing each part with rubber bands.
Once the gun is complete, set five rubber bands with the trigger held in place, and you’ve got a chopstick gun capable of rapid fire.
It’s pretty exciting that you can make a rapid-fire chopstick gun so easily! When cutting, the ends can become jagged, so be sure to sand them smooth with sandpaper or a file to avoid injury.
soccer game

How about making a handmade soccer game as a summer vacation project—something you can enjoy crafting first and then get excited playing afterward? Especially if you love soccer, you might experience surprise and delight.
It’s great that you can make it simply with familiar materials and tools like toilet paper tubes, rubber bands, wire, and bamboo skewers! With a bit of creativity, you can stylishly and coolly finish the design of the soccer field’s grass, the stands, and the players.
Playing a game you made yourself will surely become a wonderful summer memory.