![[For Upper Elementary Students] Simple but Awesome! A Collection of Summer Vacation Craft Ideas](https://i.ytimg.com/vi_webp/IcLz4MyvJAo/maxresdefault.webp)
[For Upper Elementary Students] Simple but Awesome! A Collection of Summer Vacation Craft Ideas


Summer vacation crafts—especially for older elementary students—can feel like a dilemma: “Simple projects aren’t satisfying,” but “overly difficult ones are a problem,” too, right? The truth is, by getting creative with materials and tools, you can make projects that look and function like the real deal.
Here, we’re sharing craft ideas—like coin banks, motor-based projects, and food replicas—that will make your friends say, “Wow!” They’re simple to build, yet fun to use even after they’re finished.
Use these as inspiration and add your own twists to create an original masterpiece!
[For Upper Elementary Students] Simple but Awesome! Summer Vacation Craft Ideas (1–10)
gachapon

Turn the handle and wait excitedly to see what comes out—gachagacha (capsule toys).
Gachagacha are something people of all ages can enjoy, aren’t they? Let’s try making a realistic gachagacha machine out of cardboard.
Cutting the cardboard with a craft knife and figuring out how to assemble it will likely get kids totally absorbed in the project.
The gachagacha they work so hard to create is sure to become a memorable moment of their summer vacation.
Your friends might even be surprised when they see your work.
Even after making it, you can keep enjoying the gachagacha—have a wonderful time!
Well-spinning paper cup top
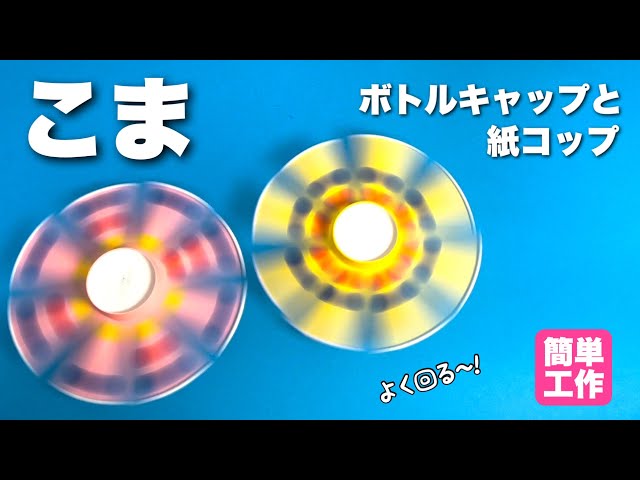
This is a spinning top made with a paper cup that spins well and is fun to watch because of its colorful look.
All you need are a paper cup and two plastic bottle caps.
First, cut slits into the paper cup and spread them out like propeller blades, then attach an axle made by combining the two caps.
That’s enough to complete the basic shape, but it’s recommended to decorate the “propellers” with an eye toward how it will look while spinning.
The impression changes depending on whether you spread the propellers before decorating or decorate first and then cut the slits, so try out various patterns.
Squeeze

Squeezes that you can easily make at home add a little comfort to everyday life.
With store-bought sponges, acrylic paint, and some glue, anyone can easily create their own original squishies.
Without much effort, you’ll end up with an adorably cute squishy that brings a smile the moment you hold it, helping nurture creativity through crafting.
With easily accessible materials and simple steps, why not try making one and experience the joy of having a small, pleasantly tactile item in your hands?
jelly candle

Let’s make cute, summery, translucent gel candles! You’ll need a heat-resistant glass, gel candle wax, a candle wick, and decorations.
You can buy everything at a 100-yen shop.
First, pour a little gel candle wax into the heat-resistant glass and stand the wick in the center by holding it with chopsticks.
Next, add your favorite decorations, then more gel candle wax in that order.
Once the gel candle wax has set, trim the excess wick and you’re done! Gel candle wax comes in various colors, so layering different colors alternately creates a beautiful gradient.
You can express all kinds of worlds depending on the decorations you add!
Paper cup Tyrannosaurus

This activity involves combining paper cups to create a three-dimensional, dynamic Tyrannosaurus.
The key is how you connect the cups: by trimming the edges and adding slits, you can set firm angles.
Build it by linking the cups from the head to the tail, then attach separately made legs and arms at the end to finish.
Try different variations, such as using cups of the same color for a cohesive look or mixing different colors for a colorful effect.
food sample

Many adults enjoy making food replicas as a hobby! If you make them at home with family or friends during summer vacation, you’re sure to get hooked by how fun it is.
Food replicas can seem tricky because of handling wax or inks, but you can use gel candles from a 100-yen shop: remove the candle from its container, melt it, pour it back into the container with parts that look like ice, and chill it—before you know it, you’ve got a drink-themed food replica.
Float “ice cream” made from silicone adhesive on top to make a cream soda, too! Give it a try.
A flying octopus? Tako-copter
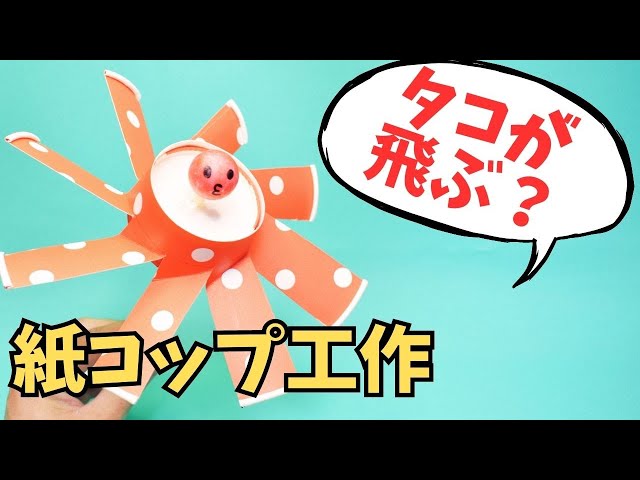
It’s a toy that combines paper cups and a round chopstick to spin like a bamboo-copter and soar into the sky.
By spreading “wings” that catch the wind and coloring it mainly red, it takes on a curious form—a flying octopus.
You’ll use two paper cups and a round chopstick: attach the chopstick and the octopus’s facial parts to a paper cup with only the bottom left to create a launcher.
Then cut slits into the other paper cup, spread it out to form propeller-like blades, and attach it to the launcher to finish.
Fine-tune the propeller angles to make your octopus fly even higher.