[Preschool] Recommended for 3-year-olds! Easy-to-make fall origami craft ideas

Autumn brings many foods at their peak, and there are fun events like moon-viewing and Halloween.
Children in daycare and kindergarten are also eagerly looking forward to the fall festivities.
So this time, we’re introducing origami ideas with an autumn theme that are perfect for 3-year-olds! Many of them are easy to make with simple steps, and we feature a variety of types—like foods and animals—so children can broaden their interests as they fold.
Find your favorite origami and enjoy the feeling of autumn indoors!
- A collection of fall origami ideas recommended for 2-year-olds! Make them easily and enjoy autumn!
- Easy! Let's make an acorn with origami. How to fold an acorn for 3-year-olds.
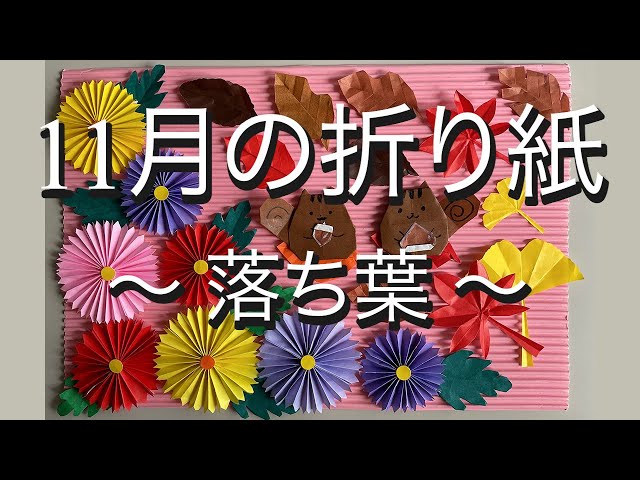
- [Autumn] Easy Origami Ideas for November
- [November] Enjoy with 3-year-olds! Craft activity ideas recommended for autumn
- [Childcare] Simple fall origami ideas
- [Childcare] Perfect for 3-year-olds! October craft ideas
- [For Preschoolers] Let’s Make It Together with the Kids! Origami Ideas for February
- Recommended for Halloween! How to make an easy origami ghost with a 3-year-old
- Preschool: Autumn-Themed Craft Ideas Recommended for November
- [October] Craft ideas for fall you can use in childcare
- Easy origami acorn folding method
- Simple Origami Ideas to Enjoy in Autumn (For 4-Year-Olds)
- [Childcare] Recommended for 3-year-olds! Origami ideas with a winter theme
[Childcare] Recommended for 3-year-olds! Easy-to-make autumn origami craft ideas (51–60)
Origami Halloween pumpkin
Here’s an origami idea for fallen leaves that also helps kids practice using scissors.
Place the colored side up and fold the paper into a triangle.
Next, make accordion folds from the left edge in 1 cm widths.
Once the accordion folds are done, unfold back to the triangle and fold up the base diagonally so that the left side becomes thicker.
Fold the top corners outward into small triangles, then slowly open the paper.
Tuck the triangular corner tips to the back to shape it like a leaf.
Open the white section on the left edge, make a slit on the opposite side, and form the leaf stem.
After that, add small cuts or folds as you like to give it the look of a fallen leaf.
Cute for moon-viewing too! A rabbit face

First, with the colored side facing out, fold along the diagonal to make a triangle.
Then crease by folding so that the left and right tips of the triangle meet.
Next, fold so that the 90-degree corner overlaps the center of the base, and then fold the left and right corners along the creases to form an overall diamond shape.
Fold the left and right corners to the center, and make a small fold in the bottom corner.
Finally, fold the top corner down to meet the left and right corners, and you’re done.
When you turn it over, it will be shaped like a rabbit’s face, so draw the face with a marker to finish.
The steps aren’t complicated, but there are quite a few folds, so take your time and give it a patient try.
chestnut

Chestnuts are a quintessential autumn ingredient.
Some preschools might even serve chestnut rice for school lunch.
Because it’s a friendly, familiar motif when made with origami, it’s perfect for a 3-year-old class.
First, fold the paper in half to make a square.
Open it, then fold the bottom half up to meet the center crease.
Flip it over, and fold the top half down into a triangle so the tip meets the center.
Next, fold the bottom-right and bottom-left corners up toward the center.
Finally, fold the two side corners inward to shape it like a chestnut and neaten the edges.
Flip it over, and your chestnut is complete! It’s also fun to draw on it or decorate it freely.
pear

As an autumn fruit, pears are also popular with children.
Here’s a pear origami folding method recommended for three-year-olds.
First, prepare origami in pear-like colors such as light yellow-green or yellow.
Fold it in half into a rectangle, then fold it in half again to make a square.
Fold the folded edge back diagonally.
Flip it over, then fold the corners slightly inward.
Next, use light brown origami paper.
Pre-cut it to one-quarter size.
Fold it in half first, then roll-fold it two more times to make a strip.
Attach it to the back of the pear with tape or glue as the stem, and you’re done!
[Childcare] Recommended for 3-year-olds! Easy-to-make autumn origami craft ideas (61–70)
Great for scissor practice too! Cosmos papercut (kirie)
@hoiku.labo [Easy Craft for Nursery Teachers] Perfect for September Wall Displays! How to Cut Vibrant Origami Cosmos ✂️ChildcareNursery teacher / Childcare workerKindergarten TeacherChildcare job openingsChildcare Column#NurseryTeacherThings#IWantToConnectWithChildcareWorkers#Nursery School Craft#DaycarePreparationNursery School PracticumChildcare studentAspiring childcare workerChildcare Job LabNursery teacher skillsJob change activities#JobChange#nursery_teacher_job_changeNursery teacher employmentProductionOrigamiOrigami CraftTranslation#Wall CreationAutumn Crafts
♪ Original Song – Craft Ideas for Childcare ♪ Hoiku Kyujin Labo – Hoiku Kyujin Labo | Nursery Teacher Job Changes and Helpful Information
I’ll show you how to make simple yet bright and cute cosmos flowers.
Start with the front side of the origami facing up and fold it in half into a square twice.
Fold it into a triangle aligning the edges, then unfold both sides.
On the loose, flappy side, draw lines imagining the petals of a cosmos flower, and cut along them with scissors.
Open the origami and stick a yellow sticker in the center to finish.
If you make a bunch and decorate your room, it will instantly feel full of autumn! It’s also perfect for practicing scissor skills.
Please give it a try.
Crickets you can make from age 3

Let’s make an origami cricket, a creature kids love to find on walks.
Prepare one sheet of origami paper to get started.
Fold it into a triangle twice, then open up the pocket area as you unfold.
Fold both sides toward the center line, then open up the pocket area again as you unfold.
Shape the cricket’s body and legs by sharpening the tips as you fold.
By making crisp creases, you’ll end up with a cool, three-dimensional cricket that can stand.
Give it a try!
Cute little fox

Let’s make a fox out of origami—a creature that often appears in fairy tales and folk stories set in autumn.
This time, we’ll use two sheets of origami paper.
First, fold the first sheet into a triangle.
Lift and fold only the top layer at the largest corner so that a small white part shows.
Turn it over, then fold both side corners up toward the center to form the ears.
Draw the eyes with a pen.
Next, fold the second sheet into a triangle, then fold it in half again, slightly offset.
Finally, glue the face piece from the first sheet to the body piece from the second sheet, and you’re done.
There aren’t many steps, and it’s very easy to make, so give it a try!