[Childcare] Recommended for 3-year-olds! Craft activity ideas


Around the age of three, children develop a sense of self, their imaginative world expands, their vocabulary increases, and their fine motor skills improve—there are so many signs of growth.
We hope they continue to grow significantly as they receive plenty of stimulation in their daily lives.
In this article, we’ll introduce craft activity ideas recommended for three-year-olds.
We’ve gathered fun ideas that will spark the curiosity of three-year-olds: perfect for wall displays, toys they can make and play with, projects that use unique techniques, and activities that can be used for pretend play!
There are also ideas ideal for practicing with scissors and glue, so choose activities that match the children’s developmental stage and give them a try!
- Let’s make it with 3-year-olds! Fun handmade toy ideas
- [For 3-year-olds] Winter craft activities and bulletin board decoration ideas for use in childcare
- [Childcare] Perfect for 3-year-olds! October craft ideas
- [For 3-year-olds] Perfect for September! A Collection of Craft Ideas to Enjoy Autumn Nature
- [November] Enjoy with 3-year-olds! Craft activity ideas recommended for autumn
- [Crafts for 3-Year-Olds] A Collection of Fun Ideas for Autumn! Let's Incorporate Seasonal Motifs
- [Nursery/Kindergarten] Crafts you can play with after making them
- [Childcare] Recommended for toddlers! Toy ideas you can make and play with
- Toddler-approved fun! DIY toy ideas for 2-year-olds
- Craft activity ideas for 4-year-olds
- [For 3-year-olds] A roundup of craft ideas to enjoy in summer! Introducing various motifs and techniques
- Irresistible for 3-year-olds! A collection of fun Halloween craft ideas to make
- [Childcare] Fun craft ideas and craft activities perfect for summer
[Childcare] Recommended for 3-year-olds! Craft Play Ideas (71–80)
Creative play with colored water and droppers
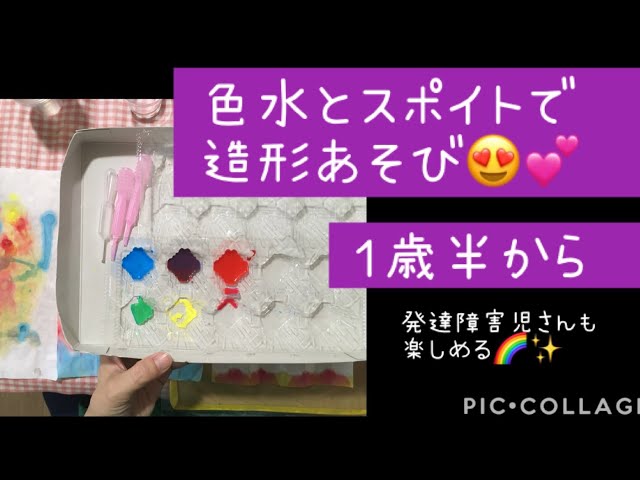
This is an art activity where you drip colored water onto washi paper using a dropper.
We recommend using a stronger type of washi than regular calligraphy paper.
It’s helpful to prepare a backing board in advance by wrapping a piece of cardboard with plastic.
Put paint in an egg carton, then use the dropper to drip the paint onto the washi paper.
Fold it into a size that’s easy for children to hold, then unfold it to finish! You can fold the paper into a square or a triangle—either is fine.
Some children may feel uneasy about the colors mixing, so show them a sample and reassure them by saying, “It’s okay if the colors mix!”
Making Slime with Potato Starch

Let’s make slime using potato starch that is safe even if children touch it or put it in their mouths.
If you add 170 cc of water to 200 g of potato starch, it will have just the right consistency: it hardens when squeezed, but turns runny when you release your grip.
Once you reach that point, add food coloring to dye it.
You can color it red, blue, and yellow, and then experiment by mixing those three colors to see what new colors you can create.
Because food coloring can be hard to remove from clothing, you may use paint for coloring if the children are old enough that there’s no risk of them putting it in their mouths.
Handmade microphone

Let me introduce a cute original microphone craft.
Prepare a plastic wrap tube, a capsule toy container, origami paper, and yarn, and let’s make it.
Wrap the origami paper around the plastic wrap tube so that a bit of the paper sticks out on either the left or right side.
On the side where the paper sticks out, tape on the yarn, crumple the extra paper to make it small, and tuck it into the center of the wrap tube—this completes the microphone handle.
Next, place the capsule toy container on top of the wrap tube and tape it so it won’t fall off, and your microphone is complete! Draw a switch on the handle, and add illustrations or stickers as you like to create your very own original microphone.
Sunflower made with string threading

When you can enjoy creating with familiar materials, it stimulates your expressive and imaginative abilities and nurtures a love of making things, doesn’t it? With this craft, you can make a sunflower using a paper plate, yarn, and origami paper.
The steps are simple: use a hole punch to make holes around the paper plate for threading the yarn.
After threading the yarn through the holes, glue long, thin strips of origami paper around the edge of the plate to form petals.
It’s a recommended craft that lets you have fun using your fingertips.
Choose different colors and thicknesses of yarn to create a lovely sunflower!
Art project using tissue paper
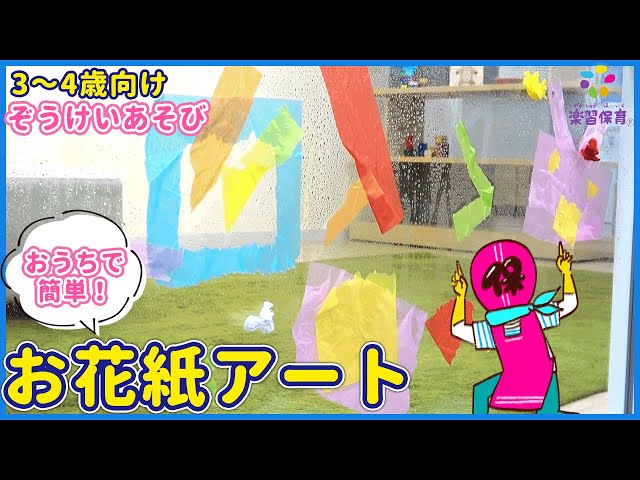
How about some creative play using tissue paper? Enjoy the soft texture of the tissue paper, the fun of how it lets light pass through, and its colorful hues.
Prepare various sizes of tissue paper, water, a spray bottle, plastic bottles filled with colored water, a funnel, construction paper, glue, and so on.
First, have fun with the sensations by dropping, grabbing, and crumpling the tissue paper.
Next, mix tissue paper with colored water in a plastic bottle, shine light on it, and observe how the light passes through.
Finally, it’s also fun to stick dampened tissue paper onto a window or other glass surface.
You can then paste those pieces onto construction paper to make a lovely wall decoration!
Snow globe made from a plastic bottle

Here’s how to make a snow globe using a plastic bottle.
Prepare an empty bottle from a lactic acid bacteria drink, decorative pom-poms, beads, glitter, liquid glue, and a hot glue gun.
Put the beads and decorative pom-poms into the empty drink bottle.
Fill the bottle about halfway with liquid glue, then add water.
Color a piece of paper with colored pens, place it into the bottle, and let it tint the liquid.
Mix everything together, then top up with water to push out any air, and you’re done.
Close the cap tightly and secure it with a hot glue gun so it won’t open.
Wrap vinyl tape around the top to finish.
Decorating with washi tape might make it even cuter!
Ice cream for 3-year-olds

Let me introduce a cold and tasty ice cream craft.
Prepare one sheet of origami paper, construction paper, crayons, and glue, and let’s get started.
Fold the origami paper in half.
Fold the left and right corners toward the center line.
Glue the finished ice cream cone onto the construction paper, and have the children draw the ice cream with crayons to complete it.
It’s also recommended to prepare round stickers or fruit stickers for toppings.
Be sure to try making this delicious-looking ice cream!