[Childcare] Recommended for 3-year-olds! Craft activity ideas


Around the age of three, children develop a sense of self, their imaginative world expands, their vocabulary increases, and their fine motor skills improve—there are so many signs of growth.
We hope they continue to grow significantly as they receive plenty of stimulation in their daily lives.
In this article, we’ll introduce craft activity ideas recommended for three-year-olds.
We’ve gathered fun ideas that will spark the curiosity of three-year-olds: perfect for wall displays, toys they can make and play with, projects that use unique techniques, and activities that can be used for pretend play!
There are also ideas ideal for practicing with scissors and glue, so choose activities that match the children’s developmental stage and give them a try!
- Let’s make it with 3-year-olds! Fun handmade toy ideas
- [For 3-year-olds] Winter craft activities and bulletin board decoration ideas for use in childcare
- [Childcare] Perfect for 3-year-olds! October craft ideas
- [For 3-year-olds] Perfect for September! A Collection of Craft Ideas to Enjoy Autumn Nature
- [November] Enjoy with 3-year-olds! Craft activity ideas recommended for autumn
- [Crafts for 3-Year-Olds] A Collection of Fun Ideas for Autumn! Let's Incorporate Seasonal Motifs
- [Nursery/Kindergarten] Crafts you can play with after making them
- [Childcare] Recommended for toddlers! Toy ideas you can make and play with
- Toddler-approved fun! DIY toy ideas for 2-year-olds
- Craft activity ideas for 4-year-olds
- [For 3-year-olds] A roundup of craft ideas to enjoy in summer! Introducing various motifs and techniques
- Irresistible for 3-year-olds! A collection of fun Halloween craft ideas to make
- [Childcare] Fun craft ideas and craft activities perfect for summer
[Childcare] Recommended for 3-year-olds! Craft play ideas (91–100)
Collage Ice Cream
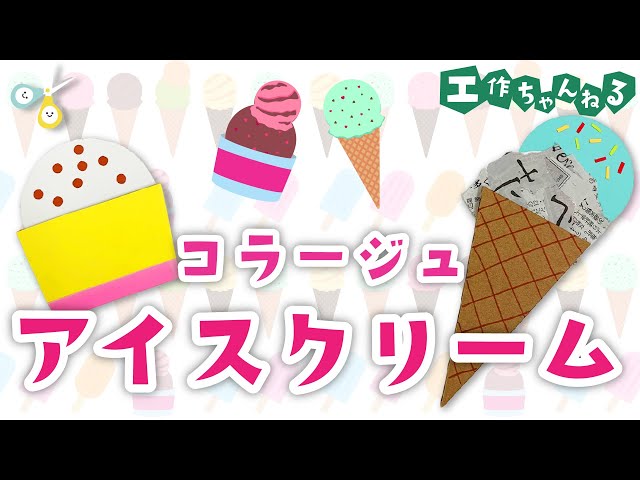
Here are some ice cream craft ideas that also let you enjoy making collages.
Cut the cup or cone bases out of cardboard, then decorate them by drawing patterns with pens or using colored paper.
For the ice cream scoops, basically cut circles out of construction paper, and have fun adding various toppings with small pieces of colored paper or stickers.
It’s also cute to make “collage ice cream” by gluing torn newspaper or flyers onto the round paper scoops.
Once your ice cream is done, attach it to the base to finish.
Musical Instrument Crafting: Guitar

We’d like to introduce a DIY musical-instrument craft: a guitar you can play once it’s finished.
Prepare four paper cups, three rubber bands, a felt-tip pen, tape, and scissors.
First, place the bottoms of two paper cups together and secure them with tape so they don’t shift.
Next, make three slits in the rim of each of the remaining two paper cups.
Insert these slit cups onto the taped-together cups, and hook the three rubber bands onto the slits so they don’t cross over like an X.
Finally, pluck the rubber bands to check that they make sound—that’s it! The steps are simple, so give it a try!
Osakana Maru Uchiwa

How about making a round fish uchiwa fan that feels like summer? First, cut a circle about 20 cm in diameter out of thick paper, and cut out a finger hole and a fish shape.
Next, cut a clear file to a size that will cover the fish opening and attach it to the thick paper.
Any work using a craft knife should be done by the caregiver/teacher.
Then, cut colorful cellophane and stick it on like fish scales.
Finally, layer and glue another sheet of thick paper on the back, add a round sticker for the fish’s eye, and draw freely around the edges.
When light passes through, the sparkling cellophane looks beautiful and brings a pleasant sense of coolness.
Making houses out of thick paper (cardstock)

Here’s a guide to making an adorable cardboard house.
Use a ruler to sketch the house’s dimensions on the cardboard.
Carefully cut along the guidelines with scissors or a craft knife.
Add color to the cardboard using construction paper.
Cutting the construction paper with scissors is recommended, but tearing and pasting pieces might add a charming, handmade feel to the work as well.
Use glue to attach the parts and assemble them so they don’t fall apart.
Once you add the final decorations, your cute dollhouse is complete.
If you like, adding sparkly stickers or beads can make it even more charming!
Handmade maracas

Here’s an introduction to easy, handmade maracas you can make with everyday materials.
Gather a capsule toy case, a toilet paper roll, a plastic bottle, beads or buttons, and vinyl tape, and let’s get started.
Cut off the neck portion of the plastic bottle, roll the toilet paper core to make a sturdy handle, and attach it securely with vinyl tape.
Put the buttons or beads inside the capsule toy case, fasten it firmly with vinyl tape, and close the lid.
Once it’s finished, shake your maracas, sing along, and have fun!