Origami Ideas for 4-Year-Olds: Halloween Edition

We’ve gathered origami folding instructions with Halloween motifs that 4-year-olds can enjoy.
Most of the finished pieces are flat, so you can decorate walls with them or use them as motifs for wreaths and hanging decorations.
Three-dimensional pumpkins and the like are cute when displayed on a table, too.
While talking about the origins of Halloween and the meanings of its motifs, enjoy making origami together and let the children soak up the Halloween spirit!
Wishing the children a fun-filled Halloween.
[For 4-year-olds] Halloween Origami Ideas (1–10)
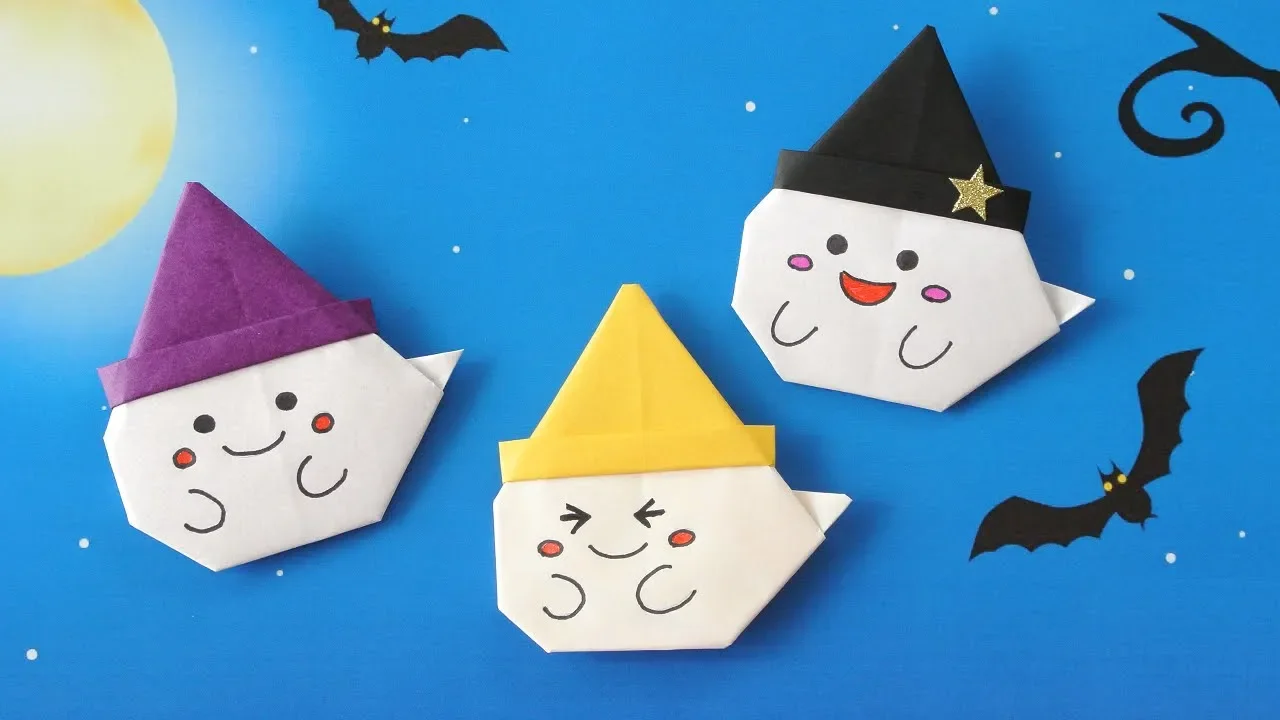
A ghost wearing a hat

Here’s how to fold a cute, plump little ghost dressed up with a witch’s hat.
You’ll use both the front and back colors of the origami paper: the front color becomes the witch’s hat, and the white back becomes the ghost’s body.
Making the protruding part of the hat involves some precise folds and might be a bit tricky, but once you get that, all that’s left is shaping the ghost’s body.
Fold it in your favorite colors and make lots of ghosts wearing colorful hats together!
How to fold blinking eyes
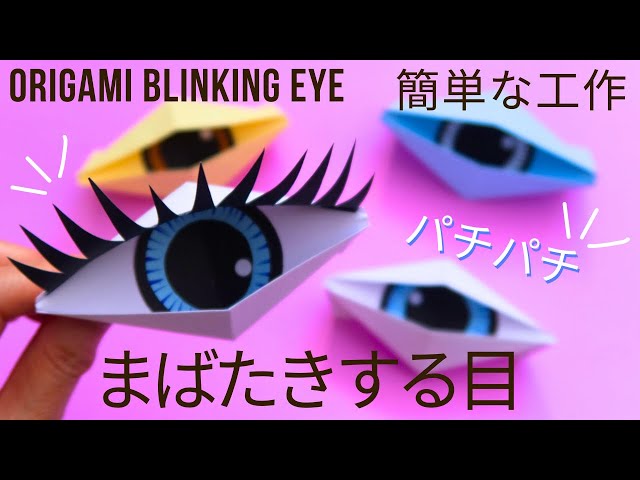
How about some blinking eyes that look a bit eerie in the dark? They’re perfect for Halloween toys, too! First, fold a piece of origami paper in half into a triangle to make a crease, then fold both ends inward toward this crease three times.
Next, fold it in half from the other direction to make another crease, and fold both ends toward the center along that crease.
Shape the whole piece into an eye by folding the straight edges diagonally.
Attach a handle, and the eye is complete! Finish it by adding a separately made drawing of an eye in the center and gluing on eyelashes around it.
It moves! A flapping bat
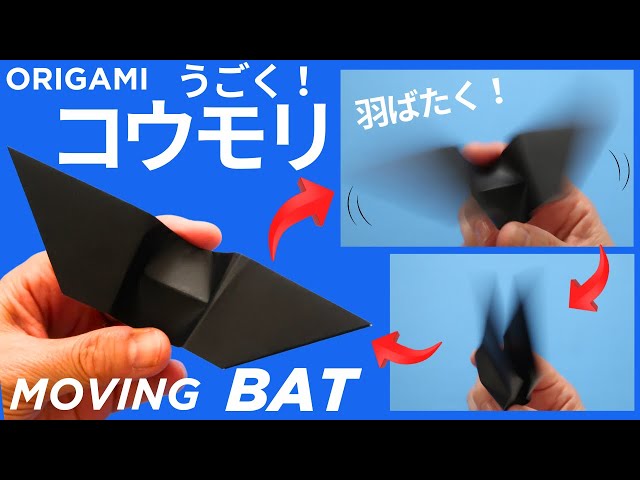
This is perfect for Halloween decorations or toys, with wings that flap amusingly.
First, cut the origami paper into a long rectangle and fold it in half vertically to make a crease.
Then fold both ends into triangles toward the center.
Keeping that shape, fold it in half vertically again, and fold further in the same direction to add a light crease at the center.
Next, flip it over and insert a finger at the center to make two creases.
Reinforce the creases you made earlier, and it’s done! By lightly holding the top and bottom of the center and moving them, the wings on both sides will flap.
Halloween wand
https://www.instagram.com/p/CjaPn2GPlGI/Why not try making a super impactful, fun, and cute Halloween wand together with kids who can’t wait for the holiday? Prepare six sheets of origami folded in an accordion style, secure each with tape, and fold them up.
Staple one end and wrap construction paper around it.
Next, attach yarn to both the origami and the construction paper to create the mechanism! The teacher can handle the mechanism, and the children can decorate with stickers, stamps, and sparkly tape.
With different color combinations, cuts, and Halloween motifs, you’re sure to end up with a uniquely original creation.
skeleton

Perfect for Halloween, this is a cute origami skull.
First, fold the paper into a rectangle twice, then tuck it in so it becomes a square.
Open it up, and shape the top section into the face and the bottom section into the teeth.
A key tip: when you first fold it into a rectangle, leave a tiny gap between the lines that meet.
That way, the teeth look slightly gapped, which makes it look more skull-like.
For the eyes and nose, you can glue on colored paper punched out with a craft punch, or draw them with a pen.
Make lots of them to create a lively display!
Halloween ghost decoration

This is a perfect craft for Halloween wall decorations or hanging ornaments! First, stick the eyes and tongue of a ghost, along with a hat folded from origami, onto a paper cup.
Next, attach yarn to Halloween motifs made from construction paper and connect and secure them to the paper cup.
The origami hat might be a bit complicated for three-year-olds, so teachers can prepare them in advance.
You can also have fun customizing the motifs—pumpkins, ghosts, witches, and more.
Through this activity, why not make Halloween even more exciting together with the children?
Halloween origami wreath
You often see wreaths around Christmastime.
It’s also a great idea to decorate with a Halloween-themed version of one.
You can even make it using only origami, so it’s perfect if you want the children to take the lead in a craft activity.
Another feature of this Halloween wreath is how easy it is to add originality.
Try placing a ghost in the center of the wreath, or a black cat—come up with whatever designs you like.
There are many folding instructions available online, so it’s a good idea to look those up as well.