[April] Cute spring-themed classroom wall decoration ideas for early childhood education


Exciting spring has arrived!
Here, we’ve gathered some cute wall decoration ideas inspired by April.
There are also ones you can make together with the children.
Simply sticking on colorful flowers and adorable creatures will brighten and enliven the atmosphere of your classroom.
Feel the spring breeze, expand on these fun ideas, and bring smiles to the children’s faces.
Fill the walls with spring so the children can greet the start of their new routines with a bright and cheerful feeling.
Please use these ideas as a reference.
- [Childcare] Decorate in April! Butterfly Wall Display Ideas
- Spring wall decorations: A roundup of recommended motifs for nurseries and kindergartens
- [Childcare] Perfect for April: Wall decoration ideas to celebrate starting school and moving up a grade
- [For Seniors] Embraced by Spring: Wall Decoration Ideas to Enjoy in April
- [For Age 3] Let’s make it in April! A collection of craft ideas to feel spring events and nature
- [Preschool] Tulip wall display ideas to make in April
- [Graduation Ceremony] Add Handmade Flair and Festivity! A Collection of Wall Decoration Ideas
- [Childcare] Decorate in April! A collection of recommended wall display ideas for Easter
- Wall Decor: Celebrate April! A Special Feature on Cherry Blossom Wall Decoration Ideas
- Perfect for spring: Wall display ideas with a horsetail motif you’ll want to make in March!
- A floral wall to brighten up the kindergarten graduation ceremony! A collection of fun-to-make ideas
- [For 4–5 year olds] A collection of recommended origami ideas for March—featuring seasonal events and natural motifs
- [Graduation Ceremony] A Collection of Ideas for Handmade Bouquets and Floral Decorations to Brighten the Walls
April: Cute spring-themed classroom wall decoration ideas for childcare (1–10)
Perfect for spring! How to make fava beans

This is a cute broad bean craft.
Use glue to stick the prepared broad beans and parts onto construction paper.
When you’re done, use stickers and crayons to draw faces and add expressions.
It’s fun to make while thinking, “What kind of face should I do?” The steps are simple, so it’s an easy project for the beginning of a new school year or right after entering school.
If you stick them on construction paper, they make adorable pieces, and if you make a lot, they’re great as wall decorations.
Please use this as a reference and try your own variations!
Cute and easy! 4 butterfly picks
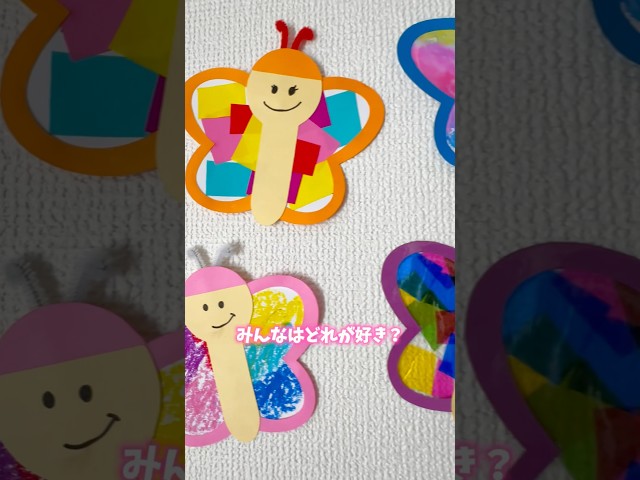
Here’s how to make butterflies in four different, fun ways.
The first is to draw swirling patterns with crayons on construction paper.
The second is torn-paper art: glue small pieces of origami paper onto construction paper.
The third is to color aluminum foil with color markers, spray it with water, and then transfer the color onto construction paper.
The last idea uses cooking parchment: attach pieces of colored cellophane to it.
Each method is lovely and results in a uniquely personal piece.
Finish by attaching pipe-cleaner antennae and gluing on the body with a drawn face.
Let’s make a butterfly with heart-shaped packing material
@atsumichan774 Spring Craft: Hello! I’m Atsumi, a nursery teacher. Today I made a butterfly using heart-shaped cushioning material I found at Daiso! No glue needed—just thread a chenille stem (pipe cleaner) through and tie it. Super easy idea. Using springlike pink-toned cushioning makes it extra cute. Perfect for spring decorations or wall displays! I think it’ll look even cuter combined with spring flower motifs. Give it a try! ■ Materials: Heart-shaped cushioning material; chenille stems or twist ties ■ How to make: 1) Thread a chenille stem through two heart-shaped cushioning pieces. 2) Tie the stem to create the antennae. Sound effect: MaouDamashii Atsumi-sensei’s Nursery Diary @atsumichan774 Butterfly Daiso Spring Nursery school Kindergarten Craft Project
♪ Original song – Nursery Teacher Atsumi @ Handmade Toys and Kids’ Crafts! – Nursery Teacher Atsumi @ Handmade Toys and Kids’ Crafts!
When you ask a 4-year-old, “What comes to mind when you think of spring?” they’ll likely say “butterflies”—a true symbol of the season.
How about making a butterfly using materials you can buy at a 100-yen shop? Combine two heart-shaped cushion pads with pipe cleaners or twist ties to form a butterfly.
The cushion material is soft, so it’s easy to thread the pipe cleaners through.
Use a pen to curl the ends for a rounded finish.
This cute, tiny butterfly craft is sure to delight your child.
[April] Cute spring-themed daycare wall decoration ideas (11–20)
Cute Footprint! How to Make a Caterpillar
A craft that can be fondly looked back on as a wonderful memory when your child grows up: a Very Hungry Caterpillar made using footprints.
Paint the soles of the feet with paint and make four footprints on construction paper.
Once dry, cut them out and stick them onto a backing sheet along with a caterpillar face made from construction paper, and you’re done.
Decorating with round stickers as you like makes it extra cute.
Preserving those tiny footprints that exist only now will be a lovely memory for your child, as well as for caregivers and parents.
It’s also delightful to feel how much they’ve grown when you look back on it later.
Be sure to try making it together with your child.
Bubble wrap beehive making
@hoiku_ratty Enjoy the texture while you create! Popping Honeycomb 🍯 [Goal] Get to know the shape and feel of bubble wrap and spark interest [Age] 3–4 years old [Materials] Construction paper Bubble wrap Paint Brushes Scissors Glue Everyone, give it a try! Thank you for reading to the end. I’d be happy if you like and follow! Feel free to leave comments with your thoughts or questions♪ ┈┈┈┈┈┈┈┈┈┈┈┈┈┈┈┈┈┈┈┈┈┈ On this account: ✏️ Crafts / Weekly & monthly plans / Event prep / Problem-solving I share easy-to-copy ideas to save time planning projects and make your personal life more fulfilling🪄 “There’s someone I don’t get along with…” “My pay doesn’t match the work!” For those feeling this way, I also offer free job-change support and consultations 🙆🏻♀️ (Even just “I want to know what kind of schools are out there” is OK!) ★ For consultations, visit the URL in my profile ★ @hoiku_ratty ┈┈┈┈┈┈┈┈┈┈┈┈┈┈┈┈┈┈┈┈┈┈Production ideasProduction ideasCraft PlayChildcare craftsWork/Project IdeaNursery teacher / Childcare worker#Nursery School CraftApril#April Production#Spring crafts #Bee Craft
♪ Original Song – Easy Nursery Crafts | Ratty 🐨 by Hoiku R – Easy Nursery Crafts | Ratty 🐨 by Hoiku R
Bees can be scary, but kids are fascinated by beehives! So let’s make a beehive using bubble wrap, which is often used as cushioning material.
First, paint the bumpy side of the bubble wrap with paint.
Yellow and orange are recommended.
Once the paint is applied all over, stamp it onto white construction paper to transfer the pattern.
After the paint dries, cut the paper into multiple hexagons and paste them onto black construction paper to form a beehive.
Finally, stick on a bee made from construction paper—and it’s complete!
Perfect for walls! A butterfly craft that makes paint play fun
Cut an A4 sheet of drawing paper into the shape of a butterfly, then apply paint on just one side.
Once you’re ready, fold it in half and lift the wing—your design will have transferred beautifully to the other side! You can also enjoy the excitement of seeing what pattern appears the moment you open it.
After that, attach the wings to another A4 sheet for the background, and stick a photo of your child in the center.
You’ll have a one-of-a-kind, adorable butterfly! It will look very spring-like on a wall display and become a wonderful, memorable piece.
Straw-blown painting flowers

Let’s make it with a simple process! Here are some ideas for blow-painting flowers using straws.
Blow painting with straws is an art technique where you blow through a straw onto paint thinned with water to create beautiful patterns and images on paper.
By blowing the paint with a straw, you get unique results.
It’s fun for both kids and adults, so try making it together with children.
What you’ll need: drawing paper, crayons, paint, and straws.
The key is the simple process—just place some watered-down paint on the paper and blow gently through the straw!