[For Seniors] Practical Crafts to Make in Day-Service Recreation: Idea Roundup


At day service craft activities, there are times when participants make items to take home.
I imagine many people display them at home, too.
This time, we’re sharing craft ideas for older adults that you can make and actually use!
We’ve gathered practical crafts you can keep using after you make them, as well as stylish pieces that look great on display.
Simply changing the origami patterns or the types of beads and ribbons can create a completely different feel, so have fun using these ideas as inspiration.
- For Seniors: Simple and Lovely Crafts – A Collection of Take-Home Project Ideas for Day Service
- [For Seniors] Small craft ideas: for yourself and as gifts!
- [For Seniors] Recommended for day services! Simple and cute small craft ideas
- [For Seniors] A Collection of Craft Ideas Using Paper Cups
- Take-Home Craft Ideas for Winter: Perfect for Day Services for Seniors
- For Seniors: Come, Spring! Recommended March Craft Ideas for Daycare Services
- [For Seniors] Simple Handicrafts Recommended for Finger Exercise
- [For Seniors] Recycle Everyday Materials: A Collection of Flyer Craft Ideas
- [For Seniors] Have Fun Making Things Based on Today’s Mood! Today’s Recommended Craft
- [Day Service] Craft Ideas for Seniors to Make in October
- [For Seniors] Easy Construction Paper Crafts Activity
- [For Seniors] Easy and Fun! Tsumami Zaiku Craft Ideas
- [For Seniors] Color Your Care Facility’s Spring: Wall Decoration Ideas
[For Seniors] Practical crafts to make in day-service recreation. Idea roundup (241–250)
muffler

How about trying finger knitting to make a scarf that even complete beginners can enjoy? It’s also recommended for older adults with no knitting experience.
Using towel yarn or mohair-like chenille yarn makes it easy, and you’ll get a fun, fluffy texture.
Start by wrapping the yarn loosely around two fingers, then use all five fingers as you go, which provides light hand exercise and stimulates the brain.
Aim for a nicely proportioned scarf about 10 cm wide and 80 cm long—everyone will be satisfied with the result.
Mini uchiwa (small handheld fan)

Mini handheld fans that are easy to make are perfect for activities at day service centers.
Dissolve some paint in water and place a few marbles in it.
Drop the marbles onto a tray lined with drawing paper, then tilt the tray to roll them around and create patterns.
Change colors and roll multiple times to achieve a layered, dimensional design.
Once the paper is dry, cut it to match the shape of the fan and attach it to a craft band.
To make the handle with the craft band, draw a line 3 cm from the edge, make slits along the line, spread it open, and round off the opposite tip.
Assemble the parts to complete your mini fan.
It not only brings a sense of coolness but also lets you enjoy an original pattern, so give it a try as a take-home project.
minibasket

Here’s how to make a basket using a milk carton.
You will need one milk carton, two kinds of wrapping paper, lace, and adhesive.
Make sure the milk carton is completely dry, and use the three sides with fewer creases.
Attach wrapping paper to both sides, draw guide lines for assembly, and make the necessary cuts.
Fold from the inside in order, shaping the basket while securing it with adhesive.
Once the basket shape is formed, glue the lace around the edge to finish.
Changing the wrapping paper gives it a different look, so you can enjoy experimenting with styles.
Give it a try!
Medal name tag

How about making a cute nameplate like the medals you get at a sports day? All you need is one sheet of origami paper and another piece of paper to write the name and insert inside.
There are many steps, but the folding itself isn’t very difficult.
Take your time and fold carefully.
If you use double-sided origami paper with different colors on each side, it will turn out more colorful and cute.
You can attach it to your chest like a badge with double-sided tape, or add a ribbon and wear it around your neck like a medal.
Tulips at the mall

Here’s how to make an easy and cute tulip using chenille stems (pipe cleaners).
Prepare two chenille stems in your favorite color for the petals and two green ones for the leaves.
Fold each stem in half, stack the folded points together, twist them, then align the ends with the knot at the top.
Twist the aligned part to secure it—this completes the leaf.
For the flower, twist once at the center while the stems are still aligned, then fold up again and twist to secure.
Round the shapes, and curl the extended ends to form the petals.
Make three identical petal pieces and glue them together to complete the flower.
Attach the flower and leaves to a plastic stick to finish your chenille-stem tulip.
Wrapping it or bundling several together into a bouquet makes it even more decorative.
yo-yo
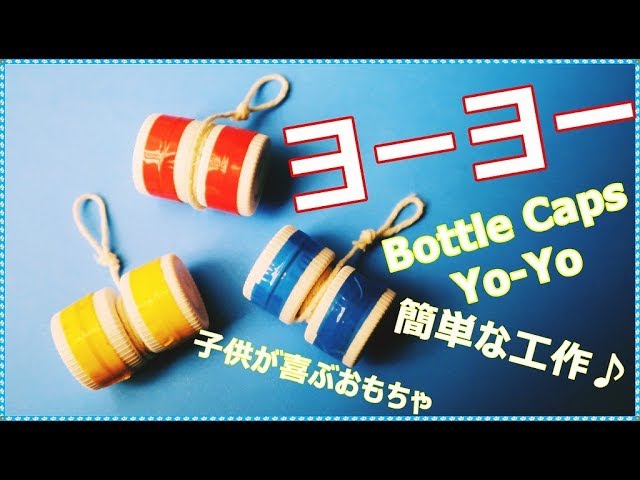
Making a yo-yo with plastic bottle caps is a craft that older adults can easily enjoy.
Use an awl to make holes in the centers of two caps, then insert a screw and fasten them together.
Thread a string through the center and tie it securely, and pack clay into the empty space inside the caps to add weight.
Finish by wrapping the whole thing with colored tape for reinforcement, and it’s done.
Activities that use the fingertips help improve concentration and stimulate brain function.
Another appeal is that you can customize the look to create your own unique piece.
Since you can actually play with it after it’s finished, it’s an idea that remains fun even after the making is complete.
[For seniors] Practical crafts to make in day service recreation: Idea roundup (251–260)
light

Lights are incredibly useful items in many aspects of daily life.
This time, let’s make a candle light using a toilet paper roll.
Prepare a paper roll, an LED light, masking tape, transfer sheets, faux leather, adhesive, and so on.
Simply stick masking tape onto the paper roll, make a slit, shape it like a roof, and attach the faux leather—it’s an easy process.
Plus, you can freely design the candle, so it’s great that you can create one that suits your taste.