[Let’s Make and Play!] Handmade Toy Ideas You Can Create Yourself

Kids love new toys, don’t they?
They figure out how to play, add their own twists, and discover new ways to have fun.
Here are some ideas for making handmade toys that are easy to customize and adapt!
These ideas use materials you already have at home or can pick up at a 100-yen shop, so they’re all things you can start making right away.
It’s great for adults to make them, and there are plenty of ideas kids can make themselves, too.
Original, one-of-a-kind toys become extra special—and even more fun!
- Let's make toys with paper cups! Simple and fun handmade toys
- Handmade games: DIY craft ideas you can make and play
- [For Elementary School Kids] Handmade Toy Craft Ideas
- [DIY] A Collection of Handmade Moving Toy Craft Ideas
- Let's make toys out of cardboard! Easy and fun handmade toys
- [Let’s Make and Play!] Handmade Ideas for a Target Shooting Game
- Easy DIY! Introducing educational toys that can be easily made with 100-yen shop items and things around the house.
- Made of paper! A fun collection of DIY toy ideas you can play with
- It's fun to spin! A collection of DIY toy ideas
- [Handmade Toys] Fun to Make! A Collection of Pull-Along Toy Ideas
- Fun for elementary school kids! A collection of craft ideas using plastic bottle caps!
- [For Kids] Today’s Handmade Craft Ideas
- [For Kids] Spins in the wind! A collection of recommended DIY pinwheel ideas
[Let’s Make and Play!] Handmade Toy Ideas (31–40)
How to Make a State-of-the-Art Crane Arm
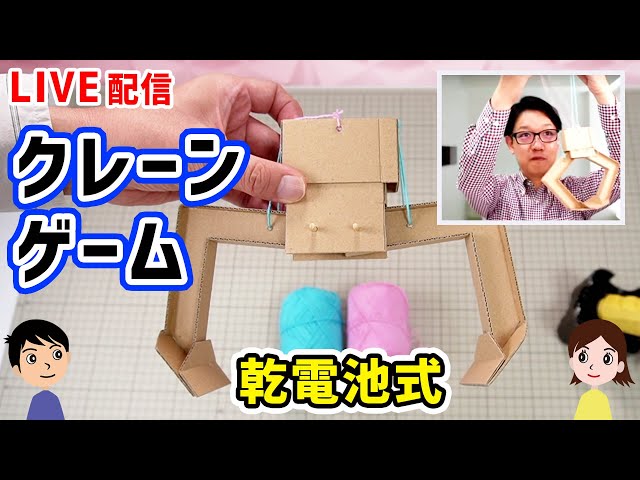
A crane game where you thoroughly assemble the arm is a craft that’s fun to build in itself.
Start by creating the arm’s frame, then attach the strap that supports the arm.
Add the part that grabs the prize to the tip and connect everything together to give it a crane-like shape.
To make it move, thread yarn through the arm, then run the yarn through the main box to set up a mechanism that transmits motion.
By changing the strength and angle with which you pull the yarn, the arm’s opening and closing will vary, helping you grab prizes more effectively.
The appeal lies in how the builder’s ingenuity changes the operability, and once it’s finished, the excitement comes from testing the controls as you play.
It’s a fun idea that sparks a spirit of challenge.
Handmade UFO catcher with magnets

A handmade UFO catcher that combines colored paper clips and neodymium magnets is a unique craft that uses magnetism.
Fix the magnet to the end of a string and secure it firmly with glue.
For the main body, connect two plastic bottle caps vertically with masking tape, adding thickness to the sides so that the clips won’t stick to them.
Thread the string through the caps to complete the arm.
Pre-drill a hole in a clear bottle, pass the string with the main body through it, and drop the clips inside.
When lowered, the magnet attracts the clips; when pulled up, the distance increases and the clips release—just like a real claw machine.
It’s a clever idea that makes good use of magnetic properties.
Let’s make darts!

Prepare several long strips of cardboard cut to a width of 3.5 cm.
Lightly spray one side with water to moisten it, then peel off the outer layer of paper.
Once the cardboard is dry, use glue and roll it up from one end into a spiral.
Keep adding strips and roll them all together.
That completes the target, so next we’ll make arrows using origami paper and toothpicks.
Use a toothpick as the arrow’s shaft, and glue origami paper to the back as the fletching.
Wrap tape around the tip of the toothpick as a weight, and it’s done.
Mount the target on a wall and try throwing the arrows to play.
5 Easy DIY Crafts You Can Try

Kids love crafts, but as first graders it can be hard to stay focused for a long time.
So here are some quick craft ideas you can finish in a short time.
You can make five things: a moving boat, a guitar, a fortune slip (omikuji), a ghost that pops out of a box, and a spinning top.
The materials are mostly recyclables—things you likely have at home—such as milk cartons, plastic bottles, wooden chopsticks, straws, ice cream sticks, and plastic bags.
You can play with each item after you make it, so once you’re done, decorate it however you like and put it to use as a fun at-home activity.
You can make it in 10 seconds! Marble run
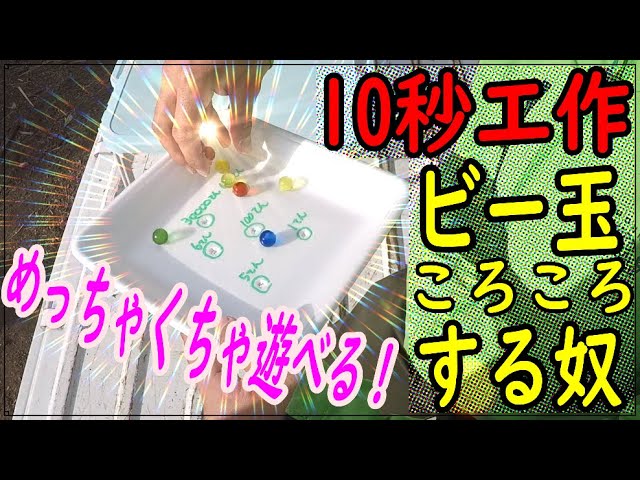
Want to play something right now? For you, here’s a marble-rolling game you can make in 10 seconds.
All you need is a food tray and a pencil.
A slightly larger tray might work better.
To make it, just poke several holes in the tray with the pencil.
Roll lots of marbles on the tray and fit them into the holes you made—done! You can also write point values next to each hole and turn it into a game to see how many points you can score by placing marbles in them.
It’s quick to make even if you don’t have much time, so give it a try!
[Let’s Make and Play!] Handmade Toy Ideas (41–50)
You can make it in 10 seconds! Marble run
Want to play something right now? For you, here’s a marble-rolling game you can make in 10 seconds.
All you need is a food tray and a pencil.
A slightly larger tray might work better.
To make it, just poke several holes in the tray with the pencil.
Roll lots of marbles on the tray and fit them into the holes you made—done! You can also write point values next to each hole and turn it into a game to see how many points you can score by placing marbles in them.
It’s quick to make even if you don’t have much time, so give it a try!
Marble run made from cardboard
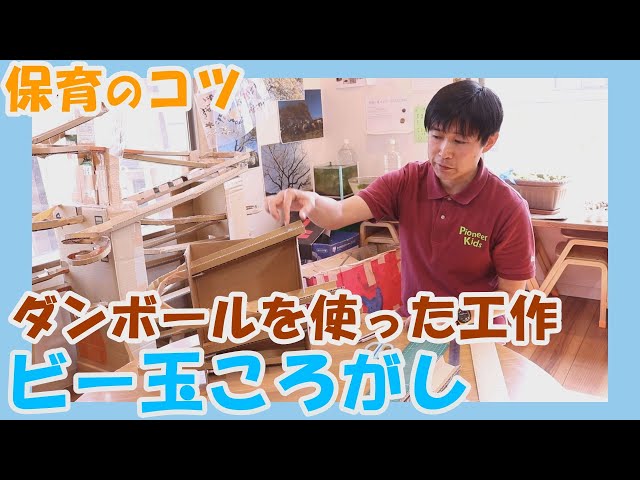
Let’s try making a cool marble run using cardboard.
Prepare a rectangular piece of cardboard that isn’t too thick, and cut off one section on the large face and one section on the narrowest side.
Then, using the pieces you removed and other bits of cardboard, build the pathways for the marble to roll along and attach them to the base cardboard.
Instead of connecting every path all the way through, it’s also fun to leave gaps here and there so the marble drops down to the next level and continues.
Be sure to set up the goal area so the marble stops securely and doesn’t roll out after reaching the finish.