![[For Kids] DIY Snowman Craft Ideas!](https://i.ytimg.com/vi_webp/L5h9DtgKjlA/maxresdefault.webp)
[For Kids] DIY Snowman Craft Ideas!

This time, we’re introducing snowman crafts you can enjoy making by hand.
When you hear “snowman,” do you picture shaping clay or rolling up cotton?
In fact, you can make them with all kinds of materials!
We’re also sharing ideas for snowmen you can create using supplies from 100-yen shops, as well as everyday items like towels and socks.
There are plenty of adorable ideas you’ll want to display in your room after you make them, so have fun crafting your own handmade snowmen!
[For Kids] Handmade Snowman Craft Ideas! (1–10)
sock snowman

Have you ever thought, “Oh, it looks like a snowman,” when you roll up your socks and toss them into the laundry basket? Here, we’ll show you a craft that uses those socks to make a snowman.
It only takes about 20–30 minutes, so it’s perfect even if you’re short on time.
Stuff cotton into the sock and use a ribbon to separate it into the body and head sections.
Use stickers for the eyes and mouth.
A key tip is to place a piece of thick paper in the bottom of the sock so it stands up well.
It’s fun as a craft, and it also works great as gift wrapping for socks.
Snowman Spin Snow Bottle
https://www.tiktok.com/@n.annlee321/video/7170274851549220097Let’s make a spinning snowman snow bottle! First, prepare a small empty plastic bottle, then stick a magnet to the inside of the cap using double-sided tape.
Use an awl to make a hole in the bottom of the bottle and thread a string through it.
Make a snowman out of construction paper, tie a paper clip to the end of the string you threaded earlier, and sandwich the clip between two snowman cutouts to hide it.
Be sure to position it so a little bit of the clip sticks out from the snowman’s head.
Straighten and curl the tip of the clip, place the snowman into the bottle, and screw the cap on.
Pull the string at the bottom, tape it in place, add foam beads and decorations inside, and you’re done.
The snowman spins around and it’s really fun!
A snowman that melts when folded

Let’s make it with scissors! Here’s a fun idea for a snowman that “melts” when you fold it.
You’ll need construction paper or template paper, snowman face parts, hand parts, glue, tape, and string.
First, cut the paper into a spiral.
Next, attach the snowman’s face and hands with glue or tape.
Finally, add the string to the snowman’s hat, and you’re done! Hang it from the ceiling, and it’ll spin cutely whenever the wind blows.
Give it a try!
Magnet Snowman
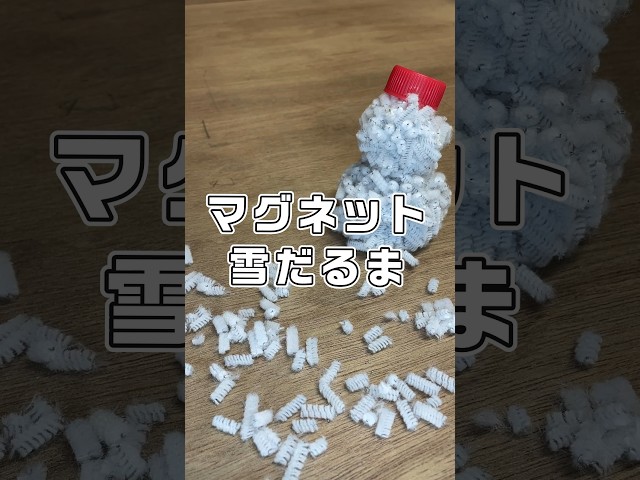
So fluffy and cute! Here’s an idea for a magnetic snowman.
You’ll need five plastic bottle caps, magnets, white chenille stems (pipe cleaners), scissors, and white vinyl tape.
First, place magnets inside two of the bottle caps and secure them with vinyl tape.
Next, cut the pipe cleaners into small pieces, then roll the taped-together bottle caps around while attaching the pieces to create fluffy pipe-cleaner balls.
Finally, make balls in two different sizes, stack them, and your snowman is complete! Adding a colored bottle cap as a hat makes it even cuter.
A light and cute snowman
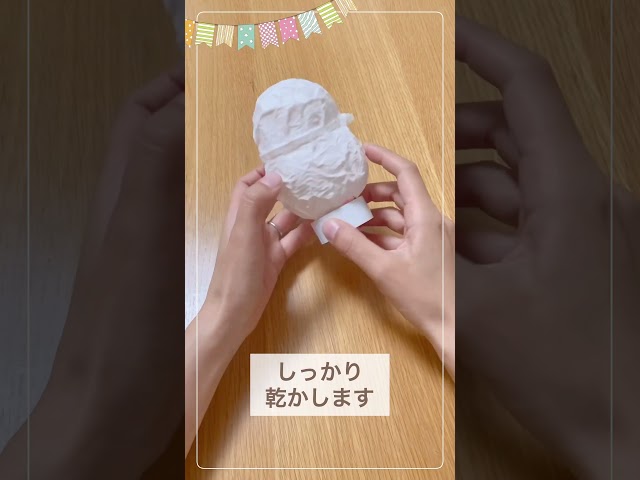
Soothe yourself with gentle light! Here are some cute snowman ideas using lights.
You’ll need balloons, zip ties, craft glue, paper cups, paper towels or washi paper, a brush, a pen, yarn, scissors, and a light.
First, inflate the balloons and attach zip ties so they form a snowman shape.
Next, stick small pieces of paper towel onto the balloons using craft glue mixed with water, then let them dry.
Finally, remove the balloons, trim the shape with scissors, and decorate with a scarf and pen—then you’re done! Turn on a light inside, and the soft glow will be wonderfully soothing.
Moving paper cup snowman

When you hear “a moving snowman,” it might sound a bit challenging, but it’s simpler to make than you’d think.
After you make it, everyone will want to move it and play together.
All you need are a straw and a paper cup.
Here’s the process: draw a snowman on the paper cup; make holes on the sides; then thread a straw—taped together at the bottom as one piece—through the holes.
This straw becomes the snowman’s left and right arms.
When you move the straw up and down, the two sides move accordingly.
Since you’ll need a blade to make the holes, please have an adult help with that part.
Snowman you can make easily

Let’s make a cute snowman using the white plastic shopping bags you get at supermarkets and convenience stores.
There’s lots of rolling and crumpling, so even small children should enjoy it.
About one hour in total should be plenty.
The basic idea is to make two spheres by stuffing tissue paper into white plastic bags and then stack them.
If you use a small paper cup as a hat, it really adds to the look.
Make the eyes and mouth out of construction paper to give it an expression.
It’s a perfect snowman to display by your front door.