

Toddlers will love it! Fun-to-make July origami recommendations
Young children are beginning to take an interest in colors and shapes.
This is an important time for them to experience the joy of creating things with their own hands.
Here, we’re introducing fun origami ideas that also help develop concentration.
Try making a variety of items using colorful paper! If you create pieces that capture the feel of summer together, you can make even hot July days enjoyable.
There are also cute works perfect for decorating walls, so get creative and enjoy July origami with the children!
Young children will love it! Fun-to-make July origami recommendations (1–10)
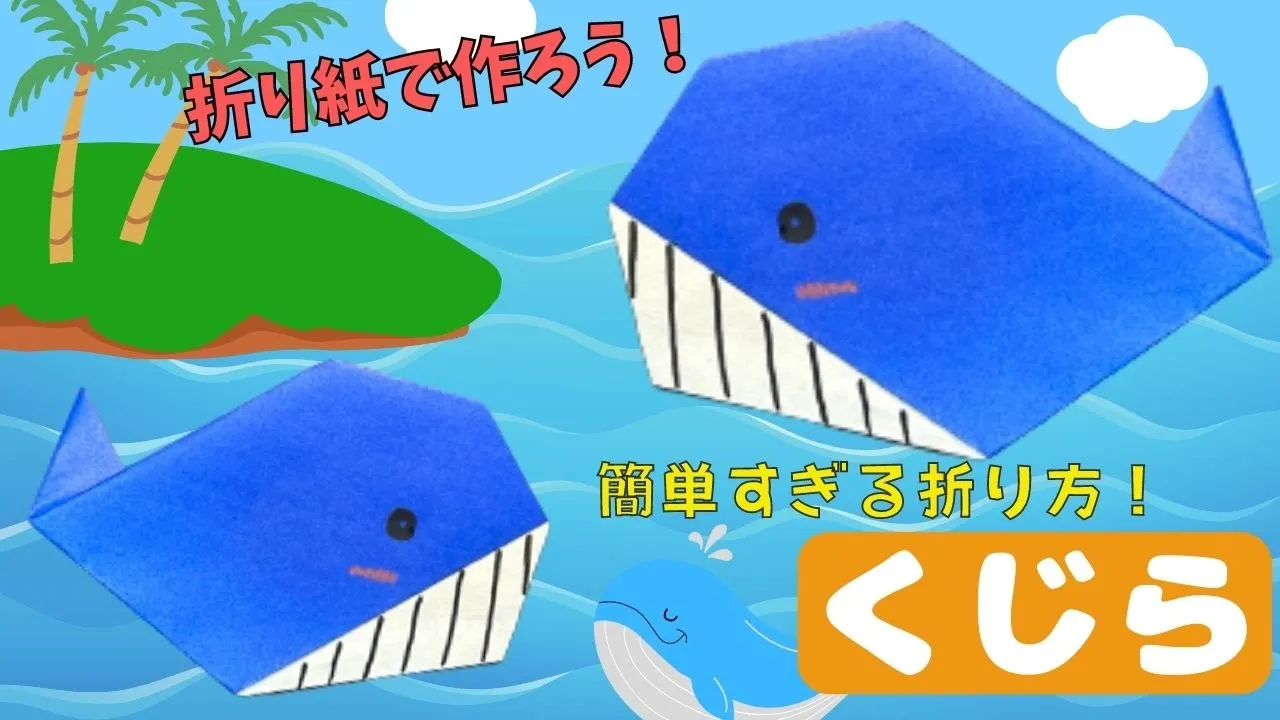
whale

Fold the origami paper in half to make a crease.
Fold the corners up toward the center line, then fold the whole paper in half to start forming the whale shape.
Shape the whale’s body so it becomes large and rounded.
Finally, fold up the whale’s tail, draw the mouth with a felt-tip pen, and you’re done.
Give this popular whale a try—kids love it! Before making it, it’s also a good idea to show photos of whales or read picture books that feature whales as part of your explanation.

fish

Let’s try folding an origami fish.
Fish live in the water, so they’re one of those things that make us feel cool and refreshed.
First, fold the paper in half, then fold it in half again, and bring the two corners toward the center.
Now flip it over and again bring the two corners from the other side toward the center.
Next, fold it diagonally, then fold it in half with the white side tucked inside.
After that, just flip it over and draw an eye.
Try making fish in various colors and sizes.
Lining up lots of fish will make it feel even cooler.

Shell ornament

How about making origami shell decorations for Tanabata? They’re easy to make: you only fold for the first half, and after that you cut evenly spaced slits.
Open it up, align the corners along the diagonal, glue them together, and you’re done.
The slits look like a spiral shell and it’s very pretty.
If you cut the origami into quarter-size pieces first, you can make cute little shells, and linking those shells together is adorable too.
Used as Tanabata decorations, they might evoke the image of shells living in the Milky Way.
A flying cicada

Some of you may have folded an origami cicada before, but it’s usually the kind that’s perched on a tree, right? How about trying a rarer version: a cicada with its wings spread in flight.
If you also fold the tree-perching cicada and display them together, you can create more variety for your wall decorations.
The key to this model is different from regular origami—you fold at the one-third mark.
It may feel a bit unfamiliar at first, but once you understand the structure, it’s easy to make.
Give it a try!
shaved ice

Shaved ice is something many people have eaten at summer festivals.
Here’s how to make cool and tasty shaved ice out of origami.
Fold the paper into a triangle twice, then unfold it completely and fold each corner toward the center of the paper.
Next, fold along the edges to align the paper neatly.
Turn it over, fold up the corners to form the shape of a shaved-ice cup, and you’re done.
Finally, use scissors to cut and create the syrup decoration.
When using scissors, be sure to clearly explain the rules and check how to use them safely.
ice cream

Let’s make an original, refreshing ice cream that’s perfect for preschoolers, using just a single sheet of origami.
Prepare one sheet of origami paper and fold it into a triangle.
Then fold the left and right sides toward the center line.
Finally, glue it onto construction paper, add round stickers as toppings, and use colored pens to decorate to make a delicious-looking ice cream.
It’s also great to display indoors as a summer decoration.
beetle (specifically, a rhinoceros beetle)

When you think of a rhinoceros beetle, you might imagine a complex shape, but this is an origami design that looks like a beetle viewed from above.
The folding process isn’t too complicated, though you’ll need to use inside reverse folds a few times to form the horn.
Draw the eyes at the end and you’ll have an adorable beetle.
It would be fun to make other insects too and turn them into a wall decoration like an insect paradise.
Please give it a try.
Besides black, light brown or brown origami paper would also suit it well.