Recycle your empty cans! A fun collection of DIY toy ideas you can make

Why not try making fun handmade toys using empty cans from juice or fruit, and even empty formula tins? These days, lots of cans come with cute designs, so it’s lovely to use the designs as they are! We’re sharing a variety of ideas, like instruments and lanterns that make clever use of an empty can’s features.
For anything involving fire, switching to an LED light will make it safer to play with, so definitely give it a try and make some fun toys with empty cans!
Recycle empty cans! A collection of fun DIY toy ideas (1–10)
A plate made from an aluminum can

Do you have any used aluminum cans around? This time, we’re giving aluminum cans a makeover! Here’s how to make a stylish dish from an aluminum can.
Prepare an aluminum can and scissors.
Cut horizontally about 1–2 cm down from the top of the can to even out the rim.
Then make vertical cuts at 1 cm intervals all the way around.
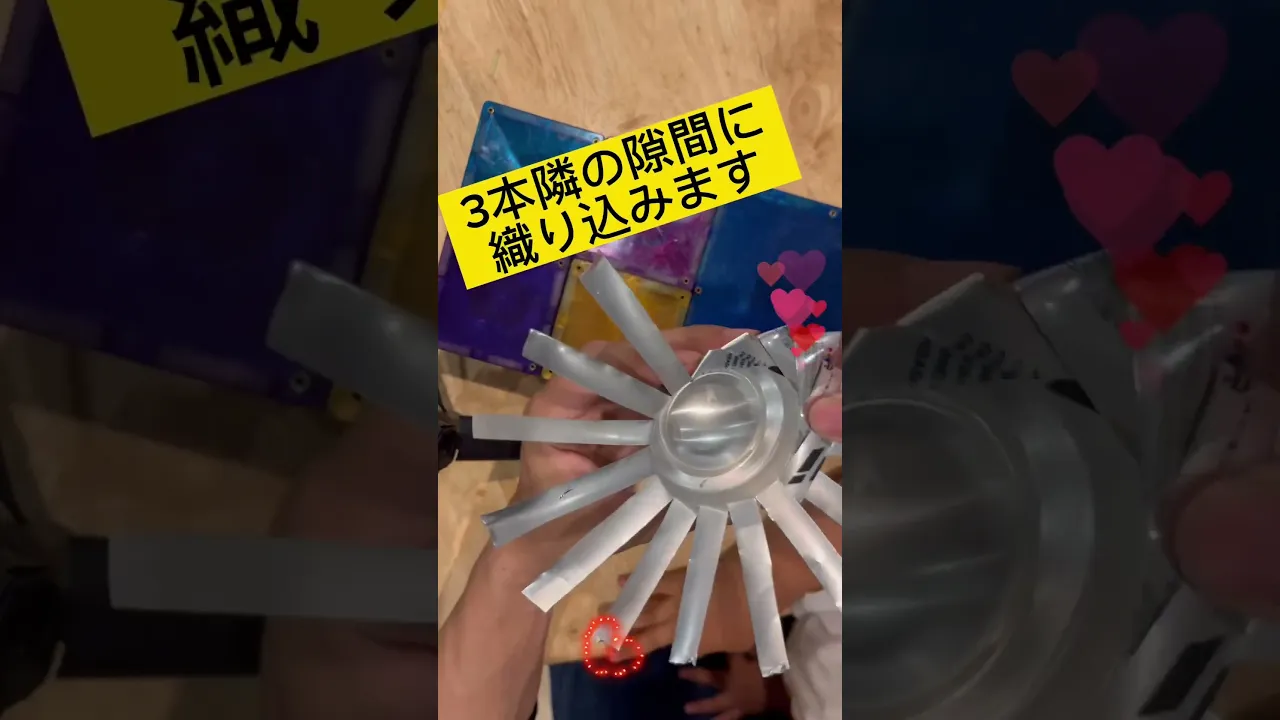
After cutting, fold each strip inward in sequence, skipping ahead by three strips each time.
Once you’ve folded all the way around, your dish is complete! It also looks cute and stylish as a small accessory tray.
The steps are simple, so give it a try!
Choo-choo, the train whistles.

Let’s make a sound-producing train using an empty can! Please prepare an empty can, a straw, a milk carton, scissors, and cellophane tape.
Press the straw against the can and find the spot where it makes a sound, then tape it in place.
Divide the milk carton into four equal parts and shape them around the aluminum can to form a train.
Take one of the four pieces and curve it to create the base of the train, shaping it as you go.
Use another piece as the roof.
For the sides of the train, overlap and cut the corners of the milk carton to refine the shape.
Cut the trapezoid for the front, attach a chimney, and your train is complete! It’s also recommended to cover the milk carton with colored paper of your choice.
Give this special, sound-making train a try!
Tin Can Yacht
https://www.tiktok.com/@kidsdiytoys/video/7150427674270305582Let’s make a cool yacht out of aluminum cans.
Please prepare three aluminum cans, wooden chopsticks, a hot glue gun, colored construction paper, and a star hole punch.
Line up the three cans, and use the hot glue gun to attach two chopsticks each across the front and back to hold them together.
On the front, attach a vertical chopstick to serve as the mast.
Cut yellow construction paper into a rectangle, glue three colored strips down the center, and punch holes at the top and bottom with the hole punch.
Thread it onto the chopstick to make the sail.
Loop twine over the mast and tie it to the base of the boat below.
Cut construction paper into triangles, stick on stars, glue on the flags, and you’re done!
Dropping-in game

How about making a drop-in toy that babies love using a formula can? First, cut fabric to fit the size of the can.
Next, wrap the cut fabric around the can as you stick it on.
Using fabric with an adhesive backing makes it super smooth.
Then cut a sink strainer lid to match the size of the can’s opening.
If you round off the tips of the slits in the strainer, it will feel nicer to the touch and also help prevent babies from biting pieces off.
Glue the lid on, and you’re done.
Try putting in and taking out balls, handkerchiefs, and all sorts of items, and have fun playing together.
Pinwheel made from an aluminum can

Here’s how to make a pinwheel that shows off aluminum’s signature sparkle.
First, punch four drainage holes in the bottom of an empty can.
Also make a hole in the center of the top.
Next, wrap the can with a sheet of paper marked with straight lines at 7 mm intervals, and use a permanent marker to transfer the marks to the top and bottom of the can.
Fix the can in a box with anti-slip so it doesn’t move, and using a template made from a paper fan, align it with the marks and make cuts with a utility knife.
Don’t cut pieces off; think of it as scoring lines.
Using an awl and nippers, stand the scored sections up and spread them outward into a circle to finish.
Be careful not to injure yourself with the knife.
Make lots and display them outside!
woodblock

Let’s recreate the sound of a woodblock using an empty can.
Please prepare a steel can, duct tape, pliers, and a teaspoon.
For safety, use the pliers to flatten the cut edge of the steel can.
Apply duct tape over the round opening of the can, and trim any excess to adjust.
Tap the taped area with the teaspoon and listen to the tone! In no time, you can reproduce a woodblock-like sound with a can.
Try changing the number of tape layers or where you place the tape to enjoy different tones.
It’s also fun to line up two cans of different sizes and tap them!
domino toppling

Here’s how to make a domino run using empty cans and flyers.
The method is super simple! Wrap a flyer around an empty can, aligning it with the edge, and tape it in place.
Then fold the opposite edge of the flyer slightly to create a small dent—your domino is done.
It’s great because it’s so easy to make.
When you play, line up the dominos so that the dented parts all face the same direction.
It’s a perfect idea for anyone who wants to play using lots of empty cans—give it a try!