[For Seniors] Crafts to Make in March! Recommended Project Ideas


March is full of delightful motifs like peach and cherry blossoms, as well as fun events such as Hinamatsuri (Girls’ Day).
In this article, we’ll introduce craft ideas recommended for seniors to enjoy in March! By mainly using soft colors like pink, white, and pale green for origami and construction paper, you can create bright, cheerful pieces—making both the crafting process and the finished display exciting.
When making origami crafts, adding patterned paper can change the atmosphere and give your work a unique touch! Feel free to use these ideas as references in care facilities such as day service centers.
- For Seniors: Come, Spring! Recommended March Craft Ideas for Daycare Services
- For Seniors: Recommended Wall Decoration Ideas for March
- For seniors: Heartwarming and cozy. Recommended handmade Hina dolls
- [Day Service] Spring Take-Home Crafts: Ideas to Warmly Brighten Your Room
- [For Seniors] Spring Wall Decorations: A Collection of Ideas to Brighten Up Your Room
- [For seniors] Enjoy spring: April craft ideas
- For Seniors: Simple and Lovely Crafts – A Collection of Take-Home Project Ideas for Day Service
- [For Seniors] Color Your Care Facility’s Spring: Wall Decoration Ideas
- [For seniors] A handmade calendar you’ll want to make in February
- [For Seniors] Have Fun Making Things Based on Today’s Mood! Today’s Recommended Craft
- For Seniors: Feel the Arrival of Warm Spring. Cherry Blossom Wall Decoration Ideas
- [For Seniors] Introducing Fun Crafts Made with Plastic Bottle Caps
- [For Seniors] Making a March Calendar: Introducing Spring-Themed Motifs and Arrangements
For Seniors: Crafts You’ll Want to Make in March! Recommended Project Ideas (81–90)
Roly-poly Hina doll
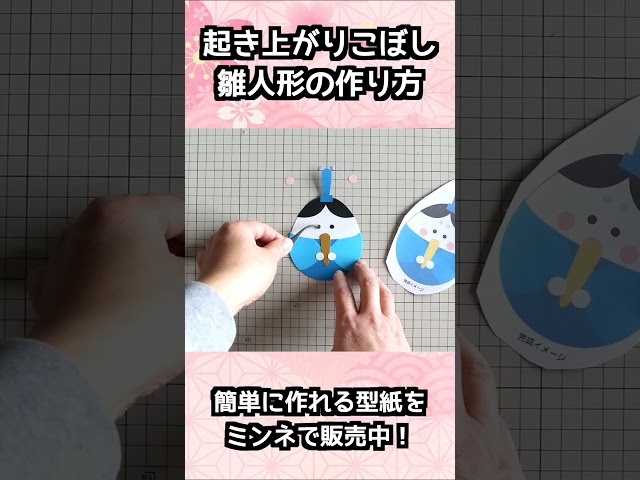
These wobbling dolls are adorable okiagari-koboshi-style Hina dolls.
You can easily make the wobbling mechanism using paper cups.
Create the Emperor and Empress with construction paper or origami, then attach them to paper cups cut to the right size, and you’re done.
Because they sway, these Hina dolls seem like something older adults could enjoy even after making them.
They also look cute displayed on a table or shelf.
Templates for the Emperor and Empress are available online, so using those can make the process easy and casual.
Hina dolls

Speaking of March, it’s Hinamatsuri (Girls’ Day), and when you think of Hinamatsuri, you think of hina dolls.
Making your own hina dolls is highly recommended.
Using a method that starts with rolled-up newspaper as the base, you can create adorably shaped dolls.
If you make the emperor and empress dolls, your grandchildren are sure to be delighted with the gift.
You could also team up with friends to add the court ladies and the five musicians.
Once you have the full set, the result will be truly impressive.
By the way, using origami or washi paper for the kimono parts really enhances the look.
Flower basket made from scrap materials

A flower basket using paper quilling—perfect for spring crafts! It’s very budget-friendly because the base of the basket is made from a plastic bottle cap.
It also makes a lovely little gift.
The basic method is to take narrow strips of paper and roll them tightly with a cuticle stick or bamboo skewer to shape them.
Creating several types—like ovals, teardrops, or fringed coils—will make it look more vibrant.
Once you stuff the bottle cap with tissue, freely decorate it with the flower parts and you’re done.
Make lots to brighten up your room or entryway!
Hina decorations made of felt

This Hina doll decoration made of felt features gently swaying ornaments as its highlight.
By using plum blossoms and traditional Japanese-patterned fabrics, it’s likely to be a piece that will delight elderly people.
Draw a semicircle on copy paper or similar using a compass to create a fan shape.
Cut out thick paper, felt, and fabric to match this pattern to make a backing, then finish it with yarn (a type of cord).
Finally, add decorations such as flowers made from felt and fabric, and attach the hanging, swaying ornaments.
It’s a Hina Matsuri decoration that brightens up a space just by being displayed—give it a try!
Washi-Modern Hina Dolls with Lace Paper

This is a perfect idea for Hinamatsuri! First, cut a sheet of patterned origami paper and a doily in half, then fold both sides inward like a kimono.
Slip the folded doily inside the origami so the lace peeks out from the kimono for extra cuteness.
Once you decide on the placement, glue it down firmly and add the face parts and accessories.
Next, color the backing paper, and stamp around the border with a dauber or a balloon to make it festive.
Finally, attach the hina dolls, and your handmade, modern-Japanese Hinamatsuri decoration is complete.
Its vibrant colors will instantly bring a spring feel to your room, and the making process is fun, too.
Creating cute and chic Hina dolls for adults

Here’s a simple way to make cute Hina dolls.
First, stick fabric tape in the center of a piece of felt, fold 3 cm from one edge, and make a 2 cm slit in the middle.
Use the slit to neatly shape the collar with a little twist, then fold the felt in half and secure it with double-sided tape.
Next, glue on a bead about 1 cm in diameter to represent the head.
After making two figures, craft small accessories from origami, thread them through a large eye bead, and attach them to the dolls to finish.
By playing with colors and accessories, you can create charming, unique Hina dolls.
The process itself is fun, so it’s highly recommended!
[For Seniors] Crafts You’ll Want to Make in March! Recommended Project Ideas (91–100)
Origami Hina Dolls

Let’s make the parts for the kimono, face, hair, hair ornament, and fan, and complete the Hina doll.
Use Japanese-pattern origami paper for the kimono.
Cut out a triangle at the center, attach the collar on the back, then fold it into a triangle.
Fold up both corners, then fold them back parallel.
Open the origami once and refold so that the bottom corner splits into two layers.
Fold the top of these two layers upward toward the back and pass it through the triangular opening to form the neck.
Next, fold in the left and right sides to make the sleeves, and fold the remaining bottom corner up to the back to finish the kimono! Make the remaining parts and complete your Hina doll.