A Collection of Fun Toy Ideas You Can Make with Paper Clay

Let’s try making all kinds of toys with paper clay!
Paper clay is such a fascinating material, isn’t it?
It’s soft to the touch, and you can stretch it, roll it, and shape it into many forms.
But after some time it hardens—what an interesting material!
I’d love to show you lots of fun ways to make paper clay toys that take advantage of these unique features.
From realistic-looking foods to toys you can actually play with—there’s plenty to enjoy!
Find your favorite toy, make it, and have fun playing with it!
A collection of fun toy ideas made with paper clay (1–10)
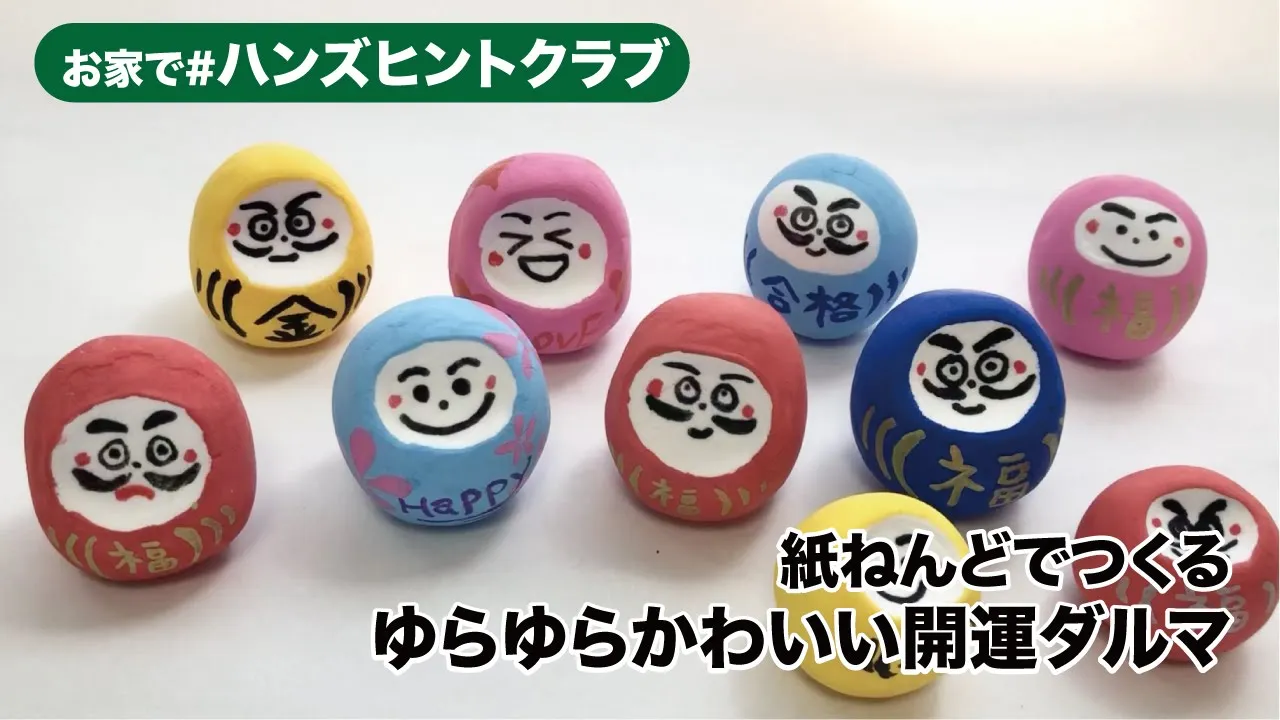
A swaying daruma

Here’s a website I recommend for anyone who wants to try making a lucky Daruma by hand! Using paper clay, you can easily and enjoyably create cute Daruma figures together with your kids.
The materials are pigment ink pens, marbles, paper clay, and a permanent marker.
You can make eight Daruma from one bag of clay.
Roll the clay into a ball and insert a marble as a weight.
Then let it dry and decorate it however you like—done! Since it’s easy to make with just a few materials, try coming up with ideas together and enjoy creating your own original Daruma.
Because this project uses clay and marbles, make sure an adult is always present to help young children.
Frappe Cappuccino

Enjoy playing pretend café! Here’s how to make a frappe cappuccino.
Prepare paper clay, paint, glass paint, a cup container with a lid, a piping bag, rubber gloves, a bowl, and a straw.
First, add paint to the paper clay to color it.
Mix the colored paper clay with white paper clay to create a marbled pattern, then put it into the cup.
Squeeze softened paper clay (thinned with water) into the cup to look like whipped cream.
Finally, drizzle glass paint on top and put on the lid—that’s it! Depending on the paint colors you choose, you can expand your menu.
Give it a try and have fun!
Hanging balloon animal

Hangable decor! Here’s how to make a balloon animal.
You’ll need lightweight paper clay, a balloon, a rolling pin, a safety pin, a spatula, craft glue, tape, fishing line (monofilament), paint, and water.
First, inflate the balloon and place crossed strips of tape near the air inlet.
Use the safety pin to poke a hole at the crossed tape and seal it with more tape.
Next, knead the paper clay and roll it out with the rolling pin.
Tear pieces of the rolled clay and attach them to the balloon.
Once the entire surface is covered, hang it and let it dry for about half a day.
The key is to slowly release a little air every hour! You can also make the parts to attach to the body while it’s drying.
When it’s completely dry, deflate the balloon and remove it.
Attach the parts with craft glue and paint it to finish! Poke a hole with the safety pin, thread the fishing line through, and try hanging it from the ceiling.
Kashiwa-mochi castanets

You can use this for various events! Here’s how to make a Kashiwa Mochi castanet.
You’ll need thick paper (cardboard), colored construction paper, paper clay, buttons, craft glue, and scissors.
First, use the scissors to cut the thick paper and construction paper into circles.
Then glue them together and cut them into a leaf shape.
Next, roll the paper clay into a plump mochi shape, and before it dries, sandwich it between the thick paper pieces cut into a leaf shape.
Attach buttons where the mochi and leaf overlap, and once the paper clay has dried, it’s complete! Playing along with seasonal songs will make your events even more memorable.
A piggy bank with a wagging tail

A cat whose tail moves and can also be used as a piggy bank is really charming, isn’t it? The method is simple, so if you get the key points right, you can make a cute cat that wags its tail.
Prepare bamboo skewers, thin straws, wire, pliers, and a milk carton.
Slide a straw onto a bamboo skewer, wrap it with wire, attach clay using glue, and let it dry thoroughly for 1–2 days.
Cut the milk carton, form it into a box shape, and carefully attach the mechanism so the cat’s tail can sway.
Cut a slot for the piggy bank, then apply clay over the top to form the cat shape; once you paint it, it’s complete.
Kids can probably help with applying the clay to the milk carton and painting, too!
Acorn Cake

Let’s create while enjoying nature! Here’s how to make an acorn cake.
You’ll need pre-processed acorns, scissors, thick paper or cardboard, craft glue, whipped paper clay, packing foam, and beads.
First, cut several pieces of thick paper into your favorite cake shapes.
Pipe the whipped paper clay onto the thick paper, then decorate the top with acorns and beads—that’s it! Stacking the cakes you make looks adorable, too.
Try using items you have at home or in your classroom, and enjoy creating your very own decorations.
Swaying mobile

Swaying gently and so cute! Here’s how to make a wobbly mobile.
You’ll need lightweight paper clay, nylon thread (fishing line), paint, a wire hanger, bamboo skewers, a craft knife, needle-nose pliers, and water.
First, knead the paint into the paper clay to add color.
Next, shape it into stars, hearts, or any designs you like, and let them dry.
Once fully dry, tie a small knot at the end of the nylon thread to form a bead-like stopper and insert it into the paper clay.
Use needle-nose pliers to take apart the wire hanger and twist it into a spiral.
Thread the nylon line with the clay pieces through the wire hanger, and you’re done! Kids are sure to be captivated by the mobile spinning round and round.