[Childcare] Fun to Make! Recommended Craft Ideas for Spring


In spring, with new admissions and moving up to the next class, you can see children in all sorts of states—excited, nervous, and everything in between.
Many teachers are probably hoping that the children will come to enjoy their days at the preschool/kindergarten.
So this time, we’re sharing craft ideas perfect for spring.
We’ve gathered plenty of motifs that evoke the season—like cherry blossoms, tulips, and ladybugs—as well as ideas you can use for events such as Easter and Hinamatsuri (Girls’ Day).
Decorate various areas to wrap your room in a spring atmosphere, and the children are sure to feel cozy and smile!
Give them a try.
Note: Since the things the children make are treated as “artworks,” we refer to them as “seisaku (制作)” in the text.
- [Childcare] Let’s make things with various materials! A collection of recommended craft ideas for April
- [Childcare] Ideas for March wall decorations
- [Childcare] Recommended crafts and activities for March, such as Hina Matsuri (Doll’s Festival) and cherry blossoms
- [Childcare] Butterfly craft ideas
- [Origami] Easy spring-themed origami ideas to enjoy with 4-year-olds
- [Childcare] Spring craft ideas to enjoy with 2-year-olds! Techniques and materials included
- Preschool: Ladybug Craft Ideas
- [Childcare] Fun Spring Activities: Ideas for Nature, Movement, and Crafts
- Recommended for graduation ceremonies! A collection of handmade cherry blossom ideas to decorate your walls
- [Childcare] Recommended for nurseries and kindergartens! Cherry blossom craft ideas
- [Childcare] Simple origami ideas for kids, perfect for spring
- Nursery/Childcare: Creative Ideas for Making Rape Blossoms (Nanohana) Crafts
- For 5-Year-Olds: Let’s Make It! A Collection of Craft Ideas to Feel the Spring
[Childcare] Fun to Make! Recommended Craft Ideas for Spring (41–50)
Dandelion candy holder

Here’s an origami idea for a cute candy holder inspired by dandelions.
It’s practical and perfect for small gifts.
Fold the paper into a triangle, divide it into three sections, then pull forward and fold to create leaf shapes.
Open the base into a square and pull along the diagonals to form a neat box shape—that’s the key.
Use a strip of masking tape wrapped around to represent the stem and bring the whole design together.
Handy for small snacks or trinkets.
It looks fun and is a recommended arrangement for everyone from kids to adults.
A box of dandelion flowers and fluff

This is a box-shaped dandelion you can decorate and enjoy, adorned with flowers and fluff.
Its stylish design makes it a striking interior accent.
Use four sheets of origami: some for the flowers and some for the box.
For the box origami, turn it face down and crease the fold lines neatly.
Fold the other side the same way, glue it, and form the box shape.
Make the dandelions with a slitted sheet and a thin strip of paper, then attach them to all four sides of the box and connect them to finish.
Arranging the petals—slit and spread—creates a vibrant look.
It’s a display-worthy craft that children and adults can enjoy together.
Fun to roll! Dandelion origami
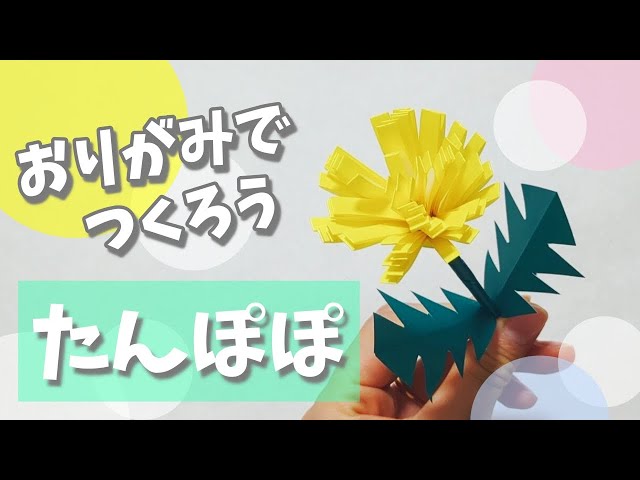
This is a voluminous dandelion origami made by rolling strips.
The petals spread out radially, giving a glamorous look.
Fold the origami paper in half and cut it, then fold each piece in half again.
Apply glue to the edge, join to form a ring, and make fine 5 mm cuts to create the petals.
Roll another piece of paper to make the stem, and fold and snip it to finish the leaves.
Wrap the petals around the stem and fluff them out for added dimension—it also works well as interior decor.
Combining yellow and orange will make it even more vibrant.
Sensory Bottle Made with Cherry Blossom Petals

When you think of spring, many of you probably picture cherry blossoms.
Cherry trees in full bloom are dazzling, yet their petals fall quickly, giving them a fleeting, delicate charm.
This time, we’ll show you how to make a sensory bottle that lets you enjoy the beauty of sakura for a long period.
It’s very easy to make: simply put liquid laundry starch and cherry blossoms into an empty bottle, then secure the lid with glue—and you’re done.
Adding cotton balls or beads is also recommended.
Take your time to relax and be soothed as you watch the cherry blossoms gently drift and sway.
windmill

How about making a pinwheel that dances in the pleasant spring breeze? You’ll need construction paper, a hole punch, scissors, a straw, glue, and so on.
It’s nice to make it while thinking and asking, “Have you seen one of these before?” or “What do you think makes it spin?” First, draw a circle on colored construction paper with a compass, cut it out, and turn it into the blades.
Let children choose their preferred colors for the paper and straw—they’ll love that.
Once it’s finished, take it out to the playground or outside the school so they can actually feel the natural wind making the pinwheel turn.
Saying, “If we run, it spins even more!” and having a little race makes for a fun, active playtime too.
Sticky Felt Balloon
Here’s an idea for making balloons that make the most of felt’s soft, fluffy texture.
First, cut light blue construction paper into a balloon shape.
Next, cut felt in three colors into triangles or squares.
Finally, use wood glue to attach the felt pieces onto the balloon and make a handle with yarn—that’s it! It’s also cute to display the balloons as if animals or characters are holding them.
Adjust tasks like cutting the paper and using scissors according to the children’s age and developmental stage.
Besides felt, it’s also fun to try various materials like ribbons and beads to decorate the balloons.
Give it a try for inspiration!
Skeleton Sakura
I’ll show you how to make beautiful, translucent skeleton cherry blossoms.
First, fold and cut origami paper to create a cherry blossom–shaped frame.
Next, trace the cherry blossom shape onto a clear plastic sheet and stick on small pieces of transparent origami.
Finally, layer the frame over the clear sheet and trim the excess with scissors to finish.
Hang them by a window or from the ceiling, and you’ll get colorful light shining through.
If you’re looking for a stylish and cute craft, be sure to give this a try.