[Childcare] Fun to Make! Recommended Craft Ideas for Spring


In spring, with new admissions and moving up to the next class, you can see children in all sorts of states—excited, nervous, and everything in between.
Many teachers are probably hoping that the children will come to enjoy their days at the preschool/kindergarten.
So this time, we’re sharing craft ideas perfect for spring.
We’ve gathered plenty of motifs that evoke the season—like cherry blossoms, tulips, and ladybugs—as well as ideas you can use for events such as Easter and Hinamatsuri (Girls’ Day).
Decorate various areas to wrap your room in a spring atmosphere, and the children are sure to feel cozy and smile!
Give them a try.
Note: Since the things the children make are treated as “artworks,” we refer to them as “seisaku (制作)” in the text.
- [Childcare] Let’s make things with various materials! A collection of recommended craft ideas for April
- [Childcare] Ideas for March wall decorations
- [Childcare] Recommended crafts and activities for March, such as Hina Matsuri (Doll’s Festival) and cherry blossoms
- [Childcare] Butterfly craft ideas
- [Origami] Easy spring-themed origami ideas to enjoy with 4-year-olds
- [Childcare] Spring craft ideas to enjoy with 2-year-olds! Techniques and materials included
- Preschool: Ladybug Craft Ideas
- [Childcare] Fun Spring Activities: Ideas for Nature, Movement, and Crafts
- Recommended for graduation ceremonies! A collection of handmade cherry blossom ideas to decorate your walls
- [Childcare] Recommended for nurseries and kindergartens! Cherry blossom craft ideas
- [Childcare] Simple origami ideas for kids, perfect for spring
- Nursery/Childcare: Creative Ideas for Making Rape Blossoms (Nanohana) Crafts
- For 5-Year-Olds: Let’s Make It! A Collection of Craft Ideas to Feel the Spring
[Childcare] Fun to Make! Recommended Craft Ideas for Spring (51–60)
Horsetail made by rolling up origami

Horsetails suddenly sprout from the soil when the weather gets warm—they’re plants you only see in spring.
Let’s try making these uniquely shaped, season-limited horsetails out of rolled origami.
Use light brown origami for the base stem, and dark brown origami to create the jagged section along the stem and the rounded tip.
Before shaping, firmly crease the origami to convey the plant’s softness—this is a key step.
If you also craft other grasses and show the horsetail rising taller than the surrounding plants, it will emphasize even more that warm spring has arrived.
Easter Bunny

For Easter, the event symbolized by eggs and rabbits, how about making an adorable Easter rabbit? First, prepare plenty of colored construction paper cut into small egg shapes.
Draw any patterns you like on the surface and fold each piece in half vertically.
Apply glue to one half of a folded piece, then keep stacking the folded eggs together.
When you stack four pieces, it turns into a three-dimensional egg.
Attach rabbit ears made from colored paper to it.
The plump shape makes for a cute, eye-catching Easter egg—enjoy using it as a decoration!
bamboo shoot

The plump, rounded shape is so cute! Here’s a fun bamboo shoot idea.
Bamboo shoots are in season in spring, and their texture and aroma are distinctive, aren’t they? Some preschools may even include hands-on experiences with bamboo shoots as part of food education.
This time, let’s make a bamboo shoot out of origami! All you need is one sheet of brown origami paper.
If you crease firmly as you fold, it will turn out beautifully.
When decorating, we recommend adding green accents like bamboo leaves or stalks to make it look more festive.
Give it a try!
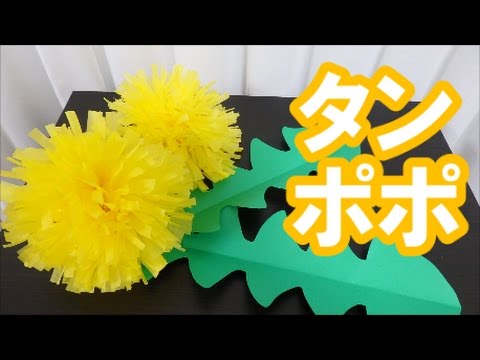
Three-dimensional dandelion

It looks just like the real thing! Here’s an idea for making a 3D dandelion.
You’ll need yellow origami paper, yellow-green origami paper, green origami paper, pink origami paper, scissors, and craft glue.
First, connect strips of yellow origami paper that you’ve cut into long, narrow pieces.
Make 1 mm-wide fringe cuts, then roll it up while applying craft glue; once it’s rolled, the dandelion flower is complete.
After making the stem and leaves with green origami paper, create a frame with the pink origami paper.
If you add some curves and motion to the stem and leaves, it will look even more like a real dandelion.
[Early Childhood Education] Fun to Make! Recommended Spring Craft Ideas (61–70)
Dandelions made with tissue paper
Dandelions poke their heads out of the ground when spring arrives.
Seeing them take root even in asphalt gives these spring flowers a sense of strength! Let’s try making dandelions by arranging flower paper.
Flower paper—also known as tissue paper—is a thin paper material you can find at 100-yen shops.
Cut slits into both ends of a bundled stack of flower paper, open it out firmly like a fan, and gently separate the sheets one by one.
It might also be fun to make the distinctive dandelion leaves out of colored construction paper! The process of opening the flowers is something children will likely get absorbed in.
Making dandelions with plastic raffia (suzuran tape)

Here’s a craft project for making dandelions with yellow raffia tape.
Wrap the raffia tape around a piece of cardboard to give the dandelion volume.
About 10 wraps creates a nice, full dandelion.
Remove the tape from the cardboard, tie the center, and then split the strands while imagining the dandelion’s petals.
Stick the raffia tape together with double-sided tape, draw the leaves with crayons, and you’re done! It might also be fun to draw your favorite insects and flowers around it.
Cherry tree made with stamps

Cherry blossoms blooming in the schoolyard and outdoors—their delicate pale pink color is so beautiful, isn’t it? Let’s try making them easily with paint stamping.
Once you’ve prepared drawing paper with branches and a trunk drawn on it, have the children use pink paint to stamp the blossoms.
They can go bold using their fingers or palms, but stamping with the bottom of a plastic bottle is fun too! Depending on the bottle’s shape, the stamp can look like a flower, so it might be interesting to try different bottles and wait for the children to notice the patterns themselves.