For upper-grade boys! Simple yet awesome craft project [Don’t call it lazy]


I want to make something for my summer break craft project that makes people say “Wow!” but I’d like to avoid anything too difficult.
Great news for upper-elementary school boys! In this article, we introduce intriguing craft projects with clever mechanisms you can build using everyday materials.
Even creations that look complex—like a fountain where water seems to flow upward or a spinning top that floats in midair—are actually surprisingly easy to make.
Once you finish, you can submit your project with an explanation of how it works and use it as a science project, too.
Go ahead and try these fun crafts that apply principles of physics!
- For summer vacation homework! Simple and amazing crafts for elementary school students that you’ll want to make after seeing them
- [For Upper Elementary Students] Simple but Awesome! A Collection of Summer Vacation Craft Ideas
- Craft ideas using plastic bottle caps [for boys]
- Simple yet amazing crafts: craft ideas that elementary school students will want to make
- DIY science projects that elementary school boys will love: ideas you can make with everyday materials
- [For Adults] Simple yet Impressive Crafts: A Stylish, Eye-Catching Collection
- Elementary School Students: Simple One-Day Science Project and Craft Ideas
- Recommended for upper elementary grades! Exciting indoor recreation and games
- Elementary school kids will be hooked! A collection of fun craft ideas using disposable chopsticks
- Adults will be hooked! A collection of craft ideas using toilet paper rolls
- [Middle School Students] Easy One-Day Science Projects and Crafts Ideas
- Recommended for high school students! A collection of easy one-day science project ideas
- [For Upper Grades] Simple Magic Tricks for Elementary School Students: Astonishing and Impressive Magic
Crafts to learn how things work (21–30)
Paper yo-yo made from disposable chopsticks and wrapping paper

Let me introduce a paper yo-yo made from chopsticks and wrapping paper that’s fun to stretch and snap back.
Prepare some chopsticks and wrapping paper, and let’s get started.
Measure the length and cut the wrapping paper into a rectangle, then join the pieces with glue or tape.
Secure a chopstick with tape and roll the paper around it.
The key is to roll it tightly so there are no gaps.
Finish with decorations, and it’s done.
Try different wrapping papers to make your own original paper yo-yo and have fun! Be safe and don’t aim it at people.
Combine a chopstick rubber-band gun with an origami throwing star!

Let’s try making a “shuriken gun” that combines a chopstick rubber band gun with paper shuriken.
It’s a lot of fun because the shuriken, which you’d normally throw by hand, comes out as the projectile instead.
You’ll need two pairs of disposable chopsticks, two sheets of origami paper, and some rubber bands.
Use one pair of chopsticks without splitting them; split the other pair.
Wedge the split sticks between the unbroken pair and fasten them with rubber bands.
Fold the paper shuriken, tuck it into the rubber bands, and launch it together.
It’s a unique twist on the classic chopstick gun—give it a try! You can probably launch things other than shuriken, too.
A three-step chopstick rubber-band gun

This is a chopstick rubber-band gun that you can make with a simple procedure: use chopsticks as the base and attach a clothespin with a rubber band.
Insert the metal part of the clothespin into the gap between the chopsticks, then secure the clothespin in that position with a rubber band.
After that, to keep the chopsticks from spreading apart, wrap a rubber band around the tips of the chopsticks, and it’s done.
The mechanism is that you launch a rubber band stretched from the tip by opening and closing the clothespin.
The appeal is that you can make a chopstick rubber-band gun easily with only a few materials.
Chopstick grabber
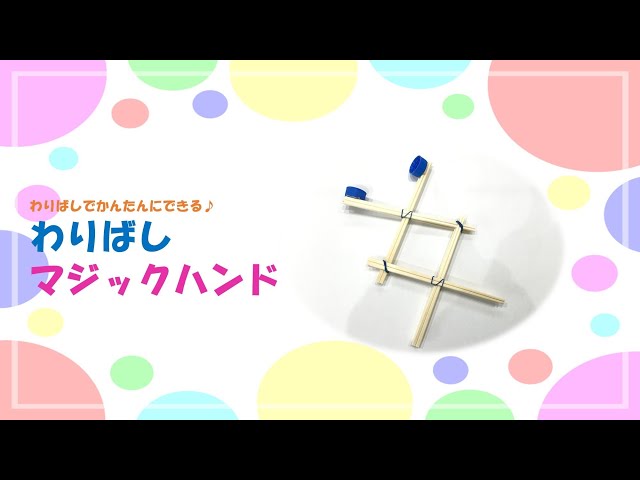
Let me introduce a chopstick grabber that’s fun to make and fun to play with.
Prepare eight wooden chopsticks, double-sided tape, plastic bottle caps, and rubber bands.
Stack four chopsticks in a crisscross pattern and secure the center with a rubber band.
Make another set the same way.
Combine the two finished sets and bind them with rubber bands where the chopsticks overlap to hold them together.
Finally, attach two plastic bottle caps to the tip, and it’s done.
Try moving the handle and have fun playing with it!
Well-spinning paper cup top
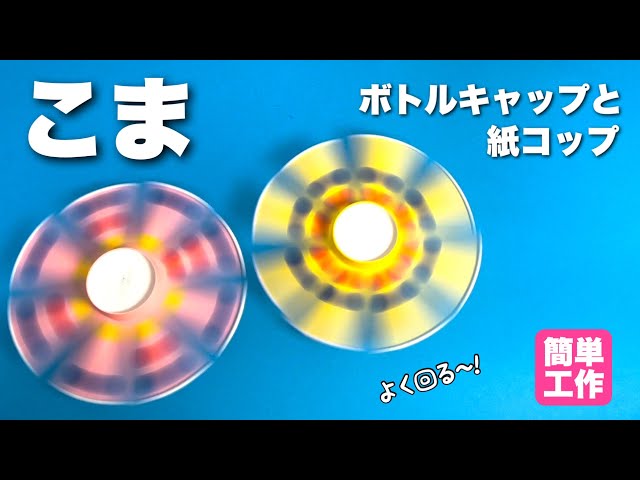
This is a spinning top made with a paper cup that spins well and is fun to watch because of its colorful look.
All you need are a paper cup and two plastic bottle caps.
First, cut slits into the paper cup and spread them out like propeller blades, then attach an axle made by combining the two caps.
That’s enough to complete the basic shape, but it’s recommended to decorate the “propellers” with an eye toward how it will look while spinning.
The impression changes depending on whether you spread the propellers before decorating or decorate first and then cut the slits, so try out various patterns.
Easy! A chopstick rubber band gun that can even use hair ties

This rubber band gun made from disposable chopsticks is very simple—you just bundle the chopsticks together and fasten them with rubber bands.
First, stack four chopsticks and secure them in two places with rubber bands.
To catch the rubber band that will serve as the projectile, leave the top and bottom sticks of the four sticking out a bit longer.
Attach a clothespin together with the topmost rubber band at the rear.
The rubber band projectile is gripped by both the clothespin and the chopsticks; when you pull the clothespin, the band shoots out.
Try using a hair tie as the projectile—it won’t hurt much even if it hits you.
How to make a chopstick gun
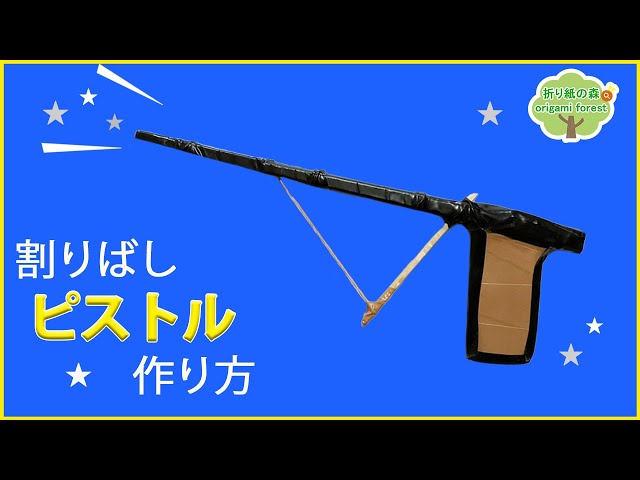
In addition to chopsticks and rubber bands, this chopstick gun uses cardboard and duct tape to combine into a pistol-like appearance.
The basic firing mechanism is assembled from chopsticks and rubber bands, and then a grip and decorations are attached using cardboard and tape.
Since you’ll end up covering the whole thing with tape so it looks like a pistol, it’s important to build a sturdy base beforehand.
Let’s also pay attention to how we decorate it to make it look as realistic as possible.