For upper-grade boys! Simple yet awesome craft project [Don’t call it lazy]


I want to make something for my summer break craft project that makes people say “Wow!” but I’d like to avoid anything too difficult.
Great news for upper-elementary school boys! In this article, we introduce intriguing craft projects with clever mechanisms you can build using everyday materials.
Even creations that look complex—like a fountain where water seems to flow upward or a spinning top that floats in midair—are actually surprisingly easy to make.
Once you finish, you can submit your project with an explanation of how it works and use it as a science project, too.
Go ahead and try these fun crafts that apply principles of physics!
- For summer vacation homework! Simple and amazing crafts for elementary school students that you’ll want to make after seeing them
- [For Upper Elementary Students] Simple but Awesome! A Collection of Summer Vacation Craft Ideas
- Craft ideas using plastic bottle caps [for boys]
- Simple yet amazing crafts: craft ideas that elementary school students will want to make
- DIY science projects that elementary school boys will love: ideas you can make with everyday materials
- [For Adults] Simple yet Impressive Crafts: A Stylish, Eye-Catching Collection
- Elementary School Students: Simple One-Day Science Project and Craft Ideas
- Recommended for upper elementary grades! Exciting indoor recreation and games
- Elementary school kids will be hooked! A collection of fun craft ideas using disposable chopsticks
- Adults will be hooked! A collection of craft ideas using toilet paper rolls
- [Middle School Students] Easy One-Day Science Projects and Crafts Ideas
- Recommended for high school students! A collection of easy one-day science project ideas
- [For Upper Grades] Simple Magic Tricks for Elementary School Students: Astonishing and Impressive Magic
Crafts to learn how things work (21–30)
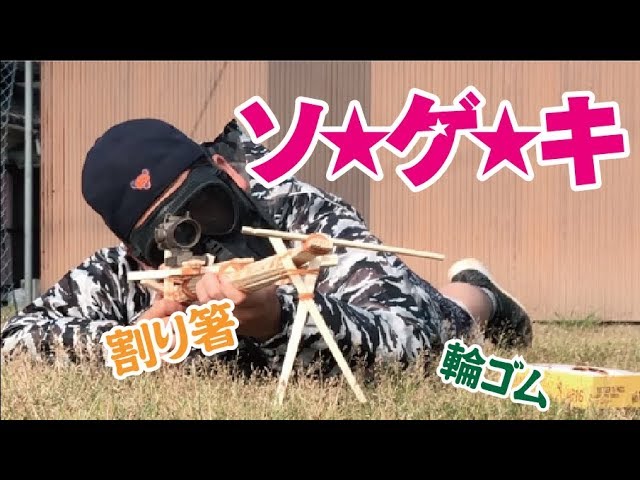
A chopstick rubber-band gun modeled after a handgun

This rubber band gun, reminiscent of a handgun, looks impressively realistic and cool.
And it’s not just the appearance—its structure is quite complex, too.
It’s made by combining many parts, and the mechanism that moves the trigger in particular is remarkable.
At the same time, the process involves only cutting and shaving chopsticks and gluing them together, so with patience you should be able to complete it.
If you’re willing to put in a bit of effort to create a rubber band gun that looks great and is fun to play with, definitely give it a try.
Rifle-style chopstick rubber band gun

This is a chopstick gun assembled into a shape like a rifle, clearly conveying a strong, powerful image.
Each part is made by aligning chopsticks and gluing them together, then assembling pieces of different lengths and widths into a rifle form.
The rubber band firing mechanism is simple: a rubber band hooked at the front is released by moving the trigger.
Because of that simplicity, the visual impression of strength depends on how much heft and presence you can express in other aspects.
You can showcase individuality by either making the most of the chopstick material itself or by adding solid decorative elements.
Crafts to Learn How Things Work (31–40)
Make it with disposable chopsticks! Sniper rifle
Simple yet profound, it features a mechanism as authentic as a sniper rifle! This is an idea for a cool chopstick rubber-band gun that you can make using just disposable chopsticks and rubber bands.
It’s so realistic to play with that adults are sure to get hooked.
It’s a craft that both adults and kids can enjoy, easy to make and fun to play with.
Create your own original toy gun and enjoy group battles together.
Be sure to prioritize safety, and you’ll love the excitement of both the crafting and the play.
Give it a try!
Rubber band gun made from disposable chopsticks and clothespins
This is a chopstick rubber band gun whose trigger is a clothespin, launching rubber bands with impressive speed—its muzzle velocity is the main attraction.
The basic build is to fix one jaw of a clothespin to the end of a chopstick bundle, then create a notch at the tip to hook the rubber band.
How you bundle the chopsticks and how you secure the clothespin are both important; the firmer the attachment, the more stable it will be when the rubber band is stretched.
Its simple look—chopsticks extending from the clothespin—also makes it a great canvas for decorations to add your own personal touch.
Even grade-schoolers can make it! Triple-shot chopstick rubber band gun
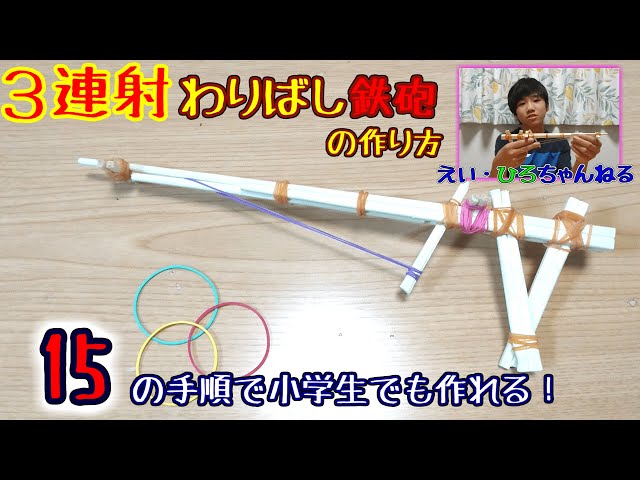
You might think it’s just a simple chopstick rubber band gun, but it actually has a feature that lets you fire three rubber bands.
The building process is straightforward: attach a handle to a bundle of chopsticks that serves as the base, then install a movable trigger so that it’s sandwiched in place.
What’s crucial here are the trigger shape and the positions where the rubber bands are hooked.
By attaching three rubber bands at different positions, they will fire in sequence.
The hooking method for each band is also intricate, so doing that accurately is a key point.
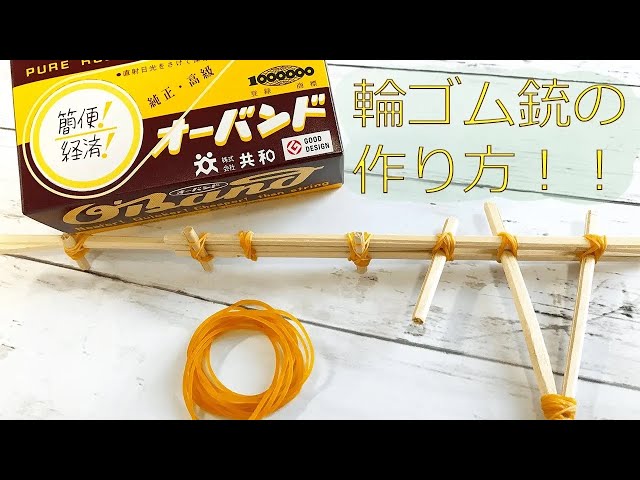
Powerful! Chopstick Gun
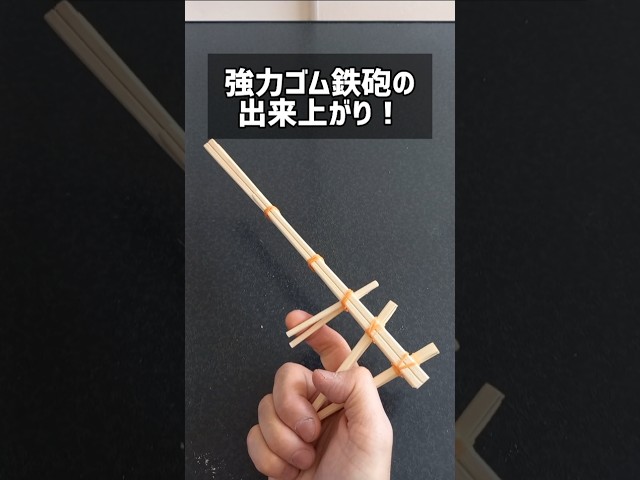
Prepare seven pairs of disposable chopsticks and plenty of rubber bands as materials.
First, use five pairs of chopsticks to make the main body.
Stack the chopsticks for the body alternately left and right so that about two-thirds overlap.
Secure them firmly at two points with rubber bands, then cut a notch at the front end to hook a rubber band.
Attach a short, cut chopstick to the rear of the body as the trigger, and glue another chopstick fixed in a V-shape behind that as the grip.
Your powerful chopstick gun is complete!
Rubber band gun with two materials
Here’s a simple rubber band gun idea you can make with about three pairs of disposable chopsticks and around ten rubber bands.
Split all the chopsticks into single sticks; leave three as they are, and cut the rest into three different lengths.
If you use a utility knife for cutting, handle it with care.
It’s also a good idea to sand the cut edges for safety.
Combine the cut chopsticks to build the body, grip, and trigger, and finally create a notch at the front end of the body where the rubber band will hook.
The body tends to be long and unstable, so reinforce it by bracing it from below with shorter chopstick pieces.