[For Upper Elementary Students] Simple but Awesome! A Collection of Summer Vacation Craft Ideas


Summer vacation crafts—especially for older elementary students—can feel like a dilemma: “Simple projects aren’t satisfying,” but “overly difficult ones are a problem,” too, right? The truth is, by getting creative with materials and tools, you can make projects that look and function like the real deal.
Here, we’re sharing craft ideas—like coin banks, motor-based projects, and food replicas—that will make your friends say, “Wow!” They’re simple to build, yet fun to use even after they’re finished.
Use these as inspiration and add your own twists to create an original masterpiece!
- For upper-grade boys! Simple yet awesome craft project [Don’t call it lazy]
- Simple but awesome! Craft ideas for upper-grade girls
- Simple yet amazing crafts: craft ideas that elementary school students will want to make
- For summer vacation homework! Simple and amazing crafts for elementary school students that you’ll want to make after seeing them
- Craft ideas using plastic bottle caps [for boys]
- Recommended for elementary school students! Science fair topics & craft ideas
- [Middle School Students] Easy One-Day Science Projects and Crafts Ideas
- DIY science projects that elementary school boys will love: ideas you can make with everyday materials
- Elementary School Students: Simple One-Day Science Project and Craft Ideas
- Toys you can make from cardboard crafts! Authentic ideas you can build and play with
- Simple and cute summer project crafts! A collection of ideas for girls that will make you want to create
- [For Kids] Today’s Handmade Craft Ideas
- [For Middle Grades] Simple Magic Tricks for Elementary School Students: Fun Magic Everyone Will Love!
For Upper Elementary Students: Simple Yet Amazing! Summer Vacation Craft Ideas (141–150)
lampshade

Here’s a lampshade idea that also works as room decor.
Brush glue mixed with water onto an inflated balloon, then stick on small torn pieces of washi paper.
For sturdiness, layer the washi several times until the balloon’s color isn’t very visible.
Be sure to leave an opening where the light will go.
Since washi is white, use tissue paper if you want to add color.
Once it’s completely dry, pop the balloon and remove it, then secure a wire along the inside edge of the opening for the light to finish it off.
Experimenting with resin?!
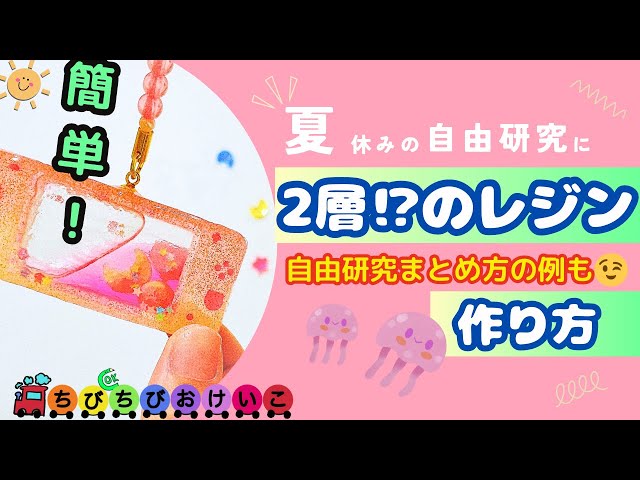
If you want to try your hand at making things with resin, why not purchase a resin craft kit? It comes with all the basic materials and tools, so you can start creating right away.
Deciding what shape to make and which parts to decorate with—and bringing your ideas to life—is a lot of fun.
While resin is often used for crafts, you can also do experiments, such as comparing how quickly different resin liquids cure! If it’s your first time, please work together with a parent or guardian.
Deodorizing pot made with an ice pack
@poccle Easy with an ice pack! I made a cute bottled deodorizing pot—perfect for a science project or a fun craft at home ♥ #craftsProduction#StayHomeTime#AtHomePlayIndependent ResearchSummer vacation homework #NurseryTeacher#NurseryTeacherMomParentingCoolant packDeodorization
♬ Relaxing, cute everyday BGM – Avi
Do you have leftover cold packs from buying cakes and other treats sitting in your freezer? Here’s a deodorizing gel pot you can make with those cold packs—perfect as a summer science or craft project for upper elementary students.
Get your materials ready: cold packs, beads, a plastic container, an empty jar, colored markers, a bowl, water, and a stirring stick.
Squeeze the contents of the cold pack into the bowl, add water, and stir until it becomes a gel.
Color the bottom of the plastic container, then add the gelled cold pack and mix to tint it.
Spoon the mixture into the empty jar, add beads or other decorations, and you’re done.
It’s a simple deodorizing pot you can make with everyday items—try creating your own original version!
Gem-like soap

Gemstone soaps are available as DIY kits, but they’re easy to make as long as you have glycerin soap and coloring.
Cut the glycerin soap into small pieces and place them in a container, then heat in a microwave at 500W for 10 seconds.
Mix in your favorite colorant to add color, and add aroma for fragrance.
Once you’ve made a few colors, pour them into another container in layers and let them set—that’s it! Try changing the color combinations and see what kinds of gemstones you can create.
Using a clear soap base also gives a light, airy look and is highly recommended.
Crafts to enjoy with 100-yen store hacks
@n.annlee321 100-yen store DIY/arrangement ☺️✨Summer Vacation Craft#HandmadeToysParenting#100-yen shop DIY
♬ Utopia – imase
Let’s customize some 100-yen shop items to make a cream soda stand.
For the base, use a flower vase.
Since the top is rounded, apply white masking tape there to represent the ice cream.
For the soda part, attach green iridescent origami paper and add round stickers to mimic bubbles.
Thread a craft pipe through a pom-pom to make a cherry, and stick it onto the base to finish.
You can use it to hold pens or clip memos.
An ehou-maki that makes you want to take a big bite
@n.annlee321 I tried stuffing it with my favorite fillings 🥰🫶#HandmadeToys#100-yen-shop#100-yen shop DIYPlaying housetranslation#ElementarySchoolMom#Kindergarten#KindergartenMom
♬ I Want To Be Loved – Yumcha
You can even use it for pretend play! Why not try making an ehomaki that looks so real you’ll want to eat it? It’s super cute and looks just like the real thing! Cut a pool noodle and wrap black felt around the sides.
Take two circles of thick paper, glue white yarn onto them in a spiral to represent white rice, and attach them to the top and bottom of the pool noodle.
Then use felt and beads to make tuna, salmon, cucumber, salmon roe, and more.
Stick them on top of the “rice,” and you’re done!
Picnic bag made from a box
@sayacky_be.child Materials and tips are here 👇🏻 Open it up—too cute♡ ▫️Materials▫️ ・Magnetic paper box (mine is from Seria) ・Rattan-pattern remake sheet (mine is from Seria) ・Bamboo-style bag handles (mine are from Seria) ・Ribbon or cord, etc. ・Fabric of your choice, 28×33 cm ▫️Tools, etc.▫️ ・Scissors ・Utility knife and cutting mat ・Ruler ・Pencil or pen (for marking) ・Ice pick (mine is from DAISO) ・Extra-strong double-sided tape for fabric (mine is from DAISO) ▫️Tips▫️ ・It’s quite hard, so you might need adult strength to cut or make holes. ・You don’t have to buy bag handles—feel free to substitute with something else ◎ ・The food that appears at the end of the video is introduced in one of my past videos♪ ⋆┈┈┈┈┈┈┈┈┈┈┈┈┈┈┈┈⋆ Nice to meet you! “Let’s be kids together♪” I’m Sayacky, a nursery teacher and mom of two♡ I share activities that get both kids and former kids excited! Please follow me☆ @sayacky_be.child ▲ Check out my other posts here ໒꒱ ⋆┈┈┈┈┈┈┈┈┈┈┈┈┈┈┈┈⋆#Sayakki-World#HandmadeToys#Childcare CraftingCraft Play#Childcare topic#AtHomePlay#StayHomeTime#100-yen shop DIYSimple craftKids' craftsHandmade#BasketBag
♪ Original Song – Sayakki's Atelier – Sayakki's Play Atelier
We’ll show you how to make an adorable picnic bag that’s a joy to open.
Prepare a one-piece box with an attached lid as the base.
Cut the box into your preferred picnic bag shape, then cover the entire surface with a makeover sheet that gives it a woven basket look.
Attach a handle and adhere fabric to the inside of the box to finish.
Any handle you like is fine.
As for fabric, a classic check pattern is always a good choice, but use your favorite.
Make some sandwiches and pop them in to complete a realistic-looking picnic bag!