

[Age 3] Simple summer origami ideas. A roundup of classic summer motifs.

Three-year-olds are getting better with their hands.
They’re starting to enjoy all kinds of origami, aren’t they? How about adults making some fun creations together with them? Here, we’ll introduce simple origami ideas perfect for summer, designed for three-year-olds.
There are lots of motifs kids love, like ice cream, bugs, and summer festival items.
We also recommend displaying the finished pieces or using them for pretend shop play.
Enjoy origami in different ways and make wonderful summer memories!
- Origami for 2-Year-Olds: Fun and Educational! Origami Ideas for Toddlers
- [For 3-year-olds] A fun collection of easy origami fish to make!
- For three-year-olds: A collection of craft ideas featuring spring events and creatures that you’ll want to make with your three-year-old
- [Childcare] A roundup of easy summer origami ideas to enjoy with 5-year-olds
- Origami perfect for summer. Fun and easy for kids to make!
- Fun July Craft Ideas for 2-Year-Olds: Summer Wall Decorations
- [For 3-year-olds] Easy-to-make origami rabbit ideas collection
- [For Preschoolers] Fold with Fun! January Origami Ideas for Little Ones
- [For 3-year-olds] Perfect for September! A Collection of Craft Ideas to Enjoy Autumn Nature
- Enjoy August with preschoolers using origami! A collection of summer-perfect ideas
- [Age 4] Easy origami ideas perfect for summer! A collection of cool, refreshing motifs
- [For 3-year-olds] A roundup of craft ideas to enjoy in summer! Introducing various motifs and techniques
- Toddlers will love it! Fun-to-make July origami recommendations
[Age 3] Simple summer origami ideas. Classic summer motifs roundup (21–30)
A penguin that’s perfect for decorations

Let’s make a penguin out of origami—perfect as a seasonal decoration for fans or other ornaments.
Fold the paper into a triangle twice, then gently squash-fold it by inserting your finger into the pocket and pressing down softly from the top to puff it open.
Keep folding along the creases to form the penguin’s shape.
Be careful when using scissors to make the cuts—don’t cut the wrong spots.
As you continue, the paper will get thicker, but sharpening your creases will make it easier to proceed.
Once you fold the wings and feet while checking the balance, you’re done.
Give it a try!

Penguin money envelope

This is a cute penguin folding method that’s perfect for New Year’s gift envelopes.
First, place the origami colored side up, fold it into a triangle twice, then open it once.
Fold both layers of the top corner down to meet the bottom edge to make creases.
Make another crease by folding only the top layer of the top corner down so it sticks out slightly past the bottom center.
Fold only the top layer of the top corner down to align with the bottom crease.
Next, fold along the upper crease, then fold the tip upward so it peeks out a little.
Fold back the part sticking out at the top.
Turn it over and fold both corners toward the center so the tips overlap.
Tuck one corner into the other.
Finally, draw the face with a pen, and you’re done!

[Age 3] Simple summer origami ideas. Collection of classic summer motifs (31–40)
Penguin parent and child
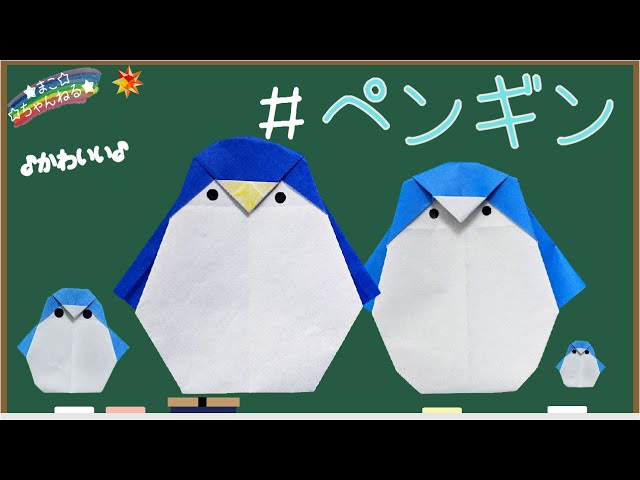
Here’s how to fold cute parent-and-child penguins.
First, turn the origami paper to the back and fold it into a triangle twice to make creases.
Fold one corner to align with the center line, open it, then fold along the creases two more times to set the folds.
Fold the corner up twice.
Next, fold both corners at the folded section toward the center line.
Fold the tip up to the front crease, then flip it over.
After flipping, fold the outer corners diagonally upward toward the center line.
Then, fold both corners outward so they stick out, like in the image of hands.
Finally, adjust the corners to shape them into penguins, and you’re done! If you make them with small origami paper as well, you’ll have a parent and child penguin set.
Decorate the eyes with round stickers or a pen.
How to make a penguin bookmark
@tatsukuriorigami [Practical Origami] Penguin Bookmark – Short Version. I made a penguin bookmark. ◇ See YouTube for details ◇ When making it, the long version with instructions on YouTube is easier to follow. — Tatsukuri’s original work — Please do not repost, imitate, or publish the folding instructions without permission.OrigamiorigamiLifehack#orgami#origamitiktok#origamitutorial
♬ A cute song with a warm atmosphere(1450510) – sanusagi
Here’s how to make a penguin bookmark that makes reading even more fun.
Get one sheet of origami paper and some colored pens, and let’s get started.
As you make the creases, you’ll form the part that slips onto the page.
When shaping the beak and wings, firmly crease the folds so the bookmark keeps a stable shape.
Color the beak and draw the face with your pens, and you’re done.
It could also make a cute little gift!
Easy penguin
Here’s a cute penguin with a simple folding method that’s recommended even for three-year-olds.
Prepare one sheet of origami paper, fold it into a triangle, and make a crease.
Flip it over front and back as you go, folding the corners so they meet at the center crease.
After folding the left and right sides toward the center, fold the wing sections into triangles and puff them out a bit to add dimension.
Fold the beak so that both sides are even, then round off the corners overall with small folds to finish.
It’s also fun to try making them with different colors of origami paper.
Penguin from Sumikko Gurashi

Here’s how to fold a loose and cute Sumikko Gurashi-style penguin.
Prepare one sheet of origami paper, some colored pens, and scissors.
Start by folding the origami paper into a square.
Open it once, then fold the left and right sides toward the center crease.
After making firm creases, hold the center down and fold both sides into triangles, puffing them up slightly as you go.
The key is to keep both sides symmetrical.
Make small cuts on the two layers at one tip on one side, then fold them inward.
Shape the figure, folding while letting the corners peek out a bit, and you’re done.
Use felt-tip pens to draw the face and other details—have fun creating your penguin!
penguin ornament
Let me introduce a cute penguin ornament that looks adorable wherever you place it.
Prepare one sheet of origami paper, a felt-tip pen, and glue, and let’s get started.
We’ll fold it using the basic crane method, but for the parts where you puff up the paper, it’s best to go slowly and provide support while folding.
Open up the origami, and while puffing it along the crease lines, tuck it in to form the penguin’s body.
Folding this section evenly will make the ornament stable when displayed.
Finish by making the wings, beak, and feet.
Even just lining them up and looking at them makes for charming penguin ornaments.